Ryobi EST0002 User Manual
Ryobi Tools
EST0002
STUDTECH™
EST0002
STUDTECH™
The Ryobi StudTech™
locates wood and metal
studs in walls. It features
a sleek, high-impact case
and a built-in clip.
Use StudTech for depths
up to 3/4 in. (19 mm) with
+1/4 in. (6 mm) center
accuracy.
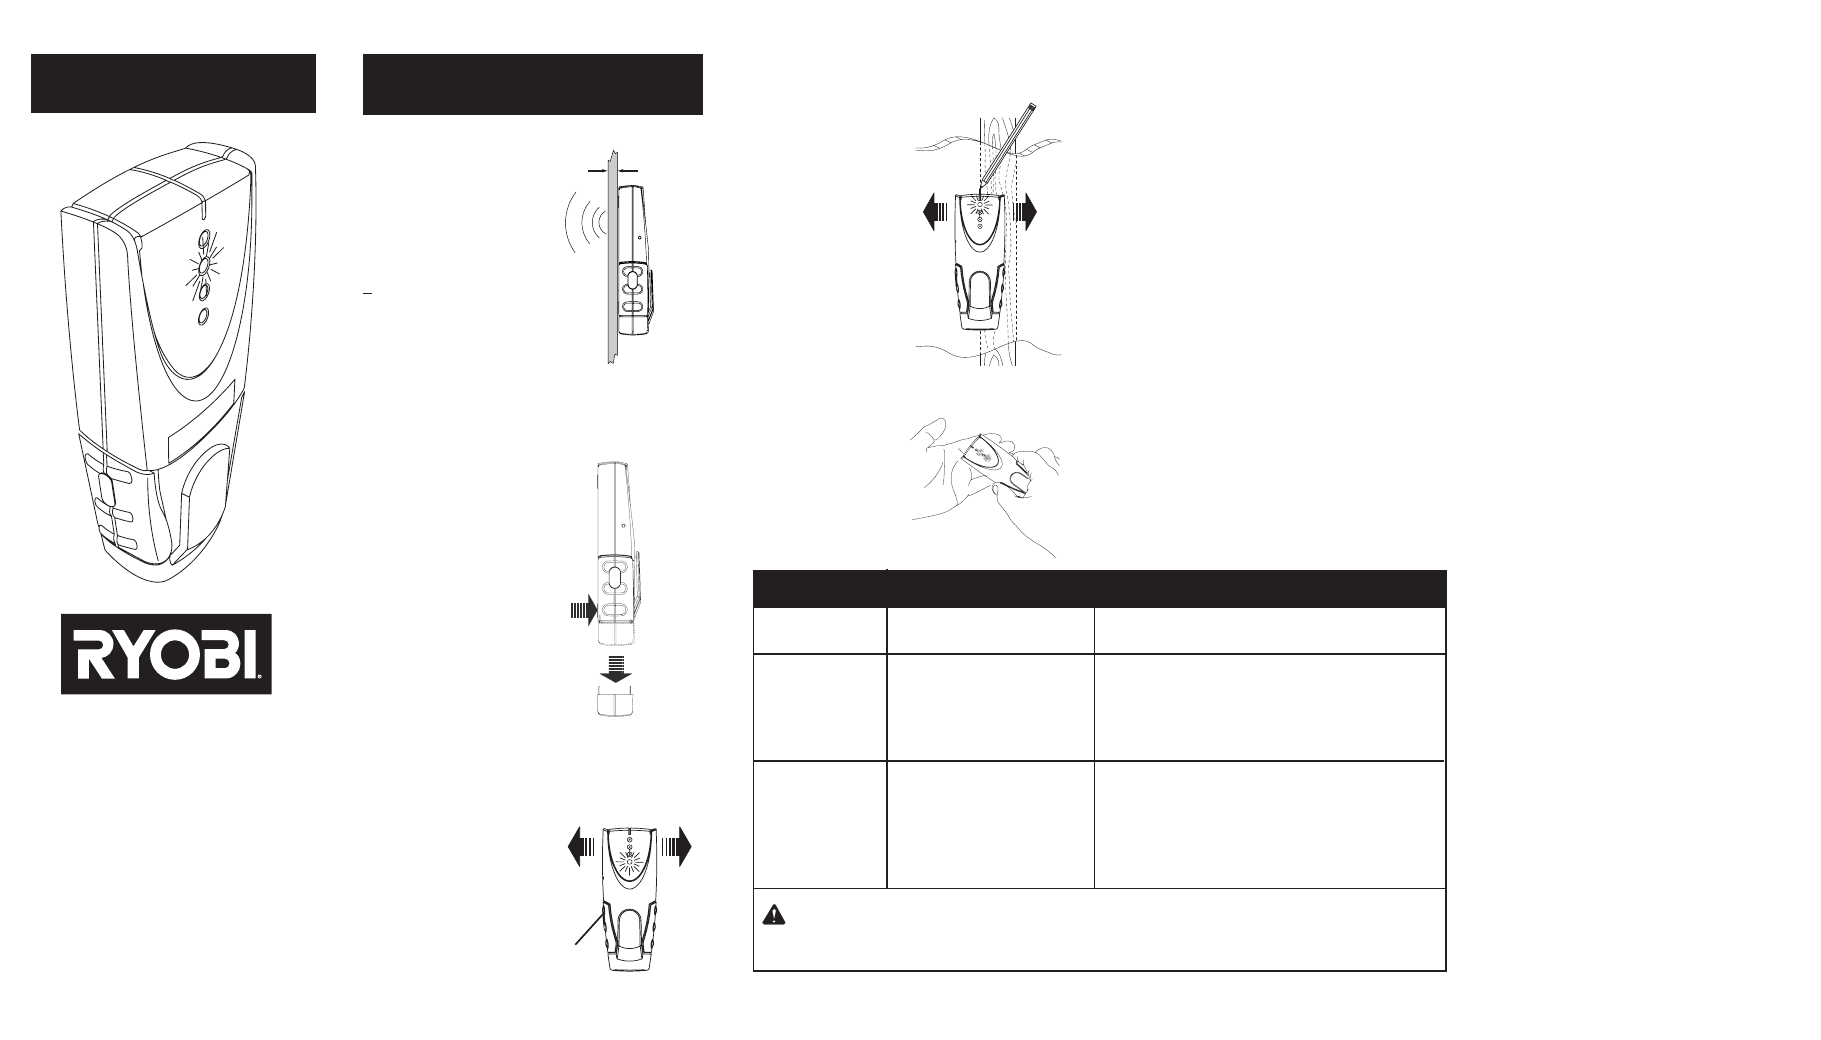
INSTALLING THE BATTERY
Situations Possible Causes
Solutions
• With StudTech turned off, po-
sition the unit flat against the
wall.
• Squeeze On/Off button and
hold in.
• Turn on and slowly slide unit
horizontally across the wall,
right or left. Red light and
“beep” indicates edge of
stud.
• When red LED is lit, the
beep sounds, locating the
edge of the stud. Mark
this spot.
• Continue scanning
beyond the marked spot
until the top red LED
goes out. Slide unit in
reverse direction to locate
other edge of stud.
• Mark this second spot.
Middle of stud is centered
between the two marks.
• Turn StudTech™ on in
the air. If the LEDs light
when you bring your
hand up to the back,
then the unit is working
properly.
Depending on the proximity of electrical wiring or
pipes to the wall surface, the StudTech™ may detect
them in the same manner as studs. Caution should
always be used when nailing, cutting or drilling in
walls, floors and ceilings that may contain these items.
To avoid plumbing, electrical, etc., remember that
studs or joists are normally spaced 16 in. (406mm)
or 24 in. (610mm) apart and are 1-1/2 in. (38mm) in
width. Anything closer together or a different width
may not be a stud, joist or firebreak. Always turn off
the power when working near electrical wires.
The StudTech™ is designed for use on dry interior walls
only. Three primary factors can affect sensing depth:
Thickness, density and moisture content.
The StudTech™ is not designed to handle materials
with inconsistent density such as:
Ceramic floor tile
Carpeting and padding
Wallpaper with metallic fibers
Freshly painted walls that are still damp (must dry at
Least a week)
Lath and plaster
CALIBRATION AND SCANNING
OPERATING NOTES
VERIFYING IF THE UNIT WORKS
WORKING WITH
DIFFERENT MATERIALS
• Pull down back of
unit to release battery
compartment.
• Snap 9-V battery into
compartment, terminal
side first, matching (+)
and (-) terminals from
battery to case.
• Replace the end cover.
Alkaline battery life is
approximately 30 hours.
CALIBRATION AND SCANNING
No indications.
Light starts blinking
and unit beeps
repeatedly.
Indications in too
many places.
• Over-the-stud calibration error.
• Scan began on dense part of
wall or over stud.
• Unit not flat against wall.
• Unit was rocked or lifted
during scan.
• Detect other objects
besides studs.
• Electrical wiring and metal/
plastic pipes may be near
or touching back surface of
wall
• Move several inches to the left or right and start again.
• Release On/Off button, move over a few inches, press
On/Off button, and start again.
• On rough surfaces, place piece of cardboard on wall,
scanning through it to help slide unit more smoothly.
• Always hold StudTech parallel to stud or joist and
move across it.
• Because studs are normally spaced 16 in. (406mm) or
24 in. (610mm) apart and are 1-1/2 in. (38mm) wide,
beware of anything closer together or of a different
width.
HOLD
BUTTON
SLIDE
PRESS
PULL
DOWN
3/4 in.
983000-283
1-04
• No studs in that area.
WARRANTY
This product is a consumable item. Therefore
it is warranted against defective parts and
labor only and not misuse or deterioration of
product through normal wear and tear for a
period of 2 years from date of purchase.
RYOBI TECHNOLOGIES INC.
1428 Pearman Dairy Road
Anderson, SC 29625
www.ryobitools.com
1-800-525-2579
WARNING: To avoid risk of electrical shock, ALWAYS turn power off when working near electric wires.
Avoid nailing, cutting or drilling in walls where electrical or plumbing may be present. Do not permit
children to use this device. It is not a toy.