TAMKO Solar Attic Vent - Thermostat User Manual
Cold-weather thermostat
COLD-WEATHER THERMOSTAT
for TAMKO SOLAR ATTiC vEnT
MODEL 31001280
WARNING: PRIOR TO INSTALLING THERMOSTAT, DISABLE THE VENTILATOR BY COVERING THE
SOLAR PANEL WITH CARDBOARD, TAPING IT TO THE UNIT TO PREVENT MOTOR FROM RUNNING.
Central District
220 West 4th St., Joplin, MO 64801
800-641-4691
08/10
Northeast District
4500 Tamko Dr., Frederick, MD 21701
800-368-2055
Southeast District
2300 35th St., Tuscaloosa, AL 35401
800-228-2656
Southwest District
7910 S. Central Exp., Dallas, TX 75216
800-443-1834
Western District
5300 East 43rd Ave., Denver, CO 80216
800-530-8868
Visit Our Web Site at
tamko.com
Application instructions for
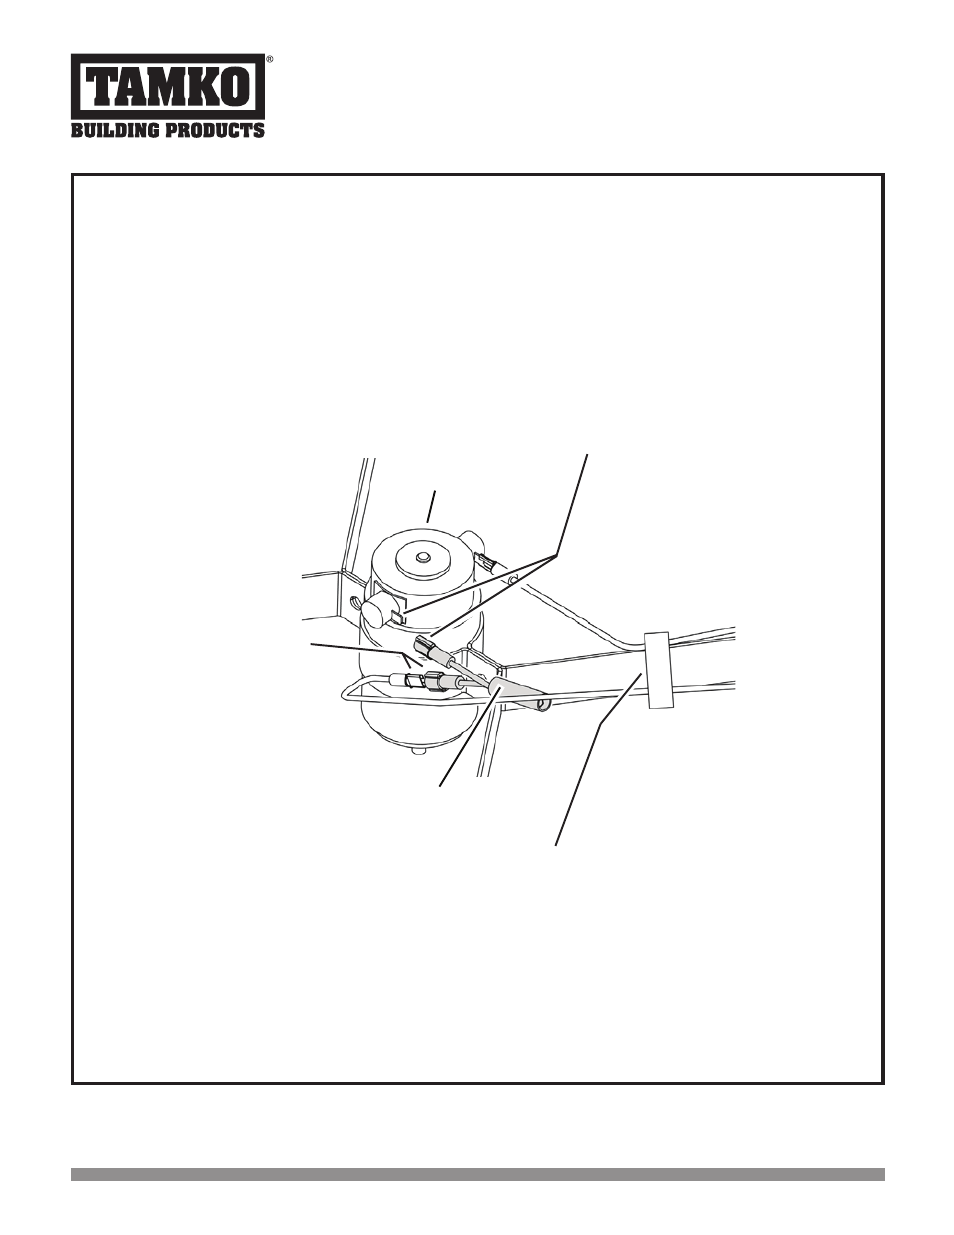
STEP 4
Install insulated female
terminal from thermostat
to male terminal on motor.
STEP 5
Tape or wire tie wires to motor
mounting bracket to prevent
contact with fan blade.
MOTOR
THERMOSTAT
STEP 3
Remove existing
RED wire terminal
from motor and
connect it to
insulated male
terminal from
thermostat.
STEP 1
Cover solar panel with cardboard taping it to the unit to prevent motor from running.
STEP 2
When installing thermostat to Surface, Remote and Curb Mount models that have
already been installed onto roof, separate the ventilator dome from the base by
removing the four (4) 5/16" stainless steel sheet metal screws. Lift the ventilator
dome off the ventilator base and proceed with the following steps.
STEP 6
(if required) Re-attach the ventilator dome to the ventilator base using the
four (4) stainless steel 5/16" sheet metal screws removed in Step 2.
STEP 7
Remove cardboard from the solar panel and verify that the ventilator operates.
99527524A