Elfa Wallbands User Manual
Wallbands
www.elfa.com
Sida 11 av 13
Wallbands
To install wallbands
level, power drill, drill bits, #2 Phillips head bit for a
power drill, hammer, ladder or step stool
TOOLS
NEEDED
TIP
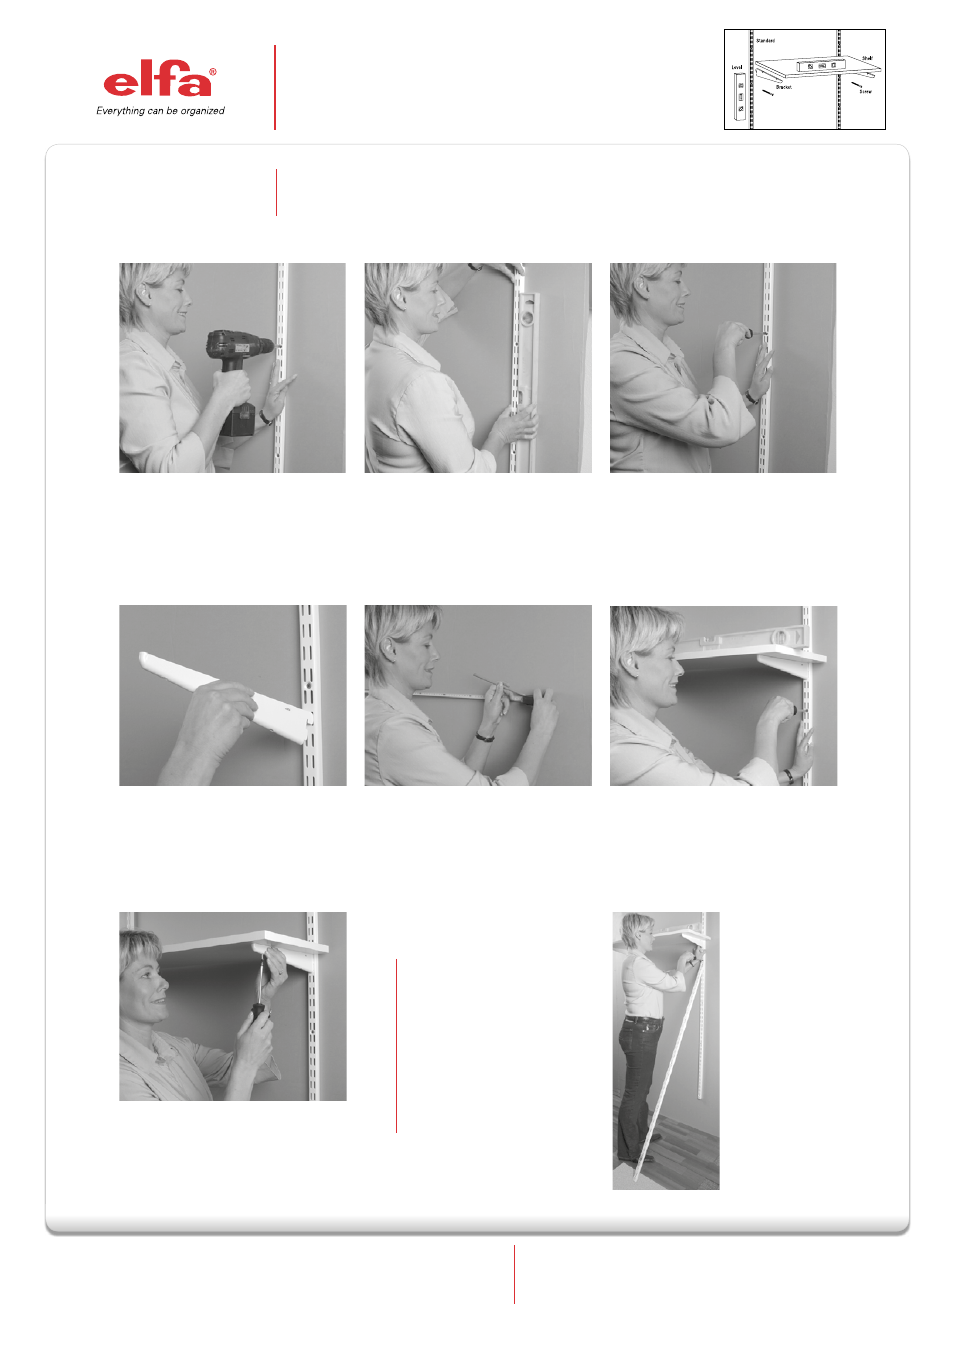
Step 1 Position one wallband
where you want it on the wall.
Mark the position of the second
screw hole from the top of the
wallband.
Step 4 Place a traditional
bracket in the wallband.
Step 2 Check with a level that
the wallband is hanging in verti-
cal position.
Step 5 To install the next wall-
band, measure and mark out a
suitable distance between the
two wallband.
Step 3 Drill holes and fasten
the remaining screws.
Step 6 Place a shelf on the
brackets and check with a level
that brackets are in level. Drill
holes and fix the wallband with
screws.
Steg 7 Install all remaining
shelves. Start from the top.
Use a third wallband as a
support during the installation.
You may then use both hands
for the installation work.
Mounting wallbands in a
corner: Install the wallband
approximately 2”/50 mm from
the corner to allow enough
room for the drill or screw-
driver.
Elfa Lumi AB
Elfagatan 5, 593 87 Västervik
Tel: +46 392-389 10 Fax: +46 392-361 25. E-mail: [email protected]