Highland 10395 User Manual
Car top luggage, Waterproof rolling duffel
Mounting Instructions
1.
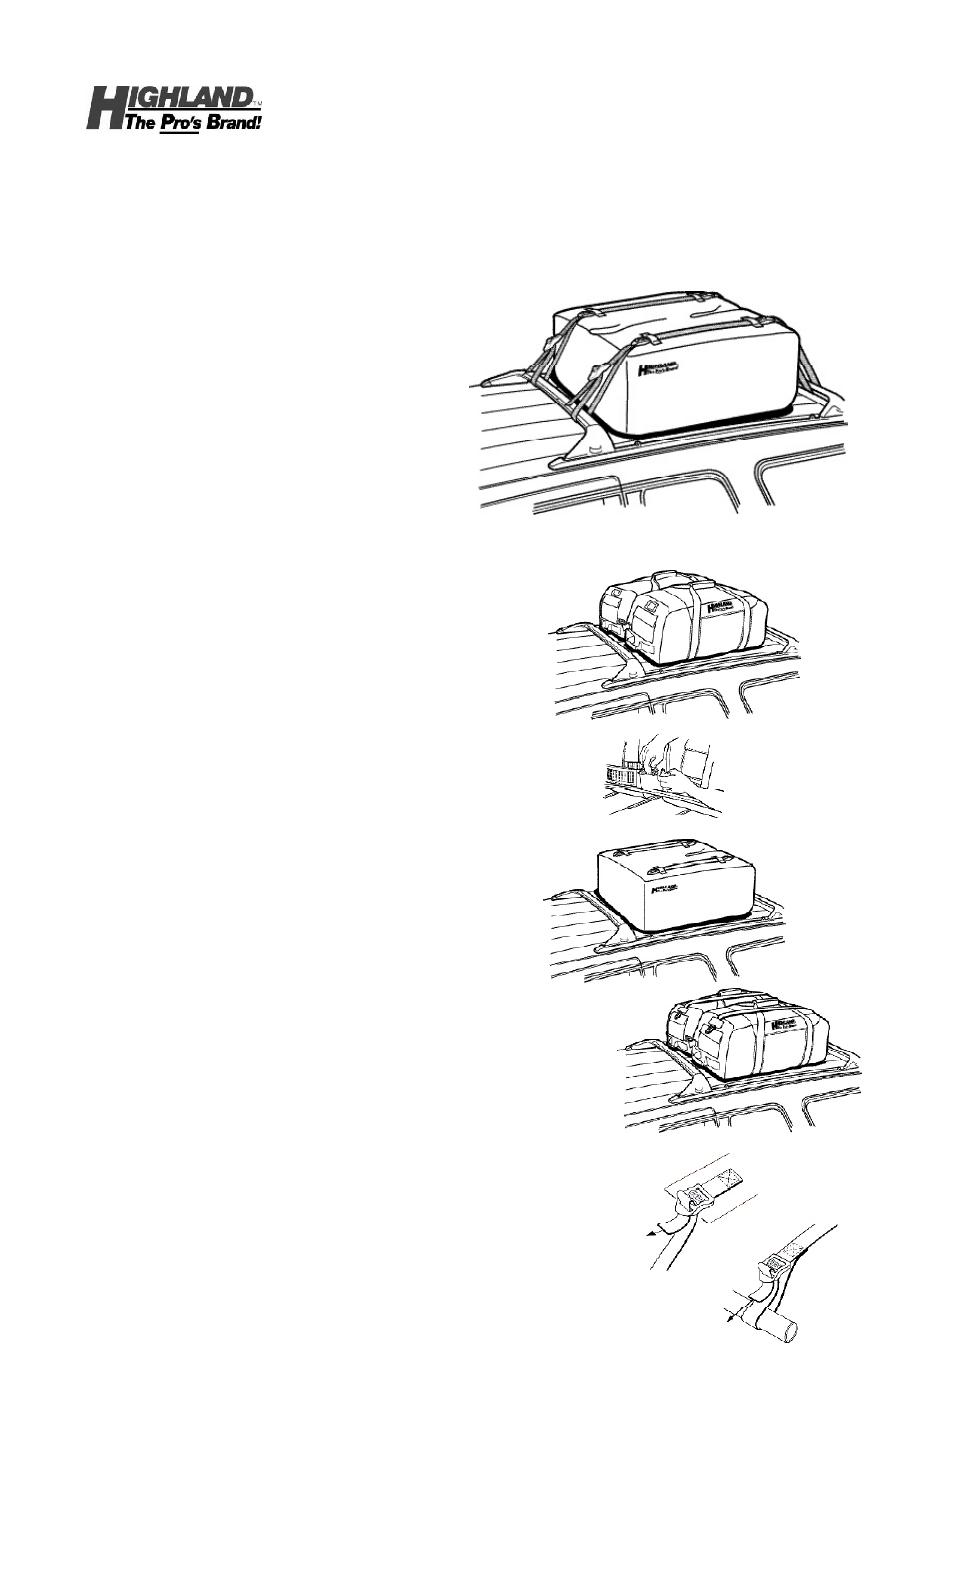
Pack your Car Top Luggage bags, then gently place on
top of vehicle with wheels toward rear of vehicle, as
shown in Figure A. The Highland logos should each
face outward. Note: Make sure wheels and runners are
clean and free of gravel or debris before placing on
roof.
2.
Buckle the two bags together at the front and rear ends,
as shown in Figure B.
3.
Place the cover, with the Highland logos facing the
vehicle sides, over the bags. Pull the cover drawstring
tight and cinch the ball lock to secure.
4a. Place the wide straps through the top loops on the
cover, from front to back, as shown in Figure C1.
(or)
4b. Place the wide straps through the loops on the bag,
from front to back, as shown in Figure C2. (Note: While
the bags can be used without the cover, use of the
cover is recommended to keep bags clean.)
5.
If roof rack crossbars are adjustable, reposition the
bars to trap the duffels snugly between the bars.
6.
Attach the lashing straps to the wide strap, as shown in
Figure D.
7.
Attach the loose ends of the straps to the roof rack
crossbars, as shown in Figure E. Take up slack in
straps by alternately tightening the front and back
straps until secure.
Notes:
A)
Reposition the lashing strap buckle as needed before
attaching straps to roof rack.
B)
Any excess webbing should be tucked away and tied
off to prevent unwanted flapping while driving.
C)
When traveling, periodically check straps to ensure
bags are secure.
D)
Cover can be stored in sealable pocket inside duffel
bag.
Highland Group Industries
31200 Solon Road, Suite 1
Solon, OH 44139
1-800-234-6992
www.highlandusa.com
CAR TOP LUGGAGE
Waterproof Rolling Duffel
Introduction
Congratulations on your purchase of Highland’s
unique and convenient Car Top Luggage. Your
Waterproof Rolling Duffel is designed to mount to an
existing roof top luggage rack. For best results, the
end opposite the wheels should face forward when
placed on vehicle roof. Please follow the mounting
instructions listed below.
Model No. 10395
Rev. 1/032002
Figure A
Figure C1
Figure C2
Figure D
Figure B
Figure E