Maytag MMC5086AAQ Installation User Manual
Installation guide
INSTALLATION PROCEDURES
1. Remove contents from the bottom shelf of your cabinet.
2. Location of template: Select the proper position on the inside or the
bottom of your cabinet for mounting the oven. Then, refer to the
attached template instruction.
3. Use center punch or nail to mark the position of the 4 holes on the
template. Then remove the template.
4. Drill 4 holes through the cabinet at the center punched position using
your 1/2
²
drill bit.
5. Remove 4 plugs from top of cabinet using teaspoon. Save plugs and
replace if oven is to be used later as a counter top.
6. Select the 4 short(1-3/8
²
) mounting screws or the 4 longer(2-3/8
²
)
mounting screws and insert them into the 4 holes on top of the oven.
7. The spacers, which are included in this package are provided for you
so that you can mount your oven flush with the front of your cabinet.
See table 1 below.
REQUIREMENTS FOR INSTALLATION
CHECKING THE CABINET:
The bottom shelf of your cabinet must be
strong enough to support an additional weight of 90 lbs. Please note, this
weight is in addition to the normal contents of the cabinet as well as any
other objects hung from the bottom of the cabinet. To check the strength
of your cabinet, we recommend you fill some plastic milk jugs with
sand(5 gallons of water) and gradually place them on the bottom shelf.
As you add each jug, inspect the cabinet for any damage(ie., separation
of joints, splitting or cracking of the cabinet, etc). If you see any damage,
you should not attach your microwave oven under the cabinet.
THE MANUFACTURER IS NOT RESPONSIBLE FOR ANY DAMAGE
TO YOUR CABINET.
* * * CHECK POINT * * *
1. Check for rotted wood and other weaknesses.
2. Check the number of screws used to install your cabinet. If your
cabinet is attached to the wall with only two screws at the top then you
should add two screws at the bottom in order to firmly secure your
cabinet to the wall(please make certain the screws penetrate the wall
studs by at least 1/2
²
).
3. Check the thickness of your cabinet s bottom shelf (It should be at
least 3/16
²
thick).
* * * CAUTIONS * * *
S
Do not install the oven over a range, cooktop, or any other heat
producing appliance.
S
It is required the electrical outlet be a standard 120 volt with at least
15 amps.
S
See use & care guide for complete electrical requirements.
S
Do not mount the oven while the plug is connected to an electrical
outlet.
* * * TOOLS REQUIRED * * *
- Drill & Drill Bit(1/2 )
- Center Punch
- Hammer
- Phillips Screwdriver
- Tape Measure
- 12
²
of Tape
* * * PARTS LIST (INCLUDED) * * *
- Mounting Screws(1-3/8
²
length): 4
- Mounting Holders: 2
- Mounting Screws(2-3/8
²
length): 4
- 1/4
²
Spacers: 8
- Template.
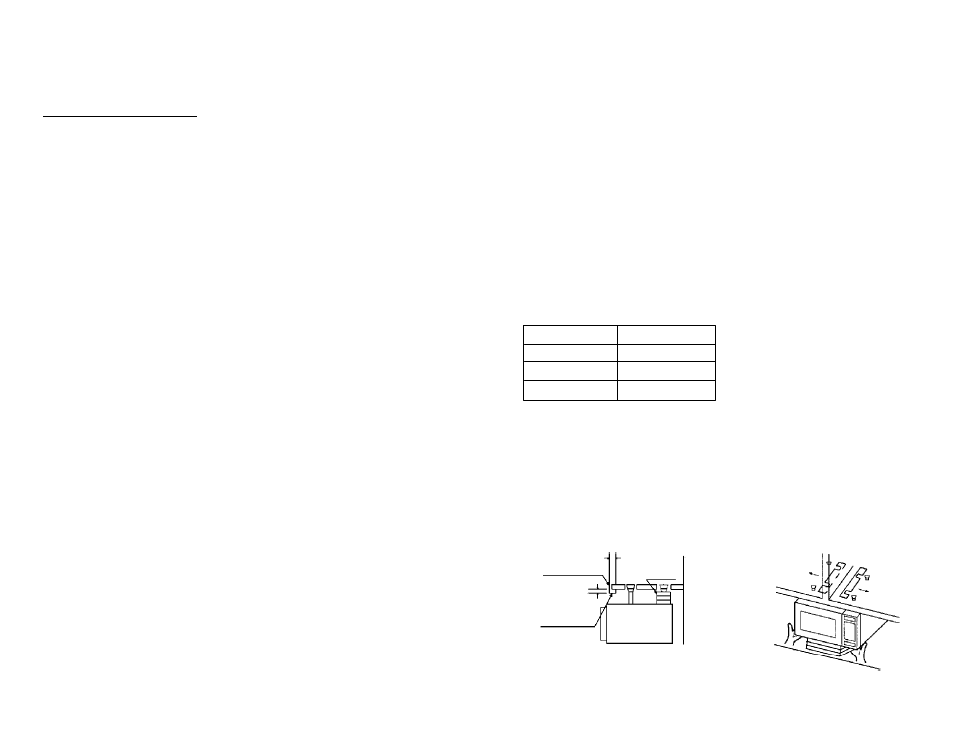
INSTALLATION GUIDE
Table 1 will provide you with an
approximate Idea regarding how
many spacers will be required to
mount the unit flush with the front
of your cabinet.
MOUNTING THE OVEN
1. Lift the microwave oven so the mounting screw enter into the 4 holes.
To hold the microwave oven securely, you should position some
support material(such as a book) underneath the microwave oven(see
figure 2). Insert the mounting holder to the neck of the mounting
screws (see figure 2).
2. Slowly tighten the 4 screws evenly until the oven is completely
secured.
Y
Spacer No.
0 to 1/2
²
0 to 2 Each
1/2
²
to 3/4
²
2 to 3 Each
3/4
²
to 1
²
3 to 4 Each
FRONT OF THE
CABINET
FASCIA BOARD
SPACER
X: Thickness
Y: Depth
Y
X
(Figure 1)
(Figure 2)