Tiffen Lowel e-studio User Manual
Lowel e-studio™ instructions, E-studio2
Light intensity is controlled through the
lamp switches on back of fixture.
The 120VAC models of e-studio2 & 4 have
separate switches for each lamp, and their
corresponding 240VAC models have lamps
that are switched in pairs.
All e-studio6 fixtures have lamps switched in
pairs. The e-studio6 lamps are switched from
the center pair to the outer most pair.
Lowel e-studio™ Instructions
General Warnings
The Lowel e-studio is a professional
lighting system. Read these
instructions and lamp manufacturers’
warnings before operating.
n
Do not leave fixtures unattended.
For stationary studio use.
n
Not for household use. Use only for photo
graphic lighting (video & film imaging).
n
Do not exceed maximum rated
wattage for unit.
n
Use maximum 55 Watt lamps.
n
Always unplug unit before relamping.
n
Be sure lamp is securely seated in
lamp socket.
n
Do not use near standing water.
n
Internal ballast produces high
start-up voltage.
n
When attaching to overhead pipes or grids,
always use Safety Cables.
n
Never bypass plug’s ground pin.
n
Do not interfere with unit’s ventilation.
n
Do not attempt to open unit, no user
serviceable parts inside. See other side for
fuse change information.
Fluorescent Warnings
n
Avoid looking directly at the tubes for
extended periods of time.
n
Fluorescent tubes contain highly
poisonous mercury.
n
In the event of lamp breakage, avoid
contact with broken pieces.
n
Read lamp manufacturers information fully.
Warnings
Mounting Plate
e-studio fixtures are sold in 2 mounting
configurations, with hardware to use on
a stand, or overhead on a lighting rail or pipe.
Stand mounting models use the Stand
Tilt-bracket; rail or pipe hanging use requires
the Overhead Mount Tilt-bracket. Both come
with the Mounting Plate
already attached to the
back of the fixture.
Whether you are using
the Stand Mount, or the
Overhead Mount,
familiarize yourself
with the Mounting
Plate before attaching the fixture to them.
The Mounting Plate has the ability to tilt the
fixture up & down, as well as rotate 180°.
If needed, it can be removed & rotated to
mount 4 ways on the fixture, depend-
ing on user preference. With the
fixture face down, remove the
plate by first using pliers to
remove the cotter
pin, and then use an
appropriate allen wrench to
loosen & remove the 4 corner screws.
Reposition the Mounting Plate, aligning it
with the 4 screw holes and the cotter pin
post. Attach & tighten the 4 screws securely,
before attaching the cotter pin
thru its post as shown.
Stand Mounting
Orient the Tilt-bracket post so that its
screw hole C lines up with the locking
knob D. Insert post and tighten
locking knob, checking to
make sure it is tightened
securely into the
screw hole.
Overhead Mounting
With the fixture laying face down on a table,
attach the Overhead Mount Tilt-bracket to
the Mounting Plate on its back. Overhead
Mounting models have a set screw replacing
the locking knob on the Mounting Plate
(see D in the image above). Similar to the
Stand Mounting description above, orient the
Tilt-bracket post so that its screw hole lines
up with the the set screw, and
tighten the screw securely
using an allen wrench. Attach
the fixture to the rail, tighten-
ing the large c-clamp bolt
securely with a wrench. Be
sure to retighten with a
wrench when positioned.
Attach one of the sup-
plied Safety Cables
between the handle on the
fixture A and the safety cable
plate on the bracket B, and
another between B and the
pipe or rail.
e-studio™ Mounting
Whether in stand mount or hanging clamp
configuration, the e-studio Tilt-bracket
& Mounting Plate combination is designed
to allow a complete range of fixture rotation
and tilting.
In stand mounting use, it will also place the
fixture’s center of gravity squarely over the
center of the stand for optimum balance.
Loosen the large Mounting Plate locking knob
A slightly to tilt the light on one axis
(up & down) and the
smaller locking knob B
to rotate the light on the
other axis (vertical vs.
horizontal placement).
Tighten locking knobs
to secure fixture
position.
Note: the smaller knob B has constant
tension locking and will hold its position
without additional tightening. Tightening
is only required for more permanent
positioning.
Tilting & Pointing
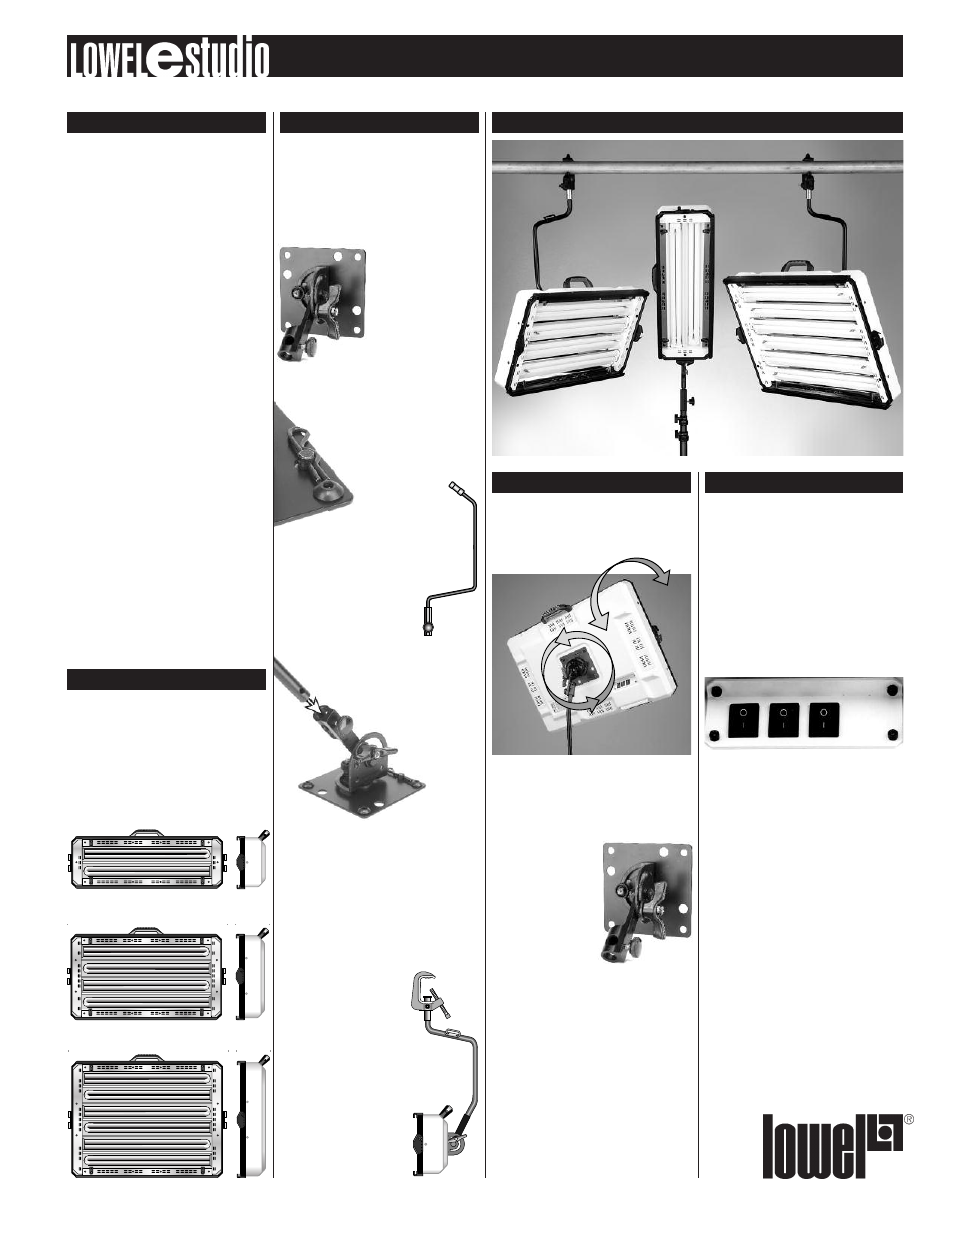
Controlling Light Intensity
3 e-studio™ models
e-studio2
e-studio6
e-studio4
B
A
C
D
B
A
Models & Voltages
e-studio comes in 3 models housing
from 2-6 T-55 fluorescent lamps.
e-studio 2 & 4 model fixtures are available
in 120VAC or 240VAC versions. e-studio6
fixtures have auto-setting ballasts to work
with 120 - 240VAC. All e-studio fixtures
are non-dimmable.