Linkskey LKV-M02 User Manual
Lkv-m02, Quick installation guide
Quick Installation Guide
Applicable model: LKV-M02
do not have to make any configuration before installation.
LKV-M02
2-port Super Mini Desktop KVM
Switch
w/ built-in 1.5M Cables
Quick Installation Guide
It’s a Plug-and-Play device: Just connect keyboard, monitor
and mouse to the KVM Switch, and then connect the KVM
cables to connectors on your computers, and then boot up
the computer one at a time, and you can start to switch
between the two computers.
For a quick start on installation and operation, please follow
the instructions below.
Thank you for purchasing the LKV-M02 Super Mini
Desktop KVM Switch! With our highly reliable and quality
product, user can enjoy countless benefits from using it.
Introduction
The LKV-M02 Super Mini Desktop KVM Switch is a 2-
port PS/2 type KVM Switch that comes with two sets of
built-in 1.5M cables to save you cabling troubles. It enables
the users to access, control, boot and reboot two
computers using only one keyboard, video and mouse.
Its
one-piece
design
of
KVM
Switch
and
cabling
accessories offers more portability and convenience to
KVM Switch users who want to save cabling troubles.
Though compact and integrated in one-piece design, you
can nevertheless expect every function of a decent KVM
Switch from LKV-M02. It is your best desktop partner for
KVM switching in the office or at home.
Before you install
The default setting of the LKV-M02 Super Mini Desktop
KVM Switch is appropriate for most systems. In fact, you
The correct setup sequence is … …
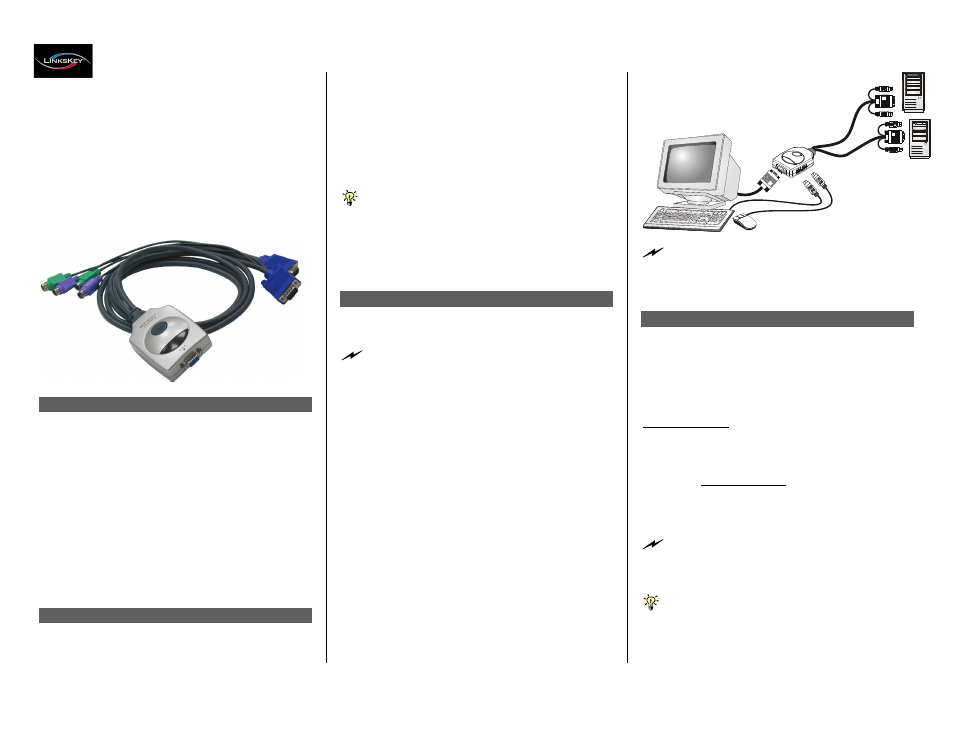
(1) Connect the sh ared keyboa rd, m onitor and m ouse to
the KVM Switch first, and then connect one set of
built-in cable to the com puters.
(2) Power up your connected com puter …
Since the KVM Switch receives power from the com puter’s PS/2
interface, it is powered up w hen you connect the K VM cables to a
PC.
Out-of-the-box Installation
Take the Super M ini Desktop KVM Switch out of the box
and begin installation….
Before connecting any cable to your K V M Switch, please m ake
sure all of your com p uters an d their peripherals have been
powered off. O therw ise, the K V M Switch m ight not be set up
properly.
Step
1. Make sure all the computers that are to be
connected
to
the
KVM
Switch
and
their
peripherals are in powered-off state. If not, power
them off before you proceed with the following
steps.
Step 2. Connect the shared keyboard, monitor and mouse
each to its ports on your KVM switch.
Step 3. Connect each set of the built-in KVM cable to a
computer’s keyboard, video and mouse ports.
You can use individual standard keyboard, mouse
and video cables to extend the cable distance, but
depends on the type of the cables you use, the
maximum cable distance is limited to 5 ~ 7 meters
(15.5 ~ 23 feet).
Step 4. Power up the connected computers one by one.
After your computer is powered up the keyboard
and mouse will be recognized and now you can
begin operating the KVM switch.
DO N O T TR Y to connect the built-in KVM cables to the
com p uters while the com p uters are still in powered-on states.
O therw ise, the com puter will have difficulty recognizing your
shared keyboard and m ouse.
Easy Operation
There are two methods to select a specific computer: using
the push button or a hotkey sequence.
Push Button
The push button lets you have direct control over channel
switching. Simply press the button to select the computer.
See Quick Reference Sheet
Keyboard Hotkeys
A keyboard hotkey sequence consists of three specific
keystrokes:
See Quick Reference Sheet
H otkey sequence = ScrL k + ScrL k + C o m m an d
key
The tw o consecutive ScrLk keystrokes should be pressed
within 2 seconds and the followin g com m and key(s) should also be
pressed within 2 seconds in likewise m anner. O therwise, the
hotkey sequence will not be validated.
For detailed H otkey sequences and their corresponding
functions, please refer to the Q uick reference sheet.
Rev..1.4
Copyright© All rights reserved. Oct 1, 2003