Sealey MCGA01 User Manual
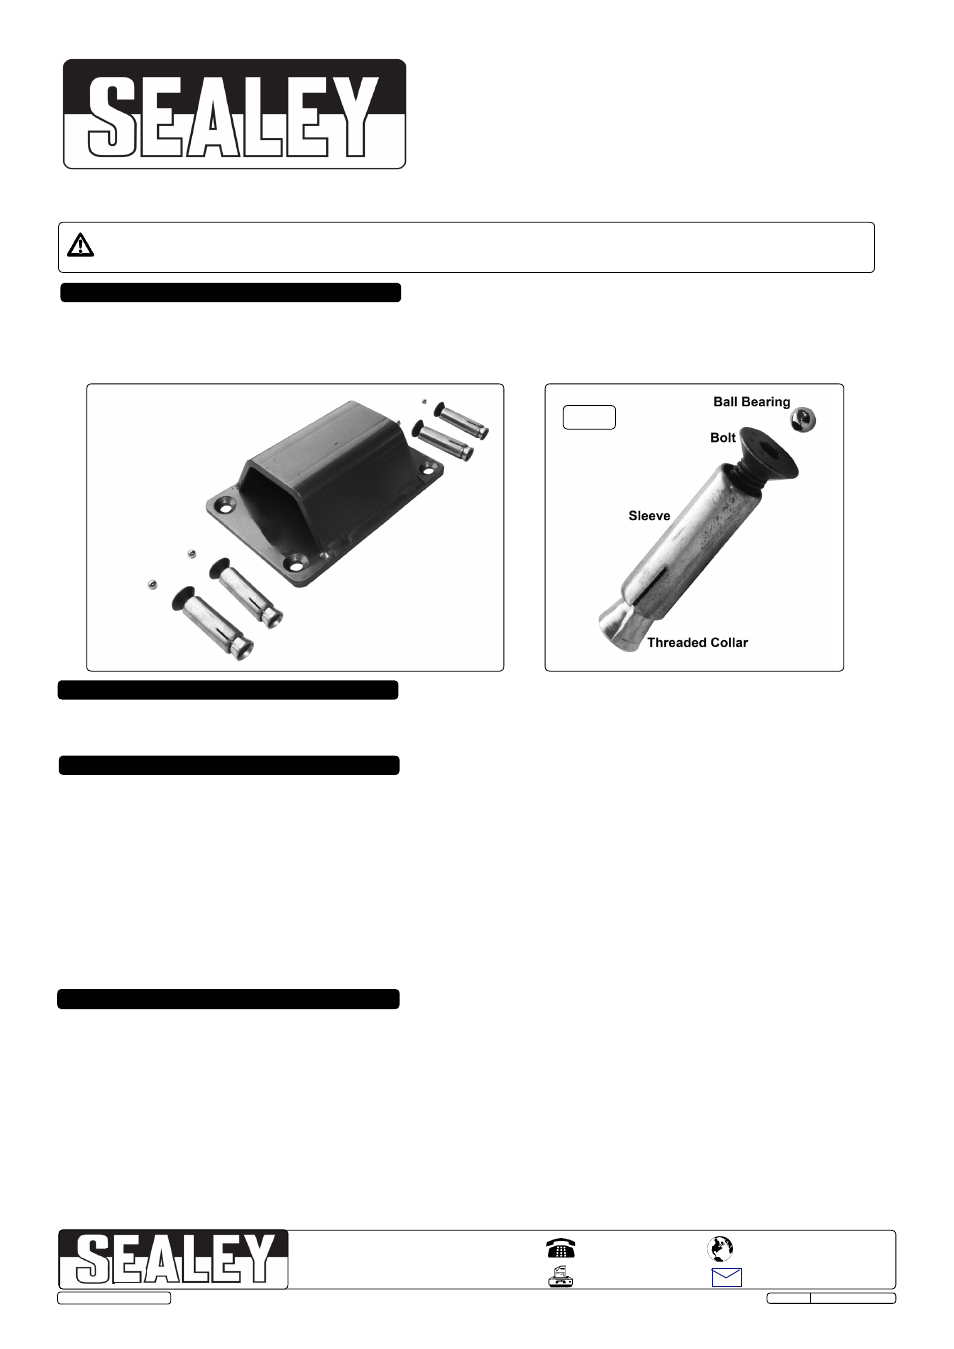
Motor cycle ground anchor - 4 security bolts, Mcga01, Fig.1
INSTRUCTIONS FOR:
MOTOR CYCLE GROUND ANCHOR -
4 SECURITY BOLTS
MODEL No
:
MCGA01
Thank you for purchasing a Sealey product. Manufactured to a high standard this product will, if used according to these instructions
and properly maintained, give you years of trouble free performance.
IMPORTANT: PLEASE READ THESE INSTRUCTIONS CAREFULLY. NOTE THE SAFE OPERATIONAL REQUIREMENTS, WARNINGS AND
CAUTIONS. USE THE PRODUCT CORRECTLY AND WITH CARE FOR THE PURPOSE FOR WHICH IT IS INTENDED. FAILURE TO DO SO MAY
CAUSE DAMAGE AND/OR PERSONAL INJURY AND WILL INVALIDATE THE WARRANTY. PLEASE KEEP INSTRUCTIONS SAFE FOR FUTURE USE.
01284 757500
01284 703534
Sole UK Distributor, Sealey Group,
Kempson Way, Suffolk Business Park
,
Bury St. Edmunds, Suffolk,
IP32 7AR
www.sealey.co.uk
Web
1. SAFETY INSTRUCTIONS
2. INTRODUCTION
3. INSTALLATION
4. USE
DO NOT install the Ground Anchor in a location where it is likely to cause a trip hazard.
Wear approved safety eye protection whilst drilling (standard spectacles are not adequate).
Keep children and unauthorised persons away from the working area whilst installing.
Heavy-duty hardened steel bolt-down anchor, supplied with all fixings. Provides a secure locking point for items such as motorcycles, cycles, boats,
caravans and trailers.
3.1. Locate the Ground Anchor on an area of sound concrete, where the unoccupied anchor will not present a trip hazard. (This unit is not
suitable for wall mounting).
3.2. Using the Ground Anchor as a template, mark the position of the required holes.
3.3. Use an 8mm masonry drill to drill pilot holes to a depth of 45mm.
3.4. Open the holes out using a 12mm masonry drill.
3.5. (See fig.1.) Unscrew the bolt from the sleeve and, making sure that the threaded collar is located at the base, drive the sleeve and collar into
the prepared hole.
3.6. Once the sleeves/collars have been settled into all four holes, place the Ground Anchor over the sleeves.
3.7. Using a 6mm hex key, screw the bolts into the sleeves through the Ground Anchor base plate until light resistance is felt on all bolts.
3.8. Tighten all four bolts gradually, in a diagonal pattern, until tight and the Ground anchor is firmly located.
3.9. To render the Ground Anchor tamper-proof, drive one of the ball bearings into each hex head with a hammer.
NOTE: The unit cannot be removed from the concrete once this has been completed.
fig.1
4.1.
Thread a high tensile security chain or cable through the loop of the Ground Anchor and attach to the item to be secured with a good quality
padlock.
4.2. A range of padlocks and motorcycle security equipment is available from your Sealey dealer.
© Jack Sealey Limited
Original Language Version
MCGA01 ISSUE:1 05/11/13
NOTE: It is our policy to continually improve products and as such we reserve the right to alter data, specifications and component parts without prior notice.
IMPORTANT: No liability is accepted for incorrect use of this product.
WARRANTY: Guarantee is 12 months from purchase date, proof of which will be required for any claim.
INFORMATION: For a copy of our latest catalogue and promotions call us on 01284 757525 and leave your full name and address, including postcode.