Setting wireless lan – Canon i-SENSYS MF244dw User Manual
Page 7
7
En
Setting Wireless LAN
Push Button Mode
1
Press .
2
Select <Network Settings>, and then press
.
3
Select <Wireless LAN Settings>, and then press
.
If a screen appears asking whether to enable the wireless
LAN, select <Yes>, and then press
.
4
Read the message that is displayed, and then press
.
5
Select <WPS Push Button Mode>, and then press
.
Wireless LAN Settings
SSID Settings
WPS Push Button Mode
WPS PIN Code Mode
Power Save Mode
6
Select <Yes>, and then press
.
7
Press and hold* the button until the lamp lights or
blinks.
You should press the WPS button within 2 minutes after
you select <Yes> in step 6.
* The time that you should hold the button may vary depending
on the router you are using.
8
Wait approximately 2 minutes after the connection.
IP address is set during this period of time.
When an error message appears:
Press
to close the screen, check whether or not the
network key is correct, and then retry the settings. If the
access point cannot be detected even after retrying,
see the following.
User’s Guide “When an Error Message Appears”
When checking the network connection:
You can check if the machine is properly connected to
the network by using a computer that is connected to the
network.
User’s Guide “Viewing Network Settings”
To set IP address manually:
User’s Guide “Connecting to a Wireless LAN”
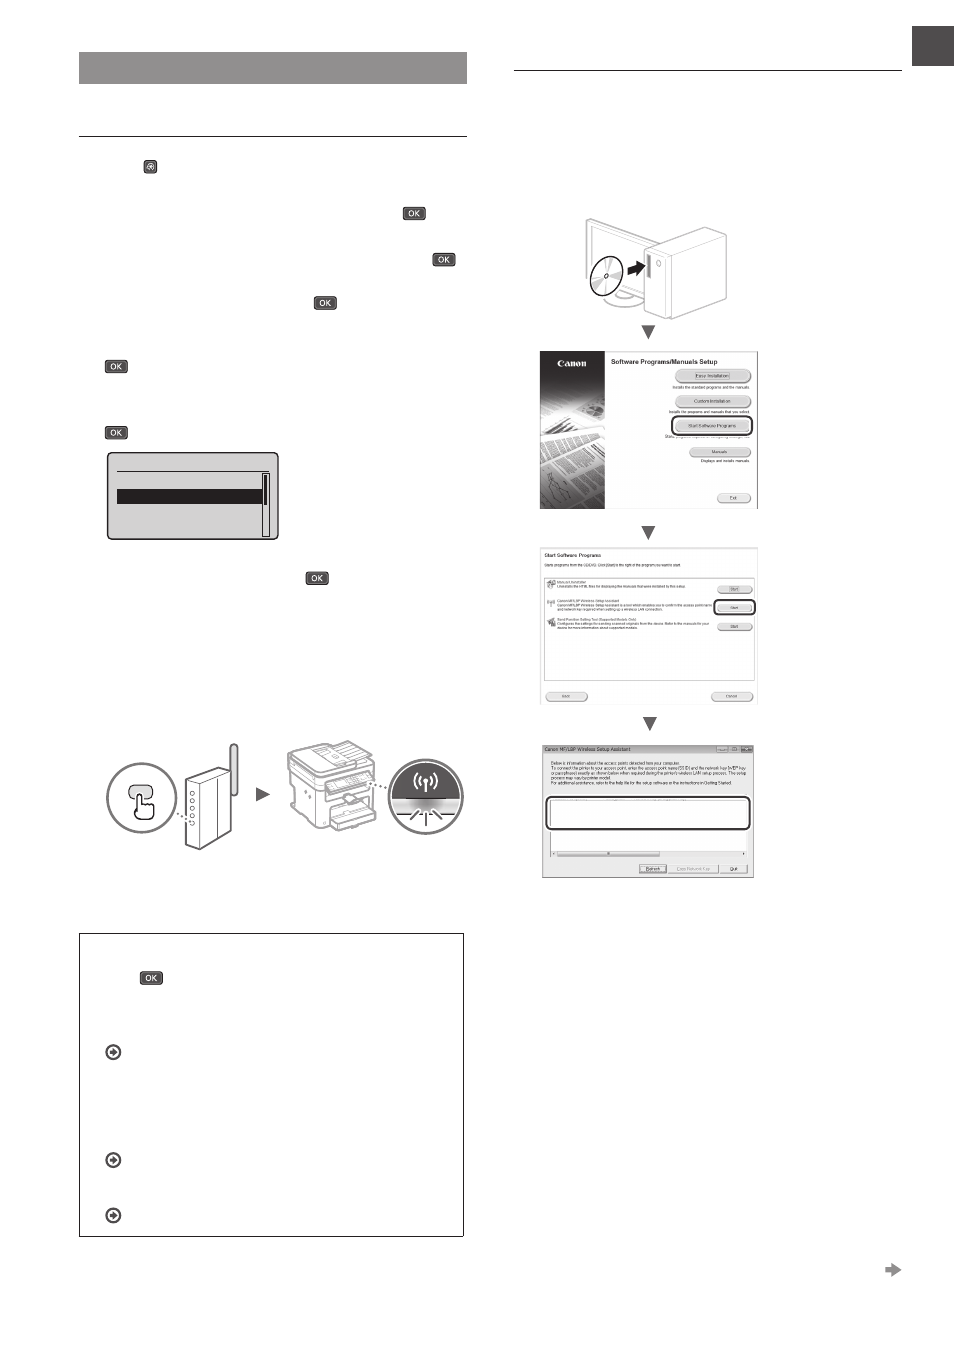
Setting the Access Point Manually
1
Check SSID or Network Key for a Wireless LAN
Router/Access Point.
• Check the label on the Wireless LAN router.
• You can check the SSID or the network key using “Canon
MF / LBP Wireless Setup Assistant,” which is included in
the DVD-ROM supplied with the machine.
If the information of the wireless LAN router is not
displayed, click the [Refresh] button. If the information is
not displayed when you click the [Refresh] button, check
if the computer settings for a wireless LAN router (access
point) are complete.
2
Write down the name of SSID and network key
displayed in step 1. When multiple access points are
displayed, write all SSIDs that are displayed.
Proceed to the next page