Preparations, Installation, When installing on a shelf – Yamaha ISX-18 User Manual
Page 12: When hanging the unit on the wall, And ( p.8), P.8)
8
Preparations
Installation
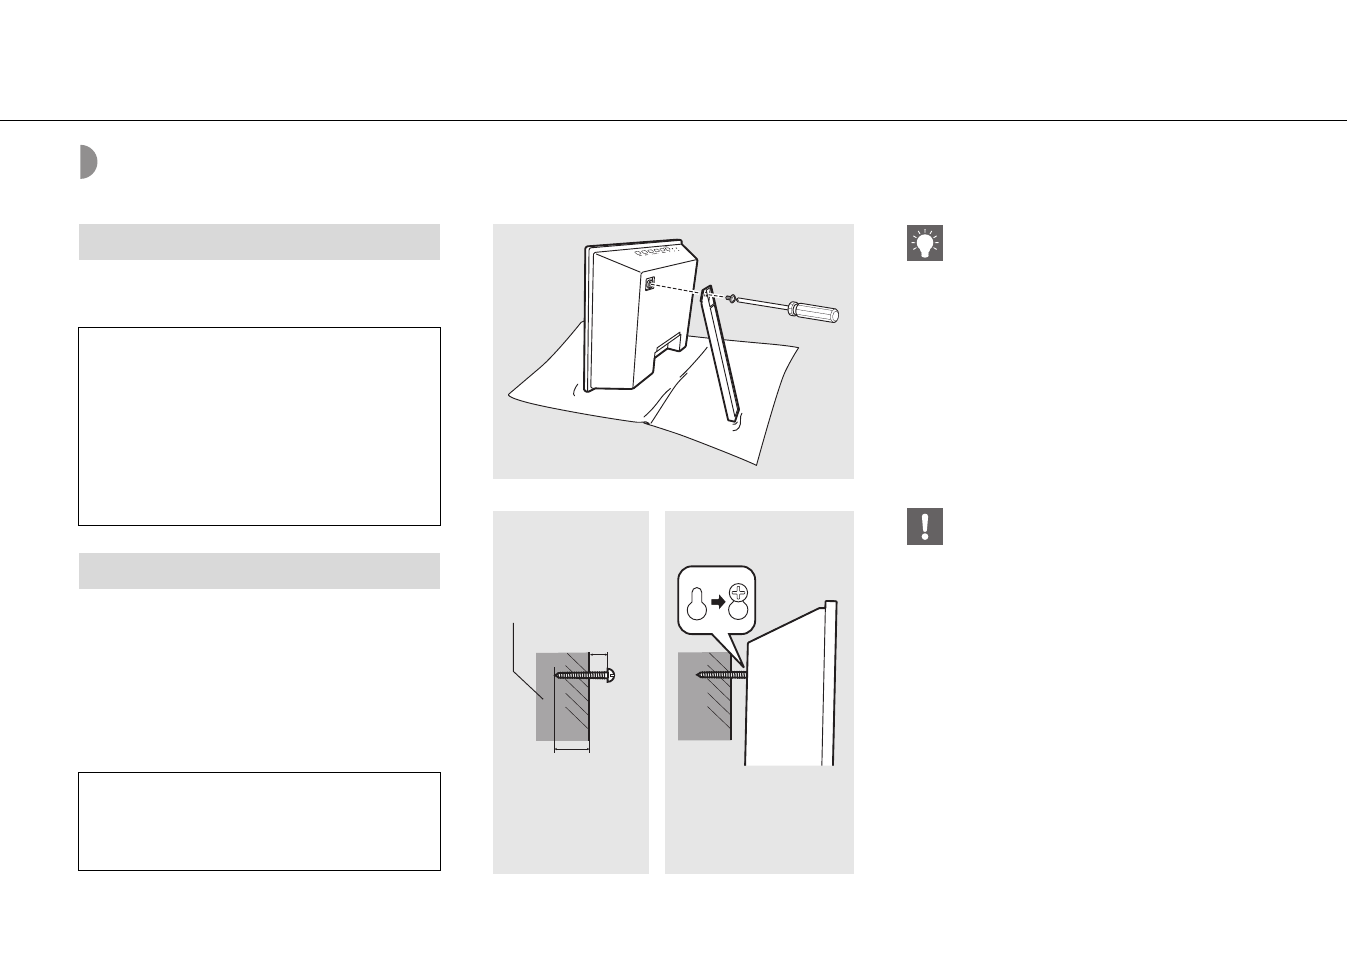
Have a Phillips (+) screwdriver ready to use during assembly.
Attach the stand using the specified screw.
1
Insert a screw into the wall.
• Prepare a commercially available tapping screw (screw
diameter 3.5 mm to 4 mm (1/8 in).
2
Hook the hole for wall-hanging
installation onto the screw head.
When installing on a shelf
Note
• Attach the stand using the specified screw supplied in
the package.
• Tighten the screw firmly so that the unit never gets
shaky.
• The unit cannot be used by itself. Be sure to complete
the installation.
• After installation, place the unit on a stable surface, and
observe the following precautions.
- Do not place on a metal sheet such as sheet iron.
- Do not cover the unit with cloth.
When hanging the unit on the wall
Note
• Secure installation is the owner's responsibility. Yamaha
shall not be liable for any accident caused by improper
installation. If you are uncertain about the wall strength,
please consult an installation specialist.
1
2
Wall/Reinforcing
material
20 mm (3/4 in.)
or more
7 mm (1/4 in.)
The unit
1.1 kg (2.4 lbs.)
• Spread a soft cloth or other protective mat over
the table before installation.
• Keep the screw out of reach of children to prevent
them from accidentally swallowing a screw.
• Make sure that the screw is securely caught by the
narrow part of the hole.
• Do not mount the unit on thin plywood or on a
wall made of soft material. Otherwise, the screw
may pull out of the surface and the unit may fall,
possibly damaging it or causing personal injury.
• Do not mount the unit on a wall using nails,
adhesives, or unstable hardware. Long term use
and vibration may cause the unit to fall.
• To prevent the unit from falling down, it is
recommended to attach a commercially available
safety wire. Use the supplied screw to attach the
safety wire to the screw hole for installing the
stand.