Part names front panel, Part names, Front panel – Pioneer X-HM76 User Manual
Page 5
4
> Install
> Playback
E
N
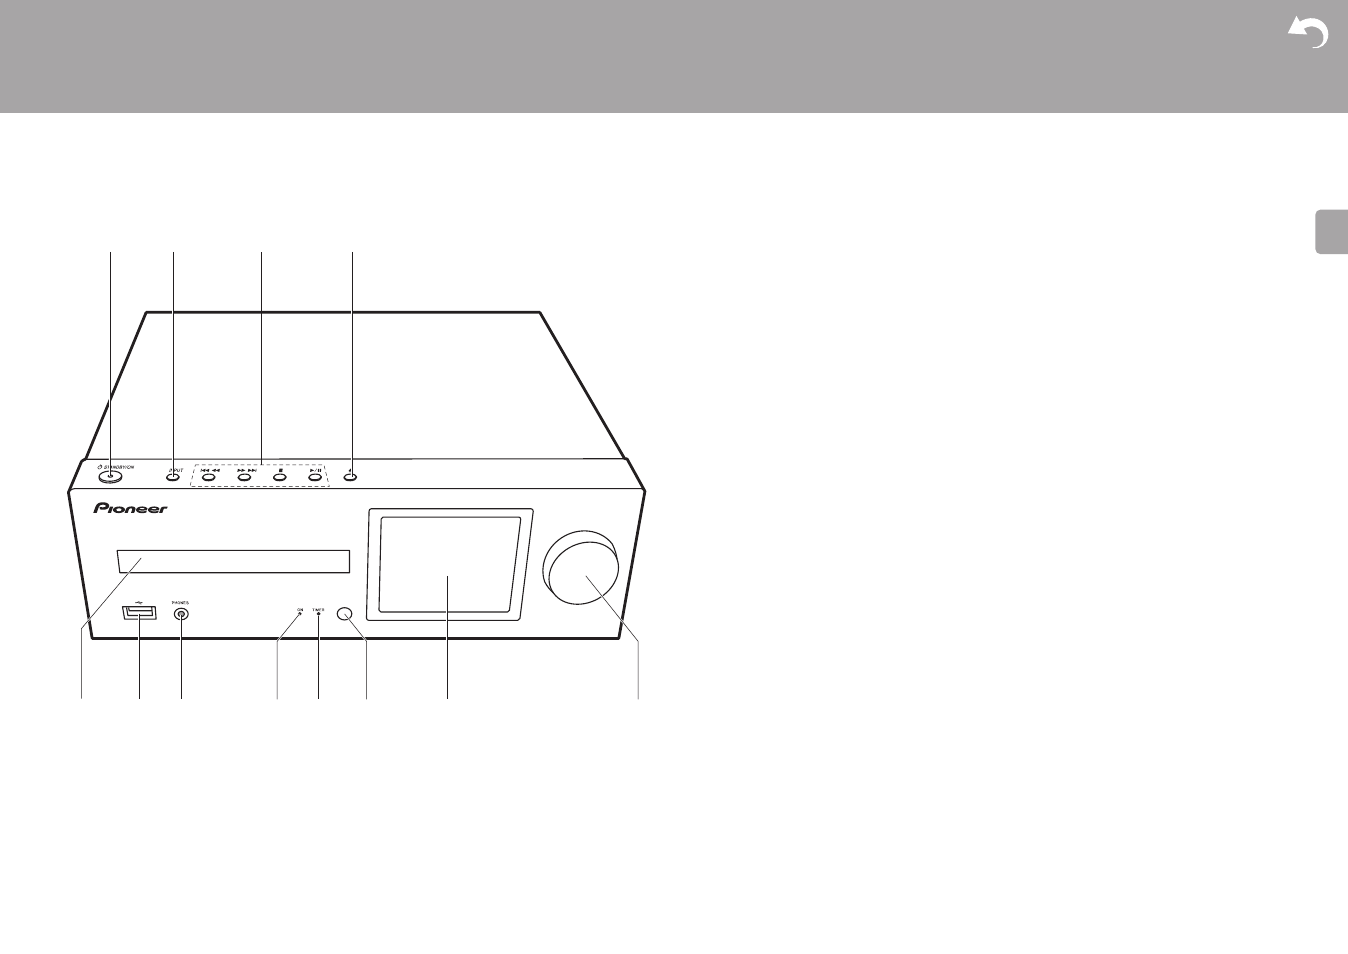
Front Panel
Part Names
1. Í STANDBY/ON button: Turns the unit on or to standby mode.
2. INPUT button: Switches the input to be played.
3. Play button:
:6
: Return to the beginning of the track being played. Press and hold to rewind the
track quickly. (CD)
Move to the previous track. (USB, Music Server)
59
: Move to the next track. Press and hold to fast-forward through the track. (CD)
Move to the next track. (USB, Music Server)
∫
: This button stops playback.
1
/; : This button pauses the playback.
0 Depending on the input, the operation may not start.
4. < button: Open or close the disc tray.
5. Disc tray: Place discs here. 8-cm discs can also be used.
6. USB port: Connect a USB storage device or HDD (hard disk drive) to play music files. You can
also supply power (maximum 5 V/0.5 A) to USB devices with a USB cable.
0 When connecting a HDD that requires more than 5 V/0.5 A, connect to the USB port
(maximum 5 V/1 A) on the rear of the unit.
7. PHONES jack: Connect stereo headphones with a mini plug.
8. Power indicator: This lights blue when the unit is on.
9. TIMER indicator: This lights when the alarm is set.
10.Remote control sensor
11. Display (ÄP8)
12.VOLUME dial: Adjust the volume. Adjust between 0 and 50.