Cleaning the laser unit -149, Cleaning the laser unit – Sharp MX-6070N User Manual
Page 152
1-149
BEFORE USING THE MACHINE►MAINTENANCE
CLEANING THE LASER UNIT
When the laser unit inside the machine becomes dirty, line patterns (coloured lines) may form in the printed image.
Identifying lines (coloured lines) caused by a dirty laser unit
• Coloured lines always appear in the same place. (The lines are never black.)
• Coloured lines appear in parallel with the direction of paper feeding.
• Coloured lines appear not only on output from a copier but also on prints from a computer. (The same lines appear on
both copies and print jobs.)
If conditions similar to the above occur, clean the laser unit as explained below.
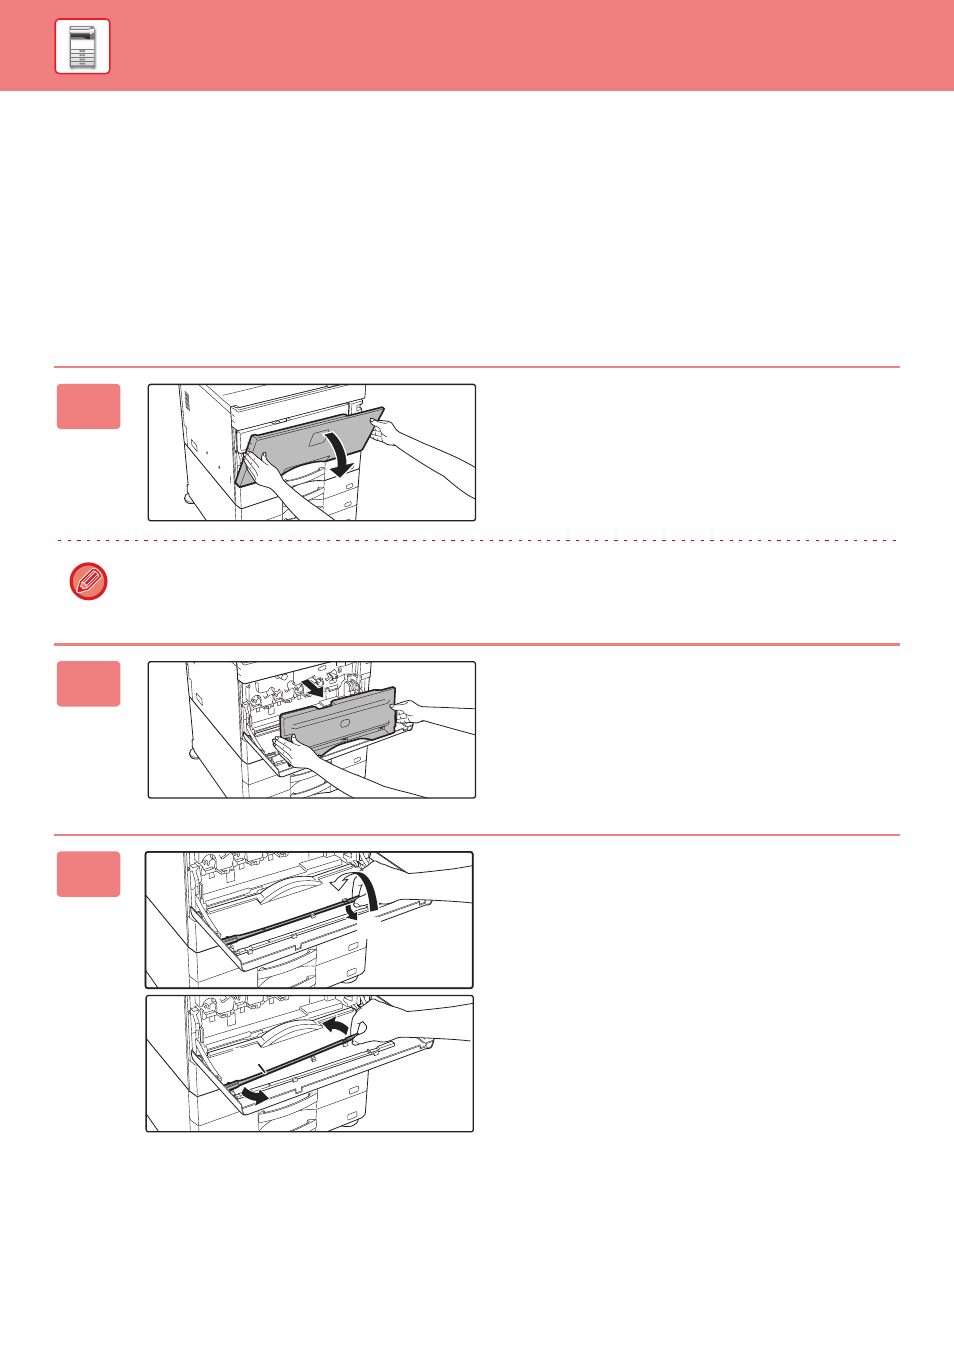
1
Open the front cover.
When a finisher (large stacker) or saddle stitch finisher (large stacker) is installed on the MX-5050N/MX-5070N/
MX-6050N/MX-6070N, open the front cover on the finisher (large stacker), or the front upper cover on the saddle stitch
finisher (large stacker), before opening the front cover of the machine.
2
Remove the waste toner box.
Press the release buttons on the sides of the waste toner
box inward and pull out slowly.
3
Take out the cleaning tool for the laser
unit.
The cleaning tool is attached to the front cover.
(1) Pull the right-hand side of the cleaning
tool to detach it from the hook.
(2) Put it over the hook to place it on the back
side.
(3) Turn the cleaning tool around the boss to
detach it from the left hand hook.
(1)
(2)
Boss