Place the original on the document glass, Specify the destination, Scanner/internet fax ►other functions – Sharp MX-6070N User Manual
Page 613
5-84
SCANNER/INTERNET FAX►OTHER FUNCTIONS
1
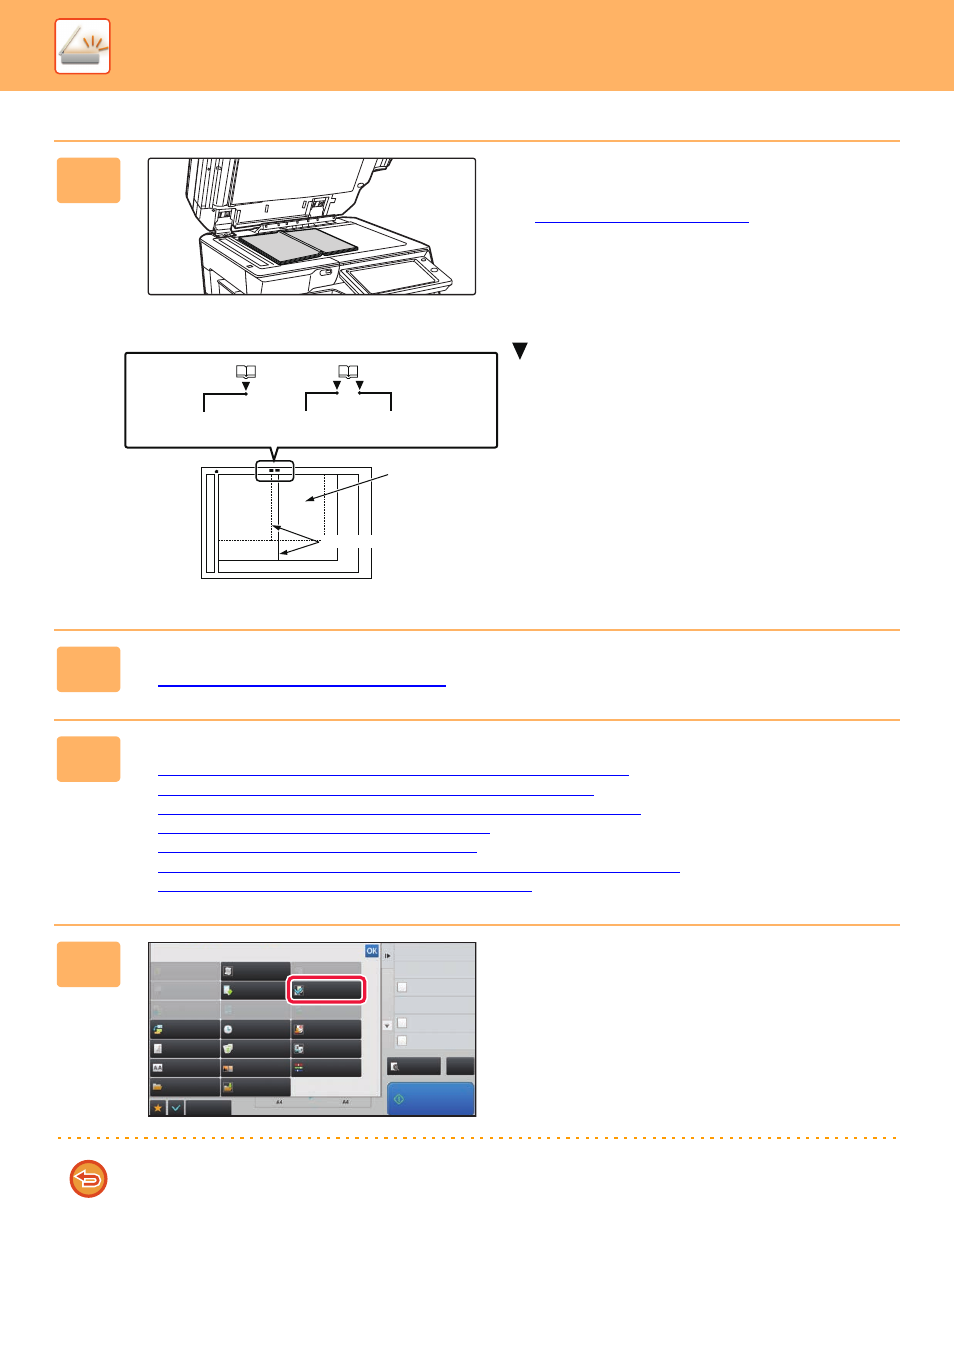
Place the original on the document
glass.
Align the centre of the original with the appropriate size mark
.
2
Tap the mode display to switch to the initial screen of each mode.
► Changing mode from each mode (page 5-10)
3
Specify the destination.
► RETRIEVING A DESTINATION FROM AN ADDRESS BOOK (page 5-16)
► VIEWING A LIST OF THE SELECTED DESTINATIONS (page 5-19)
► USING A SEARCH NUMBER TO RETRIEVE A DESTINATION (page 5-20)
► ENTERING AN ADDRESS MANUALLY (page 5-21)
► SPECIFYING A NETWORK FOLDER (page 5-22)
► RETRIEVING A DESTINATION FROM A GLOBAL ADDRESS BOOK (page 5-23)
► USING A TRANSMISSION LOG TO RESEND (page 5-25)
4
Tap the [Others] key, and tap the [Dual
Page Scan] key.
A checkmark appears on the icon.
After the settings are completed, tap the [Back] key.
To cancel the dual page scan setting
Tap the [Dual Page Scan] key to uncheck it.
Centreline of B4
original
Centreline of A3
original
Centreline of
11" x 17" original
Size mark
The page on
this side is
copied first.
Centreline of original
Back
Erase
Dual Page Scan
Book Divide
Job Build
Slow Scan Mode
Original
Count
Card Shot
Timer
Blank Page
Skip
Contrast
Sharpness
Mixed Size
Original
Verif.
Stamp
Background
Adjustment
Business
Card Scan
Multicrop
Drop Out Colour
File
RGB Adjust
Sending History
Others
Call Search Number
Verification Stamp
Send Same Image
as Fax Address
Preview
Store Data Temporarily
Quick File
Register Current Settings
Program Registration
Start
Quick File
CA