Document glass -82, Document glass, Allowed original sizes – Sharp MX-6070N User Manual
Page 85
1-82
BEFORE USING THE MACHINE►HOW TO PLACE THE ORIGINAL
DOCUMENT GLASS
This section describes the steps for setting the original on the document glass.
Allowed original sizes
When the original is a non-standard size, see the appropriate explanation below for the mode you are using.
►
COPIER: "
SELECTING THE ORIENTATION AND SIZE OF THE ORIGINAL (page 2-33)
"
►
SPECIFYING THE ORIGINAL SCAN SIZE USING NUMERIC VALUES (page 4-48)
►
IMAGE SEND: "
SPECIFYING THE ORIGINAL SCAN SIZE USING NUMERIC VALUES (page 5-48)
"
• Close the automatic document feeder slowly. Abruptly closing the automatic document feeder may damage it.
• Take care that your fingers are not pinched when closing the automatic document feeder.
Maximum original size
Standard size
297 mm (longitudinal) x 420 mm (transversal) or A3
11" (longitudinal) x 17" (transversal)
Non-standard size
297 mm (longitudinal) x 432 mm (transversal)
11-5/8" (longitudinal) x 17" (transversal)
1
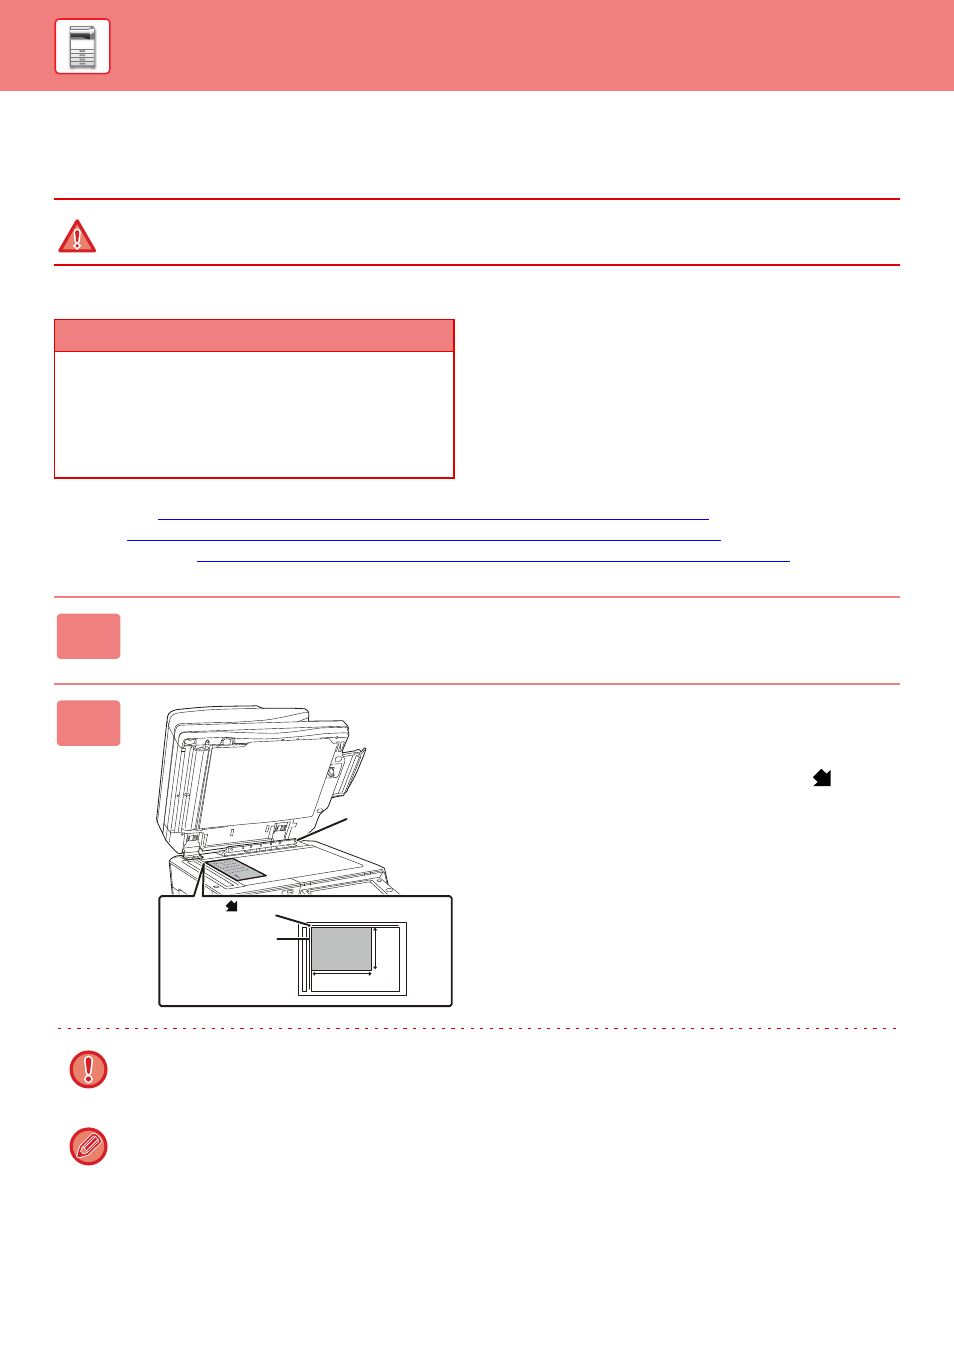
Open the automatic document feeder.
2
Load the paper with the print side
facing down.
Place the original face down and align the top left corner of
the original with back left (at the tip of the mark
) of the
document glass.
Do not place any objects under the original size detector.
Closing the automatic document feeder with an object underneath may damage the original size detector or disable
correct detection of the original size.
When placing a non-standard size original on the document glass, the size can be detected easily if a blank sheet of A4
(8-1/2" x 11"), B5 (5-1/2" x 8-1/2"), or other standard size paper is placed on top of the original.
X
Y
Original size
detector
Mark
Document glass
scale