Controlling the monitor with a computer (lan) – Sharp PN-60TW3 User Manual
Page 54
54
E
■ To set from a computer
When the monitor is connected to a computer, LAN settings
can be configured via computer.
Set up process
(1) Connect your monitor to a computer
(2) Specify the computer’s IP address
(3) Configure the monitor’s LAN settings
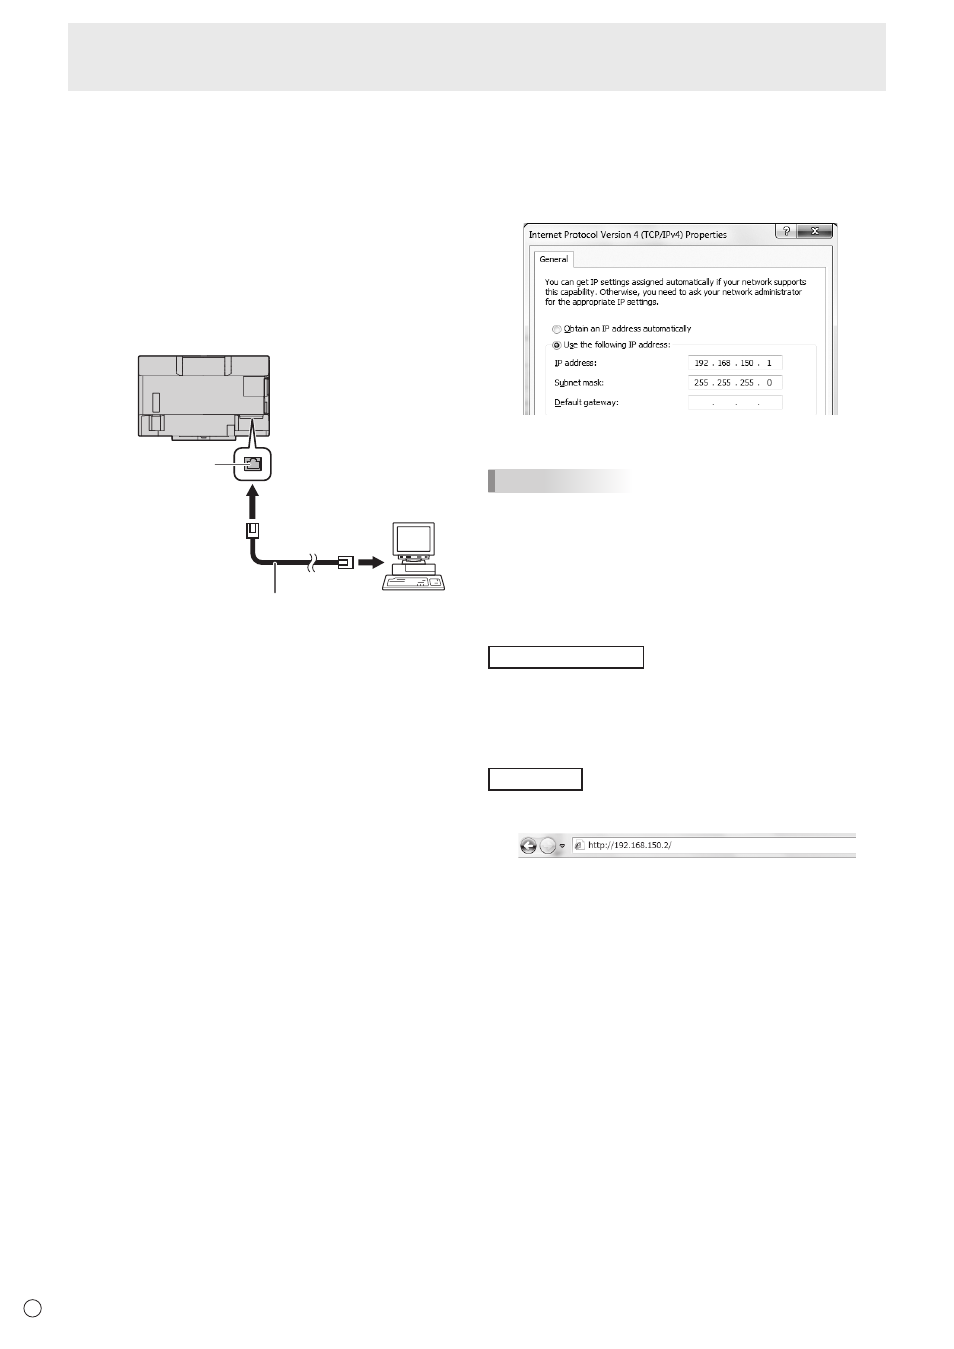
(1) Connecting your monitor to a computer
Connect a commercially available crossover LAN cable (UPT
cable, Category 5) to the LAN port on the computer and this
monitor.
LAN cable
(commercially available, crossover)
To LAN terminal
Computer
LAN terminal
(2) Specifying the computer’s IP address
To configure the monitor’s LAN settings, you must temporarily
change the settings on the computer.
This explanation is based on Windows 7.
1. Log on to the computer with an administrator account.
2. Click [Start], and then click “Control Panel”.
3. Click “View network status and tasks” in “Network and
Internet”.
In “Classic View”, click “Network and Sharing Center”.
4. Click “Local Area Connection” and then “Properties”.
5. Click “Internet Protocol Version 4 (TCP/IPv4)” and then
“Properties”.
6. Make a note of the current IP address, subnet mask, and
default gateway settings.
Make sure you write this information now as you will
be changing the IP address, subnet mask, and default
gateway settings back to these settings afterwards.
7. Temporarily change the IP address and subnet mask.
To access the monitor as it is shipped from the factory, set
as follows.
• IP Address: 192.168.150.1
• Subnet Mask: 255.255.255.0
• Default Gateway: (leave blank)
8. Click [OK] and then reboot the PC.
TIPS
• This monitor is factory preset as shown below.
(When DHCP CLIENT is set to OFF)
IP Address
: 192.168.150.2
Subnet Mask
: 255.255.255.0
Default Gateway : 0.0.0.0
(3) Configuring the monitor’s LAN settings
Access the monitor using the web browser.
Controlling the monitor
1. Turn the power ON to the monitor.
2. Set RS-232C/LAN SELECT of COMMUNICATION
SETTING on the SETUP menu to LAN.
3. Set DHCP CLIENT of LAN SETUP of COMMUNICATION
SETTING on the SETUP menu to OFF.
PC operation
4. Launch the web browser, in the “Address” box type
“http://192.168.150.2/” and press the Enter key.
Controlling the Monitor with a computer (LAN)