Controlling with a computer, Basic operation, Controlling the monitor with a computer (lan) – Sharp PN-60TW3 User Manual
Page 55
55
E
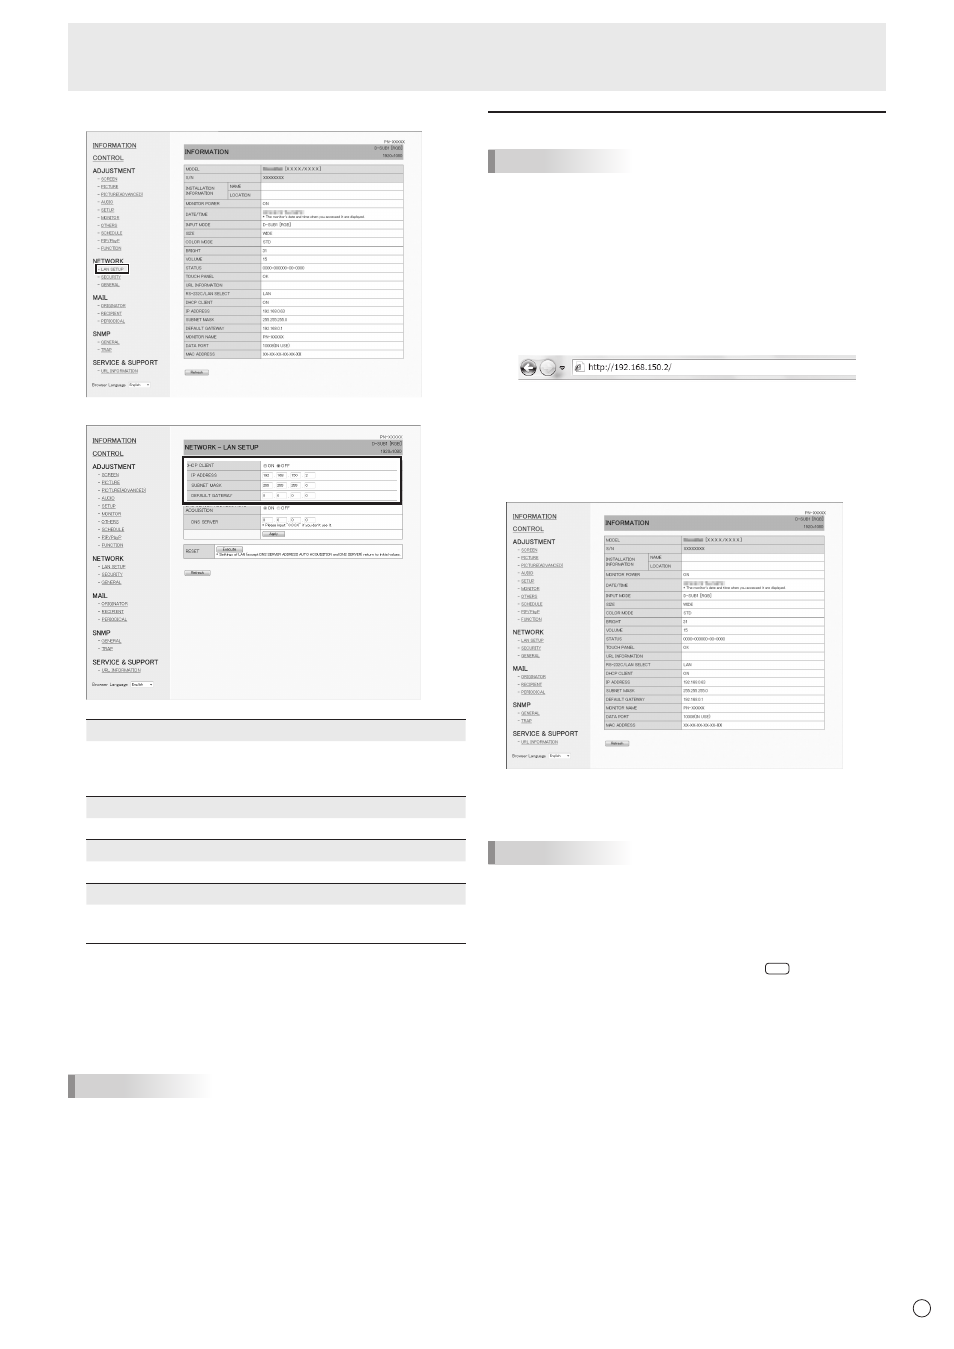
5. Click on “LAN SETUP” under NETWORK.
6. Specify the “DHCP CLIENT”, “IP ADDRESS”,etc.
DHCP CLIENT
If your LAN has a DHCP server and you wish to obtain an
address automatically, change this setting to “ON”.
To set the address manually, set this to “OFF”.
IP ADDRESS
If the DHCP CLIENT is set to “OFF”, specify an IP address.
SUBNET MASK
If the DHCP CLIENT is set to “OFF”, specify the subnet mask.
DEFAULT GATEWAY
If the DHCP CLIENT is set to “OFF”, specify the default gateway.
If you are not using a default gateway, specify “0.0.0.0”.
7. When the setting is changed, click [Apply].
8. Check the message and click [OK].
9. Exit the web browser.
10. Restore the computer’s IP address jotted in Step 6, “(2)
Specifying the computer’s IP address”.
11. Connect the monitor and the computer to the LAN.
TIPS
• Wait 10 seconds after clicking [OK] before proceeding.
• When operating using the remote control unit or similar,
click [Refresh].
Controlling with a computer
TIPS
• For security, set a USER NAME and PASSWORD.
■ Basic operation
You use the web browser on a computer on the LAN to control
the monitor.
1. Launch the web browser on the computer.
2. In the “Address” box, type “http://” followed by your monitor’s
IP address followed by “/”, then press the Enter key.
You can confirm the IP address with the DISPLAY function.
When prompted to enter a user name and password, type
the user name and password that you specified in the
security settings (see page 57), and click [OK].
3. You can check, control, and change the monitor’s status
and settings by clicking the menu items on the left side of
the screen.
• If you see an [Apply] button next to a setting, click it after
you change that setting.
TIPS
• See pages 56 to 60 for details on each setting.
• If you click [Refresh] before the screen finishes updating
the current display, the “Server Busy Error” will appear.
Wait for a moment before operating your monitor again.
• You cannot operate the monitor while it is warming up.
• If “DHCP CLIENT” is set to “ON”, press
DISPLAY
on the
remote control unit two times and then check the monitor’s
IP address.
Controlling the Monitor with a computer (LAN)