Controlling with a pc, Basic operation, Controlling the monitor with a pc (lan) – Sharp PN-U423 User Manual
Page 41
41
E
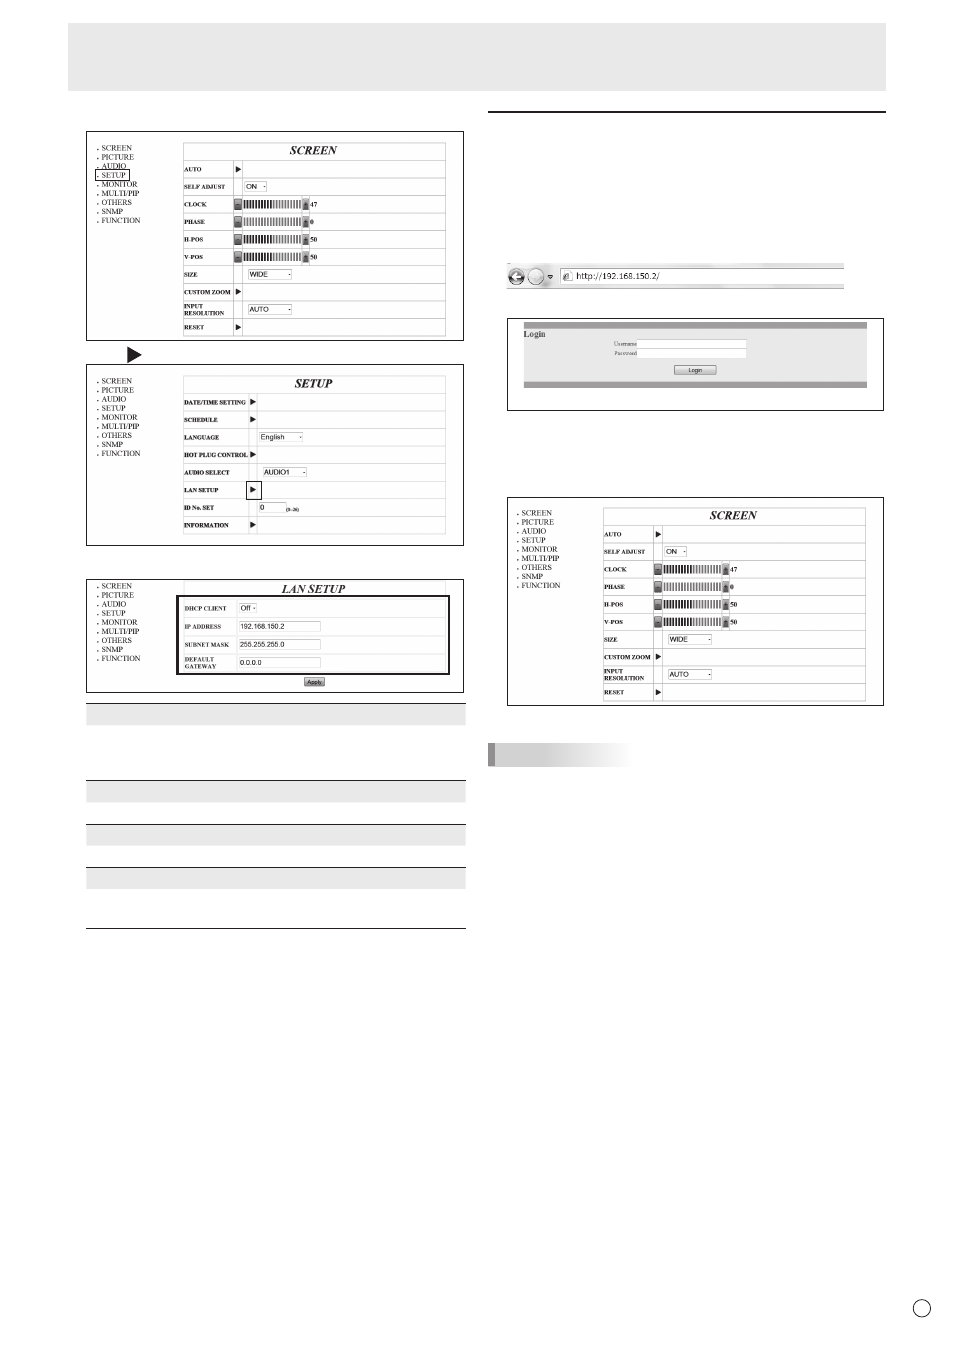
6. Click SETUP.
7. Click [ ] next to LAN SETUP.
8. Specify the DHCP CLIENT, IP ADDRESS,etc.
DHCP CLIENT
If your LAN has a DHCP server and you wish to obtain an
address automatically, change this setting to ON.
To set the address manually, set this to OFF.
IP ADDRESS
If the DHCP CLIENT is set to OFF, specify an IP address.
SUBNET MASK
If the DHCP CLIENT is set to OFF, specify the subnet mask.
DEFAULT GATEWAY
If the DHCP CLIENT is set to OFF, specify the default gateway.
If you are not using a default gateway, specify “0.0.0.0”.
9. When the setting is changed, click [Apply].
10. Exit Internet Explorer.
11. Restore the PC’s IP address jotted in Step 6, “(2)
Specifying the PC’s IP address”.
12. Connect the monitor and the PC to the LAN.
Controlling with a PC
■ Basic operation
You use Internet Explorer on a PC on the LAN to control the
monitor.
1. Launch Internet Explorer on the PC.
2. In the “Address” box, type “http://” followed by your monitor’s
IP address followed by “/”, then press the Enter key.
3. Enter in “Username” and in “Password”, and click [Login].
Enter the user name and password set in SECURITY.
If you did not make any SECURITY settings, leave the
spaces blank and click on [Login].
4. You can configure settings in each setting screen.
TIPS
• You cannot operate the monitor while it is warming up.
Controlling the Monitor with a PC (LAN)