Macro with multiple groups of actions – Contour Design Shuttle-Xpress NLE Multimedia Controller (Black) User Manual
Page 29
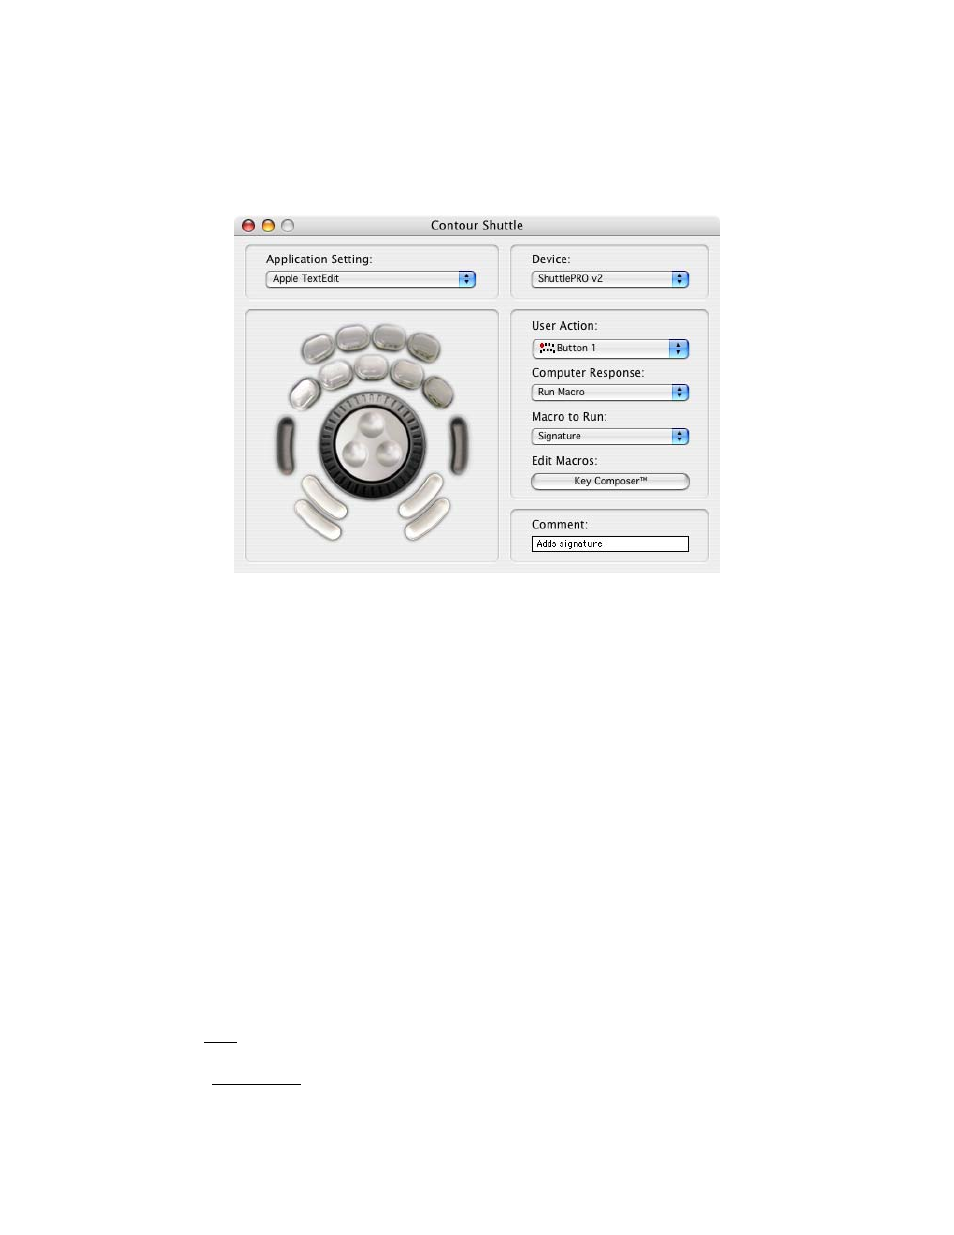
From the Shuttle device Control Panel you will now be able to associate the newly created
macro to Button 1 of your ShuttlePRO v2, by simply choosing it from the Macro to Run Menu
(see Fig. 6-2).
Pressing Button 1 will play through
all the actions
shown in the Action sequence window.
Fig. 6-2
6.2 Macro with multiple groups of actions
Let’s create a macro that allows you to switch between views (Fit in Window, Actual Size, Fit
Width, Fit Visible, Full Screen) within Acrobat Reader and let’s say we want to associate this
macro to Button 7 of your ShuttlePRO v2.
You usually select views by using the mouse or by typing a keystroke sequence on your
keyboard, specifically by clicking on View on the toolbar then going down to Fit in Window (or
typing cmd-0), Actual Size (cmd-1), Fit Width (cmd-2) or Fit Visible (cmd-3), or by clicking on
Window on the toolbar then going down to Full Screen View (cmd-l).
Let’s create a step-by-step macro based on these actions:
In the Shuttle device Control Panel:
1. In the Application Settings Menu, select
Adobe Acrobat Reader
2. From the User Action Menu, select
Button 7
.
3. Select
Run Macro
from the Computer Response Menu.
4. Click on the
Key Composer™
button to launch the Key Composer application.
In the Key Composer window:
5. Click on New in the Macro selection window.
6. Type
Acrobat Reader – Switch views
then click OK.
7. Click on New Action in the Action Sequence window (this action will be created in the
already existing group).
Contour Shuttle Multimedia Controllers
23