G-Shock G-2800-1 User Manual
G-Shock Clock
USER’S GUIDE 2534/2654
1
If the display of the watch is blank...
If the SLEEP indicator is on the display, it means that the
display is blank because the watch’s Power Saving
function has turned off the display to conserve power.
Power Saving automatically turns off the display and puts
the watch into a sleep state whenever your watch is left for
a certain period where it is dark.
• The initial factory default setting is Power Saving on.
• The watch recovers from the sleep state if you move it to
a well-lit area
*
, if you press any button, or if you angle
the watch towards your face for reading.
*
It can take up to five seconds for the display to turn on.
• See “Power Saving Function” for more information.
Getting Acquainted
Congratulations upon your selection of this CASIO watch. To get the most out of your
purchase, be sure to carefully read this manual and keep it on hand for later reference
when necessary.
Expose the watch to bright light to charge its battery before using it.
You can use this watch even as its battery is being charged by exposure to bright
light.
• Be sure to read “Battery” of this manual for important information you need
to know when exposing the watch to bright light.
About This Manual
• Button operations are indicated using the letters shown
in the illustration.
• Each section of this manual provides you with the
information you need to perform operations in each
mode. Further details and technical information can be
found in the “Reference” section.
(Light)
MO0302-A
▲
▲
▲
▲
Telememo Mode
World Time Mode
Countdown Timer Mode
Alarm Mode
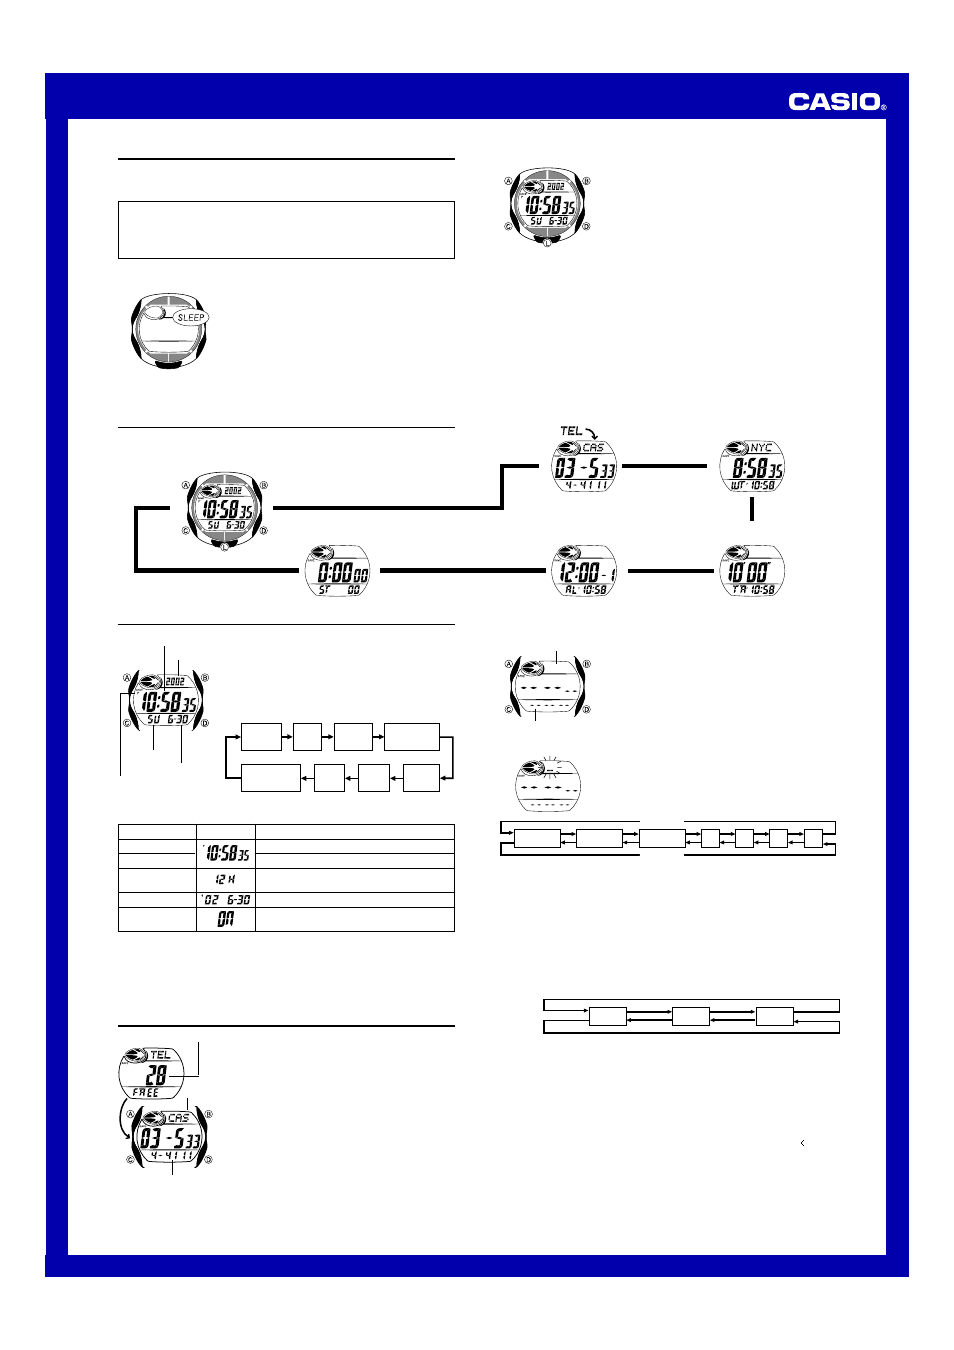
General Guide
• Press C to change from mode to mode.
• In any mode, press L to illuminate the display.
Timekeeping Mode
Press C.
Stopwatch Mode
▲
H
Hour
Seconds
12/24-Hour
Format
Power Saving
Day
Month
Year
Minutes
Timekeeping
Use the Timekeeping Mode to set and view the current
time and date.
To set the time and date
1. In the Timekeeping Mode, hold down A until the
seconds start to flash, which indicates the setting
screen.
2. Press C to move the flashing in the sequence shown
below to select other settings.
Hour : Minutes Seconds
Year
Day of week
Month – Day
PM indicator
3. When the setting you want to change is flashing, use D and B to change it as
described below.
4. Press A to exit the setting screen.
• See “Power Saving Function” for details about configuring Power Saving settings.
• The 12-hour/24-hour timekeeping format you select in the Timekeeping Mode is
applied in all modes.
Setting
Seconds
Hour, Minutes
12/24-Hour
Format
Year,Month,Day
Power Saving
Button Operation
Press D to reset to
00.
Use D (+) and B (–) to change the setting.
Press D to toggle between 12-hour (
12H) and
24-hour (
24H) timekeeping.
Use D (+) and B (–) to change the setting.
Press D to toggle Power Saving on (
ON) and
off (
OFF).
Screen
• The day of the week is automatically displayed in accordance with the date (year,
month, and day) settings.
To create a new Telememo record
1. In the Telememo Mode, use B and D to cycle through
the record screens until the new data screen appears.
• The new data screen is the one that is blank (contains
no name and telephone number).
• If the message FULL appears on the display, it
means that memory is full. To store another record,
you will first have to delete some of the records stored
in memory.
2. Hold down A until the flashing cursor (
_) appears in
the name area of the display.
3. In the name area, use D and B to cycle through
characters at the cursor position. The characters cycle
in the sequence shown below.
Name area
Number area
New Data Screen
A
to
Z
(space)
0
to
9
-
.
:
/
Press D.
Press B.
4. When the character you want is at the cursor position, press C to move the cursor
to the right.
5. Repeat steps 3 and 4 until the name is complete.
• You can input up to eight characters for the name.
6. After you input the name, press C as many times as necessary to move the cursor
to the number area.
• When the cursor is located at the eighth space of the name area, moving the
cursor to the right causes it to jump to the first digit of the number. When the
cursor is at the 12th digit of the number, moving it to the right (by pressing C)
causes it to jump to the first character in the name.
7. In the number area, use D and B to cycle through numbers and symbols
(hyphen, space) at the cursor position. The characters cycle in the sequence shown
below.
8. When the character you want is at the cursor position, press C to move the cursor
to the right.
9. Repeat steps 7 and 8 until you complete number input.
• You can input up to 12 digits for the number.
10. After inputting your data, press A to store it.
• After data storage is complete, the cursor appears in the name area of the
display, ready for input of a new Telememo record.
11. Input more data (starting from step 3) or press A again to return to the Telememo
record screen (without the cursor).
• The name can show only three characters at a time, so longer text scrolls
continuously from right to left. The last character is indicated by the symbol after it.
0 to 9
x
(space)
Press D.
Press B.
Telememo
The Telememo Mode lets you store up to 30 records, each
containing name and telephone number data. Records are
automatically sorted based on the characters of the name.
You can recall records by scrolling through them on the
display.
• See “Sort Table” for details on how the watch sorts
records.
• All of the operations in this section are performed in the
Telememo Mode, which you enter by pressing C.
Remaining memory
Name
Telephone number