Operation – Ryobi ES8000 User Manual
Page 5
5 - English
OPERATION
Suppressing sound:
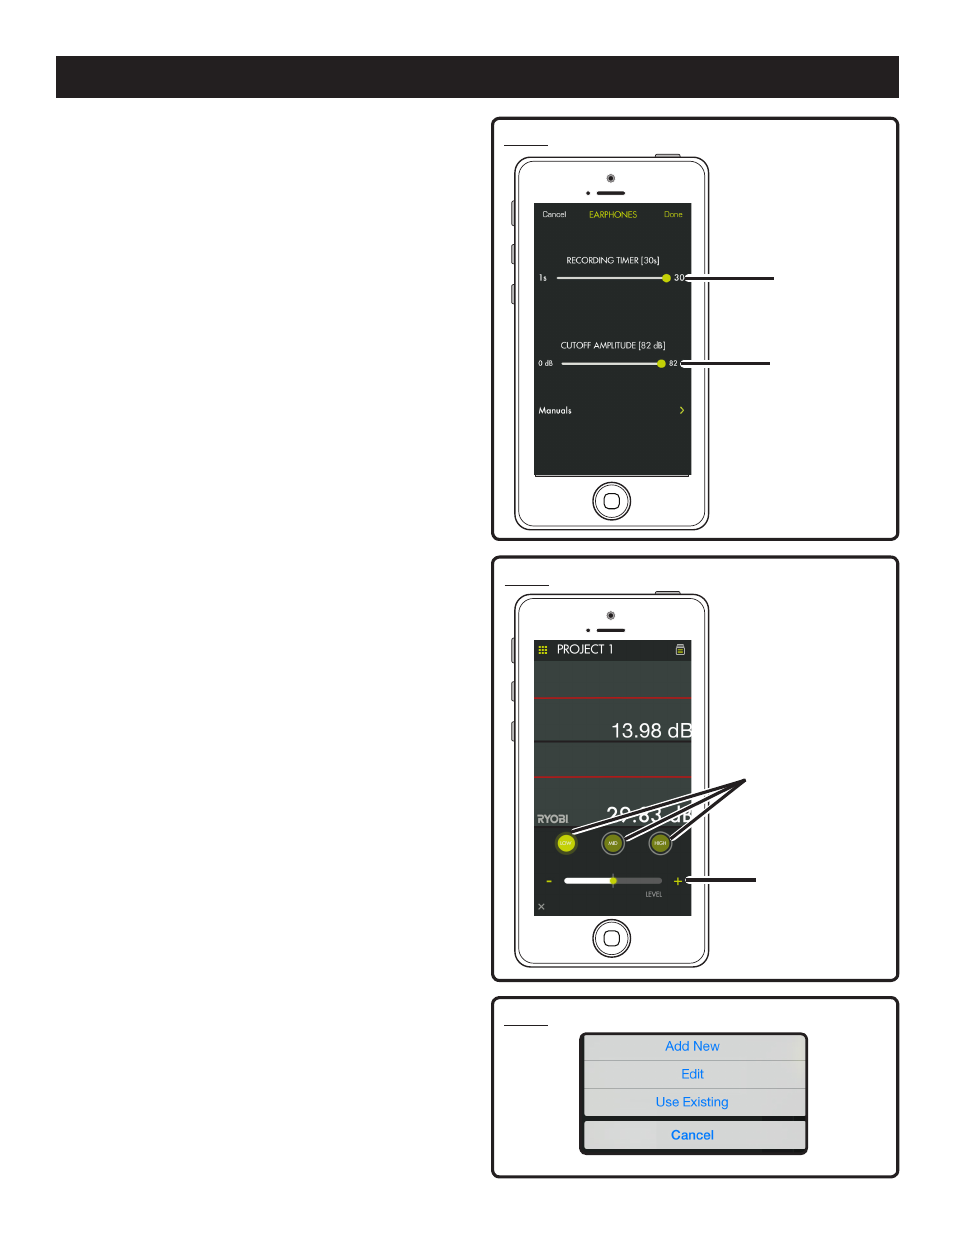
Tap the Settings icon to launch the settings menu.
Select a level of noise suppression between 0 dB and 82
dB using the Cut-Off Amplitude slider.
When finished, tap Done.
Adjusting the frequency to suppress sound:
Use the Low, Mid and High adjustments to fine-tune the
frequencies of sound to be suppressed.
Tap the Frequency icon.
Select the frequency of sound to be adjusted.
Use the Frequency Adjustment slider to fine-tune the level
of suppression
When finished, tap the “X” to exit.
NOTE: The adjusted settings will automatically be saved.
Recording sound:
You can record between 1 and 30 seconds of sound.
Record sound by tapping the record button.
Tap the button again to stop recording.
NOTE:
The sound file will automatically be saved into
the file cabinet. To access the file, select the file cabinet
icon and navigate to the saved file.
MANAGING YOUR PROJECTS
See Figure 5.
To edit, delete or share your images:
Tap the project name, a menu appears displaying
Add New,
Edit, Use Existing or Cancel.
Add New
Tap
Add New and enter the name of your new project.
Tap
Done to return to the screen. Any screen shots or
pictures taken will be saved under this new project name.
To review pictures, tap the file cabinet icon. Tap the picture
to display the saved screenshot.
NOTE: If no pictures have been saved, you will receive a
notice that no readings are available in this project. You
must save a picture before you can open to review.
Edit
Delete the characters in the name and type the new name
for the existing project.
Use Existing
Scroll through the list of project names and select the one
you wish to access.
Tap
Done to load the project.
REVIEWING YOUR PROJECTS
Tap the file cabinet icon to review the pictures in the
selected project.
Swipe left or right to scroll through the pictures. The green
arrow to the left of the project name returns you to the
work screen.
Fig. 3
Cut-off
Amplitude
Slider
Fig. 5
Frequency
Adjustment
Slider
Fig. 4
Recording
Time Slider
Low, Mid,
High Options