Operation, Warning, Caution – Ryobi RC960 User Manual
Page 9: Led function of charger, Important information for recharging hot batteries, Mounting radio charger, Storage compartment, Page 9, Fig. 5 back side of radio charger, Storage compartment fig. 6
Page 9
OPERATION
Fig. 5
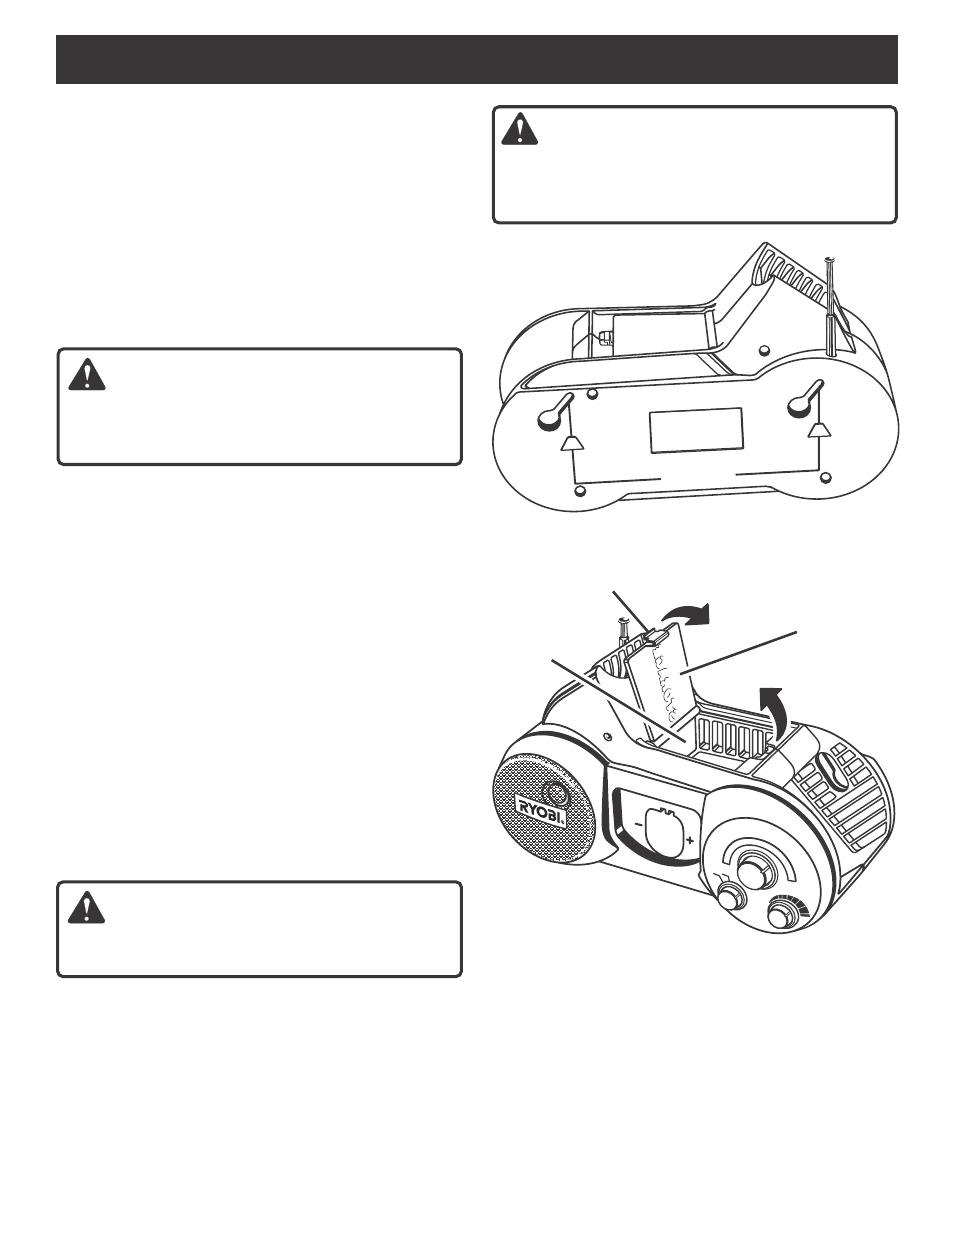
BACK SIDE OF RADIO CHARGER
UPPER
SIDE
UPPER
SIDE
6.00”
152.4 mm
ST
OR
AG
E
ST
OR
AG
E
STORAGE
COMPARTMENT
Fig. 6
AM/FM
charg
ing
600
800
12
00
1
7
00 kHz
MHz
FM
TUNING
14
0
0
1
0
8
10
6
104
100
1000
98
92
88
700
53
0
AM FM
AM
ME
STORAGE
TAB
DOOR
TO
CLOSE
TO
OPEN
LED FUNCTION OF CHARGER
■ LED on indicates battery pack is in charging mode.
■ LED does not come on indicates the following:
a. No battery pack in the charger.
b. Battery pack was not inserted into charger
properly. Remove battery pack then reinsert.
c. Battery pack is deeply discharged. Battery pack
should remain in charger 5 to 30 minutes. The
LED will come on automatically and start charging
the battery pack; or
d. Defective Battery Pack.
WARNING:
To reduce risk of injury, charge only the recommended
nickel-cadmium type rechargeable batteries. Other types
of batteries may burst causing personal injury and damage.
IMPORTANT INFORMATION FOR RECHARGING
HOT BATTERIES
When using your drill-driver continuously, the batteries in
your battery pack become hot. You should let a hot battery
pack cool down for approximately 30 minutes before
attempting to recharge.
Note: This situation occurs when continuous use of your
drill-driver causes the batteries to become hot. It does not
occur under normal circumstances. Refer to "Charging
Battery Pack" for normal recharging of batteries. If the
charger does not charge your battery pack under normal
circumstances, return both the battery pack and radio charger
to your nearest Ryobi Authorized Service Center for elec-
trical check.
MOUNTING RADIO CHARGER
See Figure 5.
Your radio charger has a "key hole" hanging feature for
convenient, space saving storage. Screws should be
installed so that center distances are 6 in. (152.4 mm)
apart.
CAUTION:
Mount radio charger to a surface that will accommodate
the weight of the radio charger, drill, and both batteries.
STORAGE COMPARTMENT
See Figure 6.
A storage compartment is located on the top portion of your
radio charger. This storage compartment is convenient for
storing small items such as bits, screws, washers, etc. The
door to the compartment opens and closes in the direction of
the arrows as shown in Figure 6. Pull back on tab and lift up
on door to open. When closing door, make sure tab snaps into
place so items will not fall out.
WARNING:
Do not allow screws or other metal pieces to touch
battery contacts or fall in battery port. Failure to do so can
result in fire, explosion, or personal injury.