TAMKO COOLRIDGE User Manual
Idge, Helpful hints
Central District
220 West 4th St., Joplin, MO 64801
800-641-4691
10/2008
Northeast District
4500 Tamko Dr., Frederick, MD 21701
800-368-2055
Southeast District
2300 35th St., Tuscaloosa, AL 35401
800-228-2656
Southwest District
7910 S. Central Exp., Dallas, TX 75216
800-443-1834
Western District
5300 East 43rd Ave., Denver, CO 80216
800-530-8868
800-641-4691
Visit Our Web Site at
tamko.com
Application Instructions for
C
OOL
R
IDGE
®
SECTIONAL RIDGE VENT
1.
Cut a slot in plywood
along roof ridge 2" wide
(1" on each side). If ridge
beam is present, cut slot
1" wide on each side of
ridge beam. Allow for a
closed area of sheath-
ing 12" at both ends of
ridge.
2.
Place first piece of
vent with female end 1"
in from gable end and
use centering line for
proper alignment along
peak. Fasten using at
least two nails at each
end and in the middle
of section in nail line
area (2-1/2" minimum
nail length). More may
be required on steeper
slopes to seat properly.
Continue installing addi-
tional pieces along ridge
sliding female end over male end, aligning using centering line.
NOTE: In cold weather, allow 1/8" gap between vent sections for
expansion.
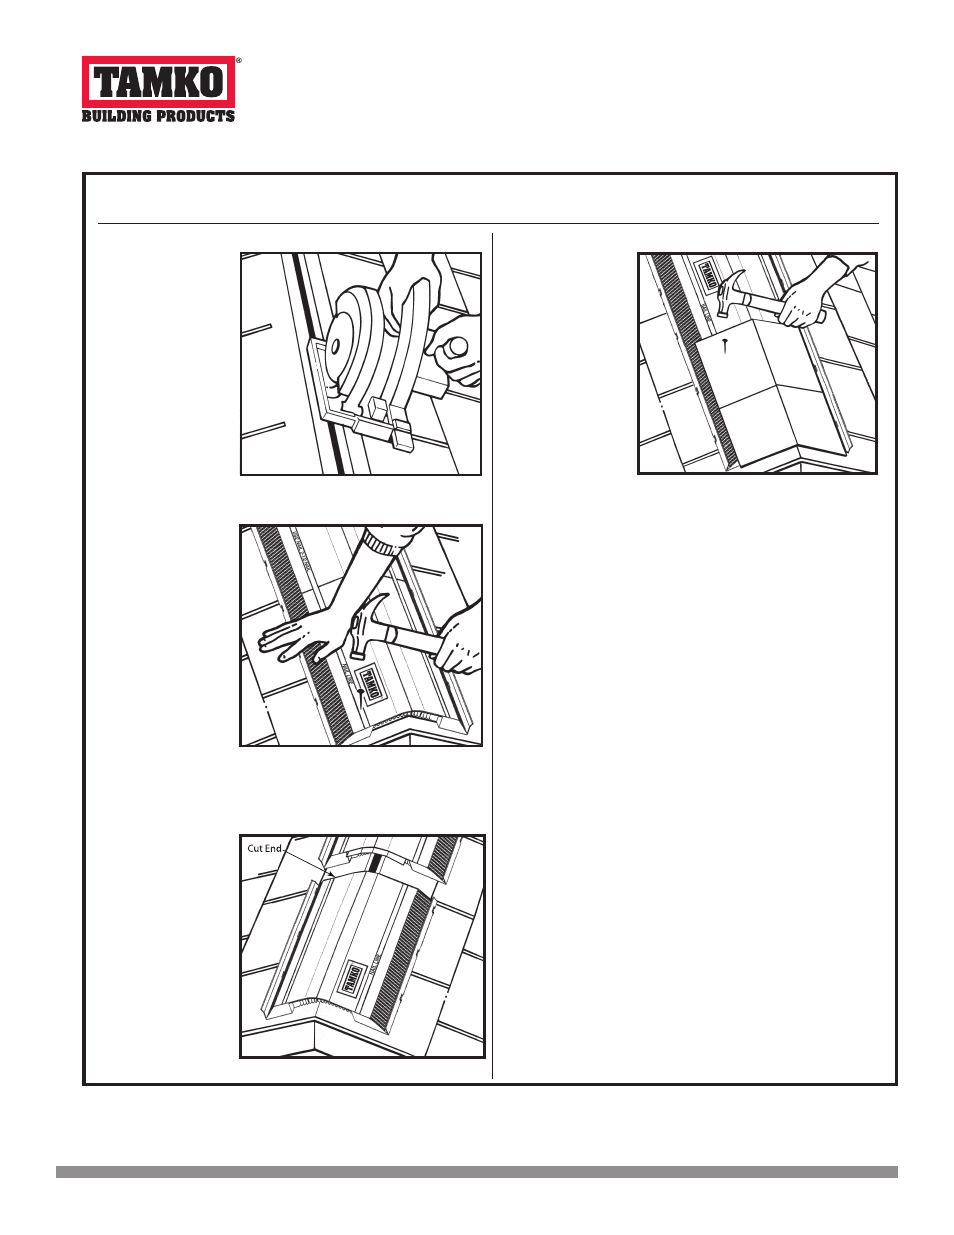
3.
When reaching the
other end, the last vent
section may need to be
cut to length. End plugs
are provided every 12"
on underside of the prod-
uct. Measure amount
needed to install to within
1" of gable end. Cut that
length in from end of vent
section and flip around
so that end plug is at
gable end. Allow male
tab from previous piece
to slide under last piece
and nail in place.
4.
Place first cap shin-
gle over vent so that it
overhangs at least 1"
over end of vent sec-
tion. Install with 2-1/2"
nails in nail line area
as you work your way
down the roof. Cut last
cap shingle so that it
overhangs vent 1" at
other gable end.
HELPFUL HINTS
Optionally, you may install cap shingles on each piece as you go along,
taking care to assure proper alignment.
If installing on dimensional or architectural shingles on new construc-
tion, leave felt underlayment about 6" long at roof ridge and fold back
under the vent so that vent is essentially installed on top of felt over the
shingles. If re-roofing, caulk between low areas of shingle and baffle of
vent after installation.
Lines across top of product indicate where the end plugs are on the un-
derside (every 12"). There is no need to flip the last piece if you measure
and plan ahead to install on an even foot increment.
The nail line area is completely free from obstructions except where
the end plugs are (unlike other sectional ridge vents that can have
nails deflect off of supports). By using the end plug indicators on top of
product, you can easily avoid nails through the end plugs.
NOTICE: This product must be applied in conformance with the manufacturer’s instructions.