TAMKO Xtractor Vent User Manual
Xtractor vent, Xlp turbo, Application instructions for
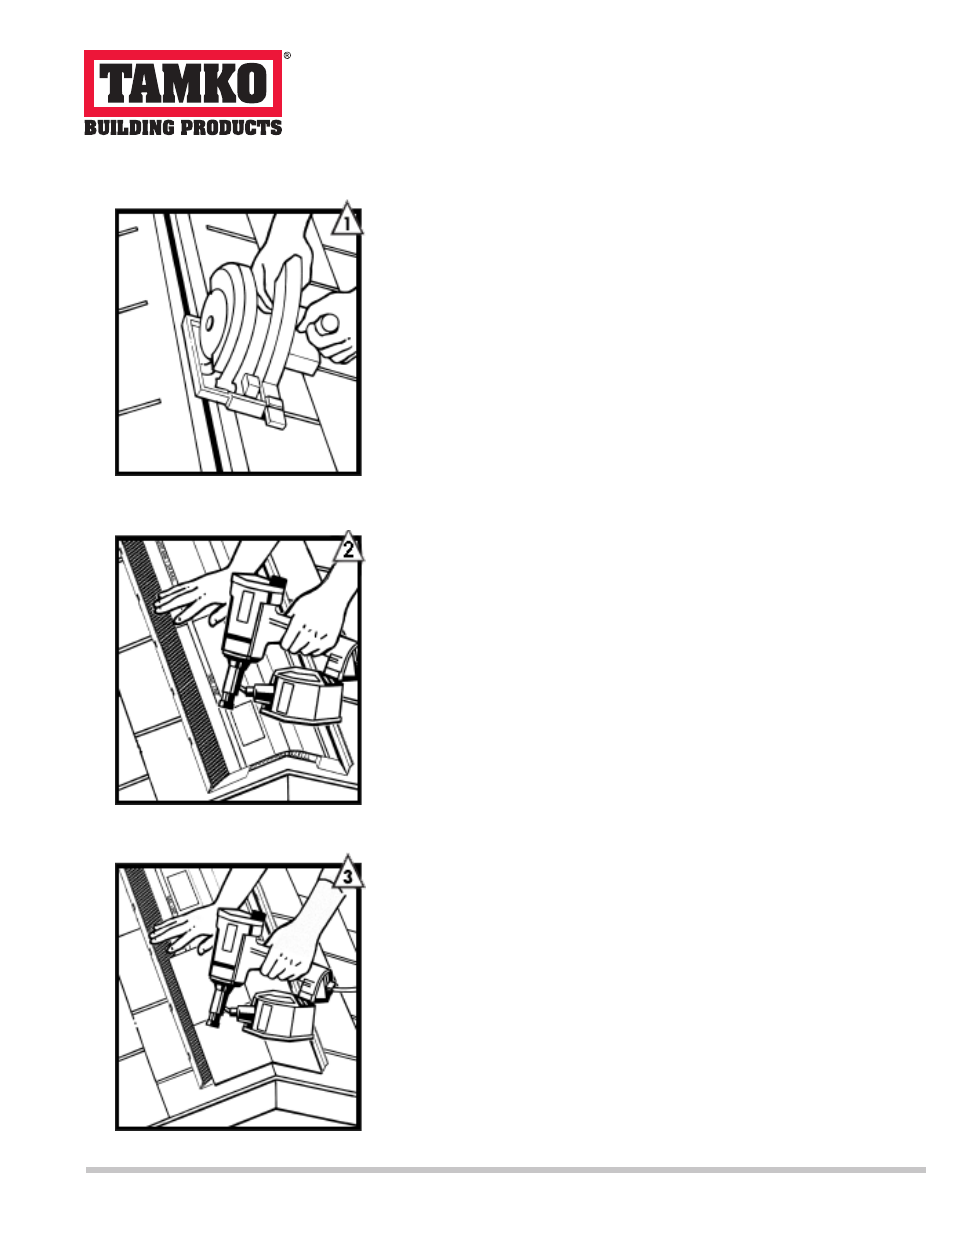
STEP 1.
Cut a slot in plywood along the roof ridge 1 1/2" wide
(3/4" on each side). If ridge beam is present, cut slot
3/4" wide on each side of ridge beam. Allow for a
closed area of sheathing 12" at both ends of ridge.
STEP 2.
Place beginning female end vent 1" in from gable end
and use center line for proper alignment along peak.
Fasten using at least two nails at each end and in
middle of roll in nail line area (1 3/4" minimum nail
length) spacing approximately every 12 inches. More
nails may be required on steeper slopes to seat
properly. Continue installing additional rolls as
needed along ridge sliding female end over male end,
aligning using centering line. When reaching the
other end, cut vent roll to 1" from gable end and nail
in place. End plugs are provided every 6" on the
underside of the product.
STEP 3.
Place first cap shingle over vent so that it overhangs
at least 1" over end of vent roll. Install with 1 3/4"
nails provided in nail line area as you work your way
down the roof. Cut last cap shingle so that it over
hangs vent 1" at other gable end.
Central District
220 West 4th St., Joplin, MO
64801 800-641-4691
Northeast District
4500 Tamko Dr., Frederick, MD
21701 800-368-2055
Southeast District
2300 35th St., Tuscaloosa, AL
35401 800-228-2656
Southwest District
7910 S. Central Exp., Dallas, TX
75216 800-443-1834
Western District
5300 East 43rd Ave., Denver, CO
80216 800-530-8868
Application Instructions for
XTRACTOR VENT
®
XLP TURBO
Continuous Ridge Vent
800-641-4691
Visit Our Web Site at
tamko.com