Suzuki 1999 Baleno User Manual
Page 51
60G-74E
INSPECTION AND MAINTENANCE
Hitting curbs and running over rocks
can damage tyres and affect wheel
alignment. Be sure to have tyres and
wheel alignment checked periodically
by your MARUTI dealer.
4) Check for loose wheel nuts.
5) Check that there are no nails, stones, or
other objects sticking into the tyres.
Your MARUTI is equipped with tyres
which are all the same type and size.
This is important to ensure proper
steering and handling of the vehicle.
Never mix tyres of different size or type
on the four wheels of your vehicle. The
size and type of tyres used should be
only those approved by MARUTI as
standard or optional equipment for
your vehicle.
Replacing the wheels and tyres
equipped on your vehicle with certain
combinations of aftermarket wheels
and tyres can significantly change the
steering and handling characteristics
of your vehicle. Therefore, use only
those wheel and tyre combinations
approved by MARUTI as standard or
optional equipment for your vehicle.
CAUTION
Replacing the original tyres with tyres
of a different size may result in false
speedometer or odometer readings.
60G-09-019E
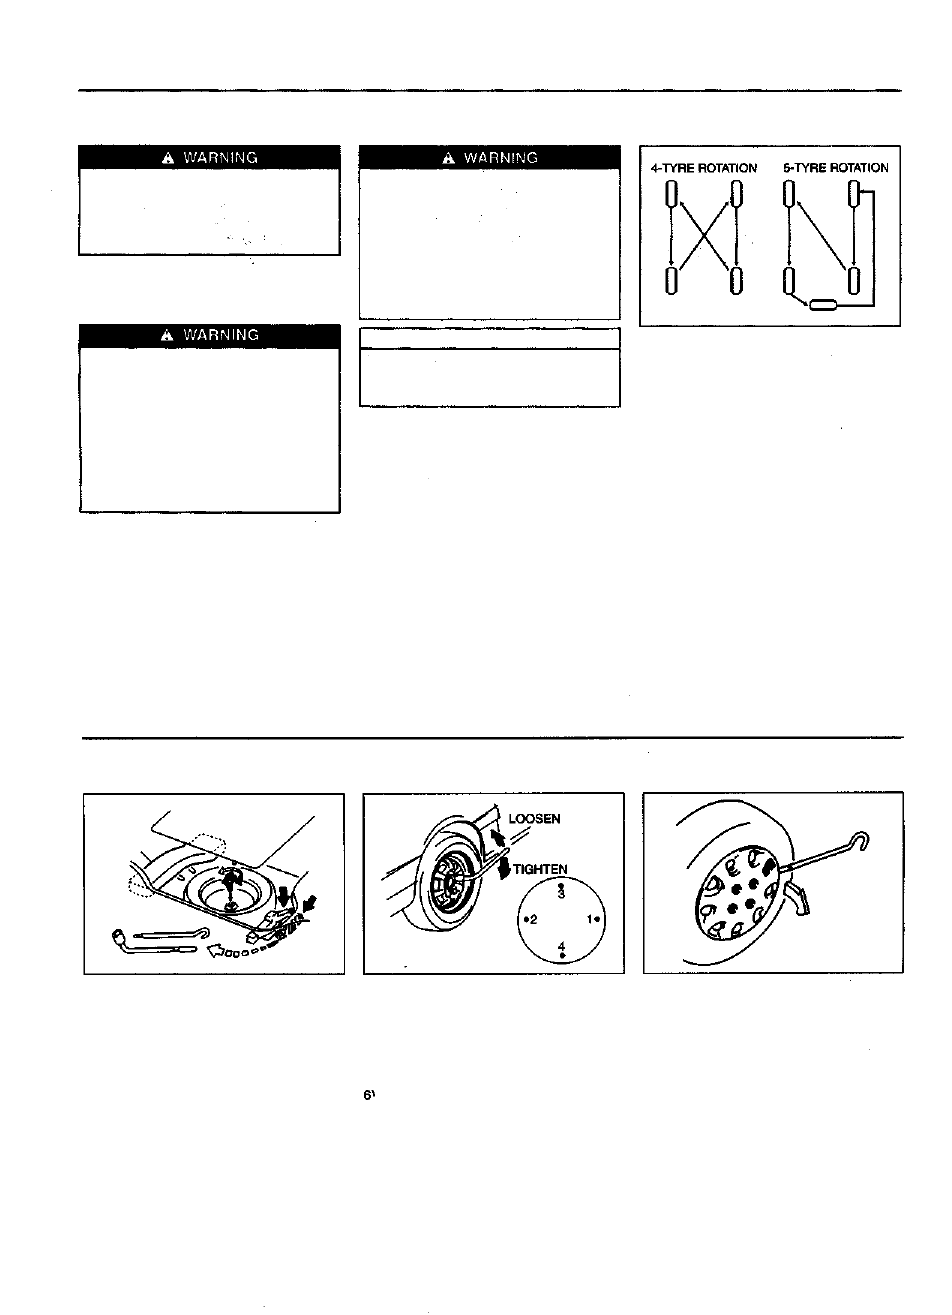
Tyre Rotation
To avoid uneven wear of your tyres and to
prolong their life, rotate the tyres as illustrated.
Tyres should be rotated every 5,000 km as
recommended in the periodic maintenance
schedule. After rotation, adjust front and rear
tyre pressures to the specification listed on
your vehicle's Tyre Inflation Pressure Label.
103
9-20
INSPECTION AND MAINTENANCE
60G-74E
60G-06-009
5)
Changing Wheels
To change a wheel, use the following
procedure:
1) Remove the jack , tools and spare wheel
from the vehicle
2) Loosen, but do not remove the wheel nuts. '
3) Jack up the vehicle (follow the jacking
instructions in the EMERGENCY
SERVICE section in this manual)
4) Remove the wheel nuts and wheel.
60G-09-020E
Install the new wheel and replace the
wheel nuts with their cone shaped end
facing the wheel. Tighten each nut snugly
by hand until the wheel is securely seated
on the hub.
Lower the jack and fully tighten the nuts
[to 8.5 kg-m (61.5 Ib-ft)] in a crisscross
fashion with a wrench as shown in the
illustration.
60G-09-021
Full Wheel Cover (if equipped)
Your vehicle includes a jack crank, which has
a flat end. Use the jack crank to remove the
full wheel cap, as shown above.
9-21
104