User operation guide – ABtUS AV417-V1 User Manual
Page 4
User Operation Guide
4
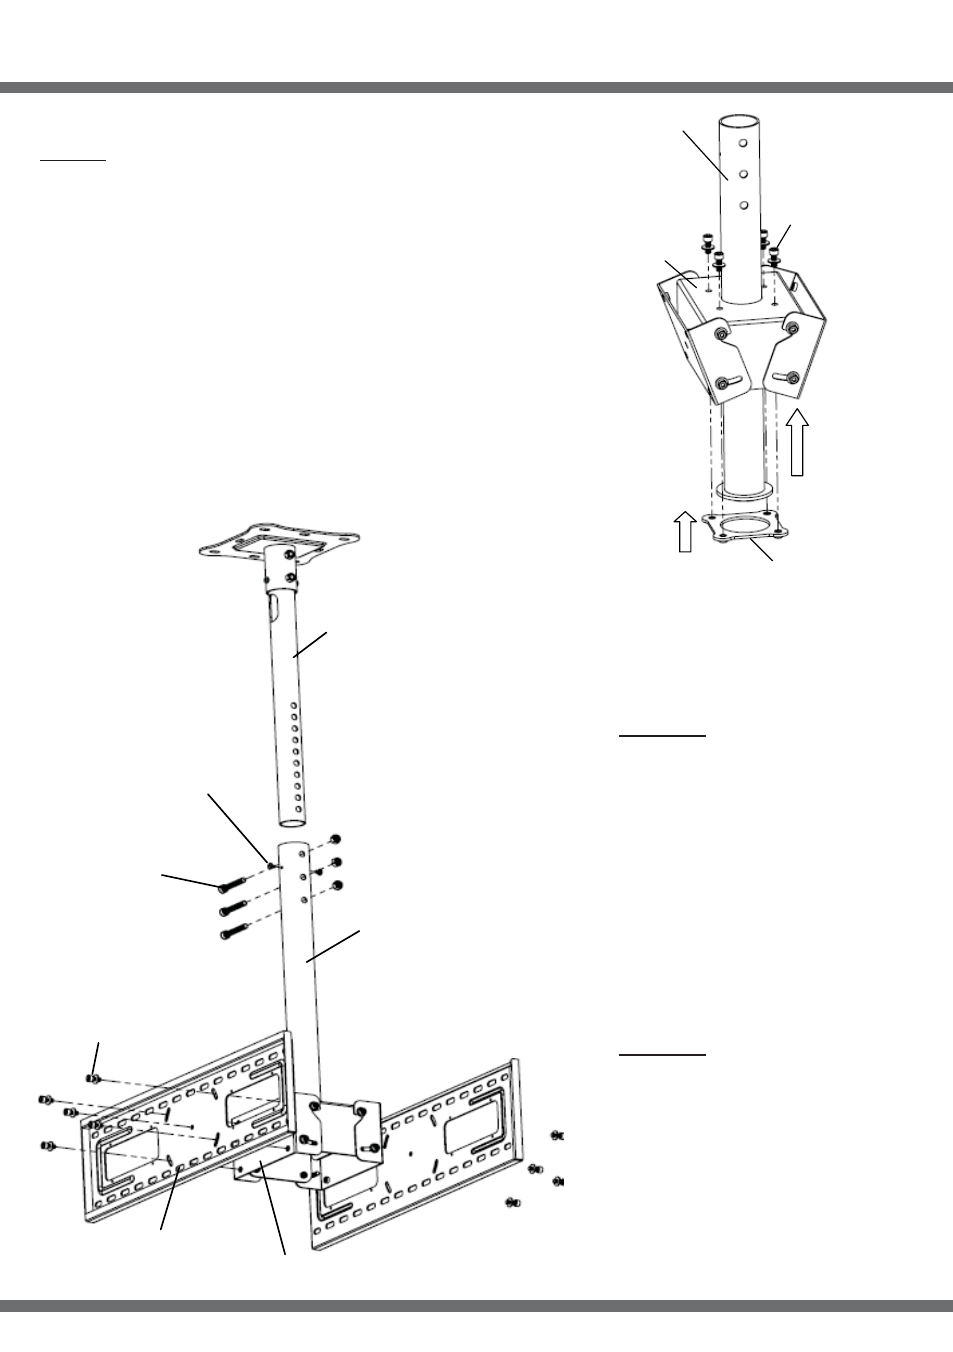
Lower
Pole
M8x20 Cap
Screws
Center
Housing
Clamping Plate
INSERT
Step-3:
Remove the M8x20 Cap Screws at the top of the Center
Housing(Part-2) and the Clamping Plate. Insert the Lower
Pole(Part-4) thru center hole of the Center Housing. Fix
back the Clamping Plate with the M8x20 Cap Screws.
Sub-assembly part
done in Step-2
Sub-assembly part
done in Step-3
M6x5 Cross
Recessed
head screws
M10x70 Cap
Screws with
Nylock nuts
M8x20 Cap
Screws and
Washers
Wall Plate
Tilting Bracket
Step-4.1:
Insert the Sub-assembly
Part done in Step-3 into
the Lower Pole of the
Subassembly Part done
in Step-2. Adjust to the
desire length and secure
with M10x70 Cap Screws
and Nylock Nuts provided.
Tighten the M6x5 Cross
Recessed head screws for
balancing.
Step-4.2:
Fix the Wall Plate(Part-5)
onto the Tilting Bracket
of the Center Housing on
both sides with M8x20
Cap Screws and Washers
provided.