2 installing an optional sfp+/qsfp transceiver – Agema AG7648 User Manual
Page 14
11
AG7648 ToR/leaf Switch
3.2 Installing an Optional SFP+/QSFP Transceiver
The SFP+ slots support the following optional SFP+ transceivers:
•
10GBASE-CR
•
10GBASE-SR
•
10GBASE-SRL
•
10GBASE-LR
•
1000BASE-SX
•
1000BASE-LX
The QSFP+ slots support the following optional QSFP+ transceivers:
•
40GBASE-CR4 DAC
•
40GBASE-CR4 DAC to 4 x SFP+
10GBASE-CR DAC
•
40GBASE-LR4
•
40GBASE-SR4 to 4 x 10GBASE-SR
•
40GBASE-SR4
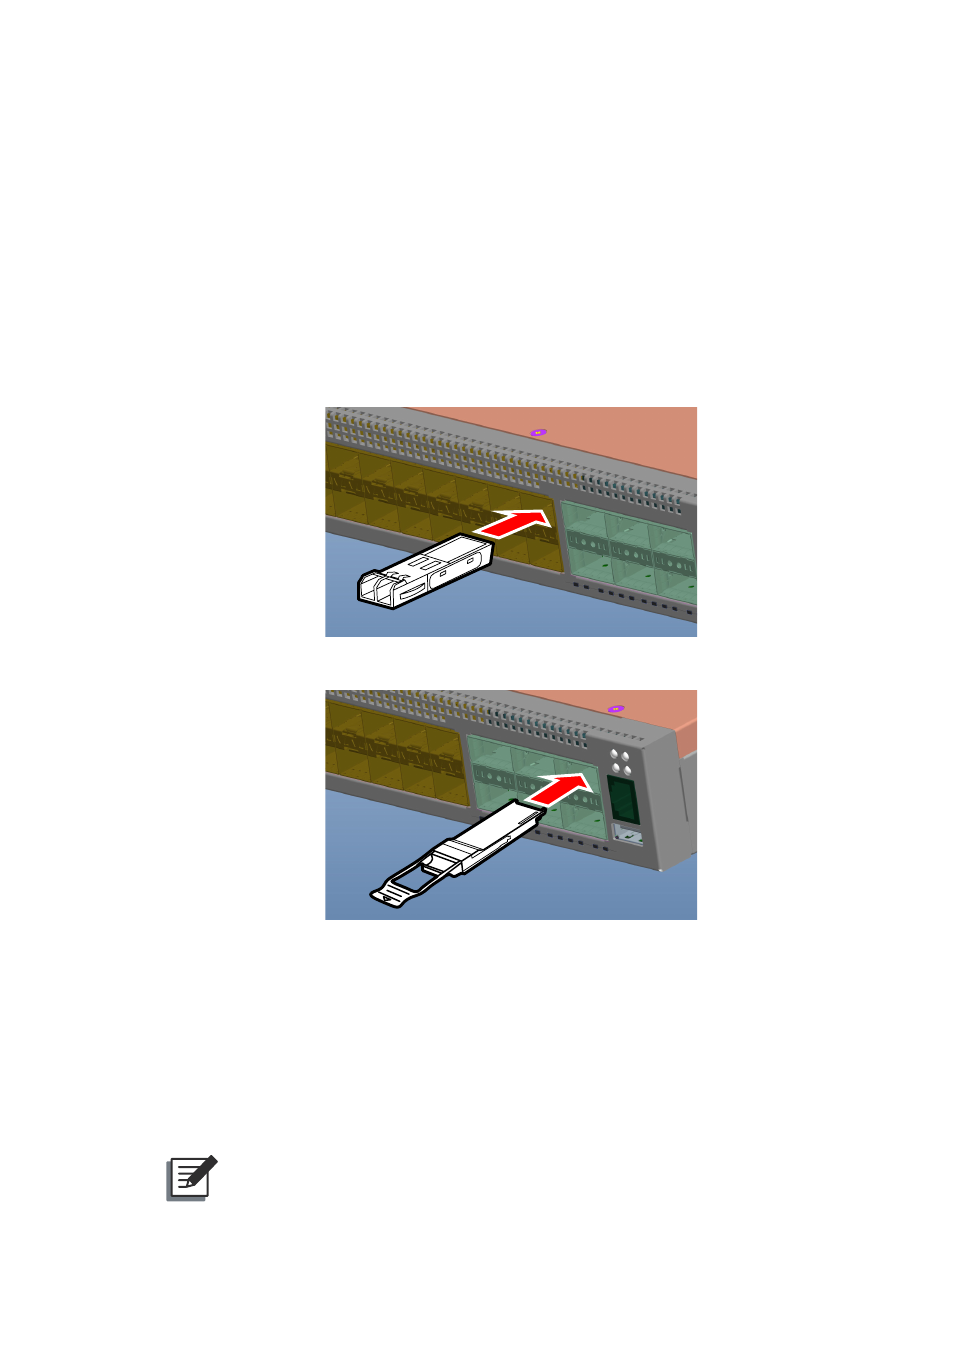
(Figure 3-4: Inserting an SFP+ Transceiver into a Slot)
(Figure 3-5: Inserting a QSFP Transceiver into a Slot)
To install a SFP+/QSFP transceiver, follow these steps:
1. Consider network and cabling requirements to select an appropriate SFP+/ QSFP
transceiver type.
2. Insert the transceiver with the optical connector facing outward and the slot connector
facing down. Note that SFP+/ QSFP transceivers are keyed so they can only be installed in
one orientation.
3. Slide the SFP+/ QSFP transceiver into the slot until it clicks into place.
NOTE:
•
SFP+/QSFP transceivers are hot-swappable. The switch does not need to
be powered off before installing or removing a transceiver. However, always
first disconnect the network cable before removing a transceiver.
•
SFP+/QSFP transceivers are not provided in the switch package.