Hdmi cable testing battery door timing chart – Atlona AT HD800 User Manual
Page 5
5
No.
Resolution
V Hz
No.
Resolution
V Hz No.
Resolution
V Hz
1
480p
60
2
720p
60
3
1080i
60
4
1080p
60
5
480i
60
6
576i
50
7
576p
50
8
720i
50
9
1080i
50
10
1080p
50
11
1080p
24
12
640x480
60
13
800x600
60
14
1024x768
60
15
1280x1024
60
16
1920x1200
60
17
720p
(3D Frame Packing)
60
18
720p
(3D Side-by-Side)
60
19
720p
(3D Top-to-Bottom)
60
20
720p
(3D Frame Packing)
50
21
720p
(3D Side-by-Side)
50
22
720p
(3D Top-to-Bottom)
50
23
1080p
(3D Frame Packing)
24
24
1080p
(3D Side-by-Side)
24
25
1080p
(3D Top-to-Bottom)
24
atlona.com
Toll free: 1-877-536-3976
Local: 1-408-962-0515
HDMI Cable Testing
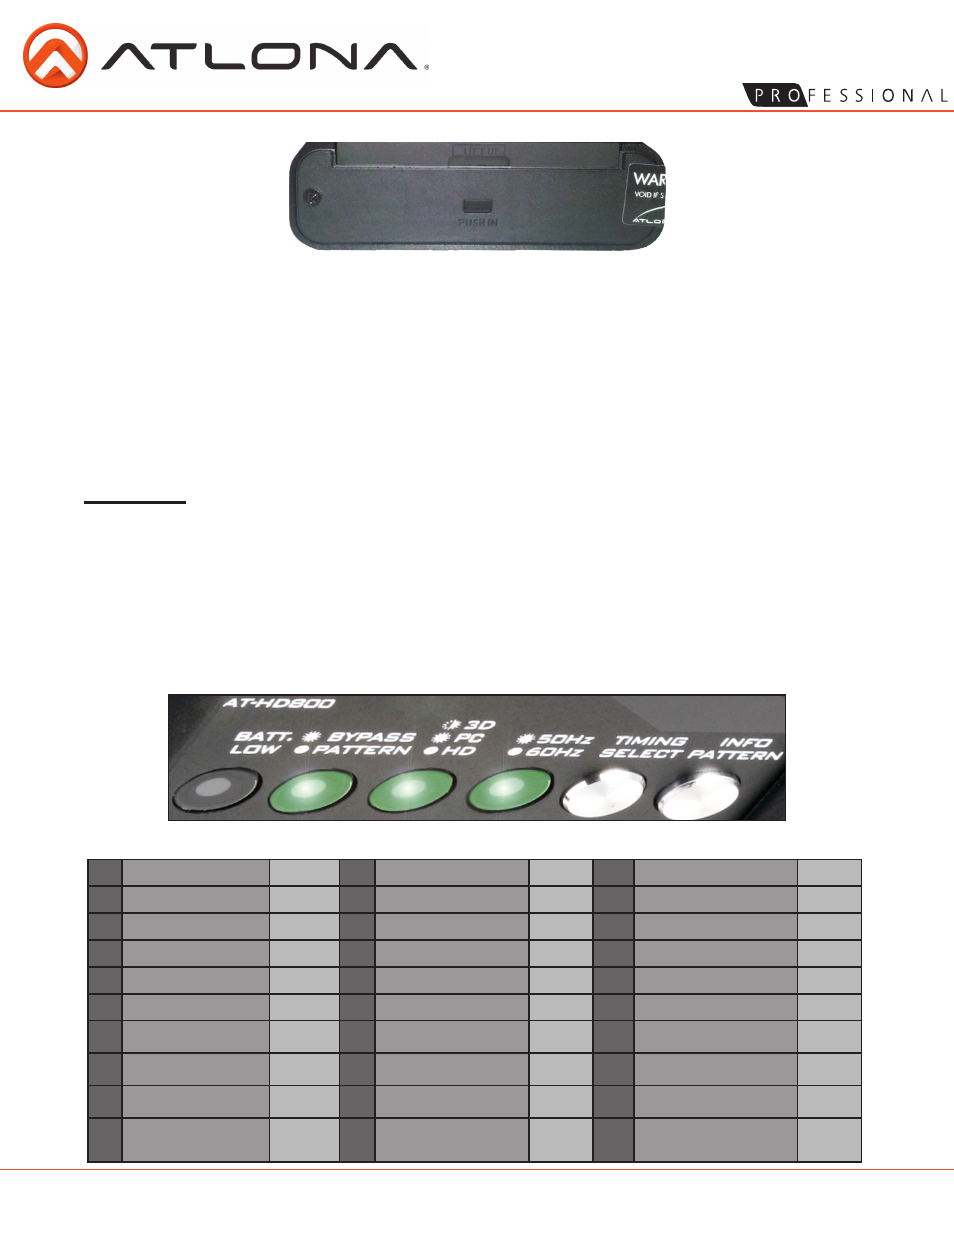
Battery Door
Timing Chart
Important: Before testing the HDMI cables, ensure the AT-HD800 is not in 3D mode. If in 3D
mode, connect to any display and hold the timing select button for 3 seconds to reset to the
display’s resolution (the AT-DIS7-PROHD can be used for this step). Once out of 3D mode the
AT-HD800 is ready to test the HDMI cables.
Connect the HDMI cable into the HDMI In and HDMI Out ports, then press and hold the
timing select button for 3 seconds. If the HDMI cable passed then all 3 green LEDs will blink
briefly then go solid and remain solid. If the HDMI cable can’t pass the full signal then the
green LEDs will become solid briefly then return to blinking.
The battery door can be found at the bottom of the HD800 under the signal LEDs and
function buttons. To remove the door, first take the protective rubber casing off. Find
the button that says “Push IN” and press it in with a hard tipped item, such as a pen or
screwdriver (Do not use fingernail or there is a risk of breakage). The latch should pop up and
the door can be slid off.
To replace the battery door, slide the door back into place and press the latch slightly
backwards. Press down until the latch has snapped back into place.