Atlona AT HDMI 24M User Manual
Page 5
2
3
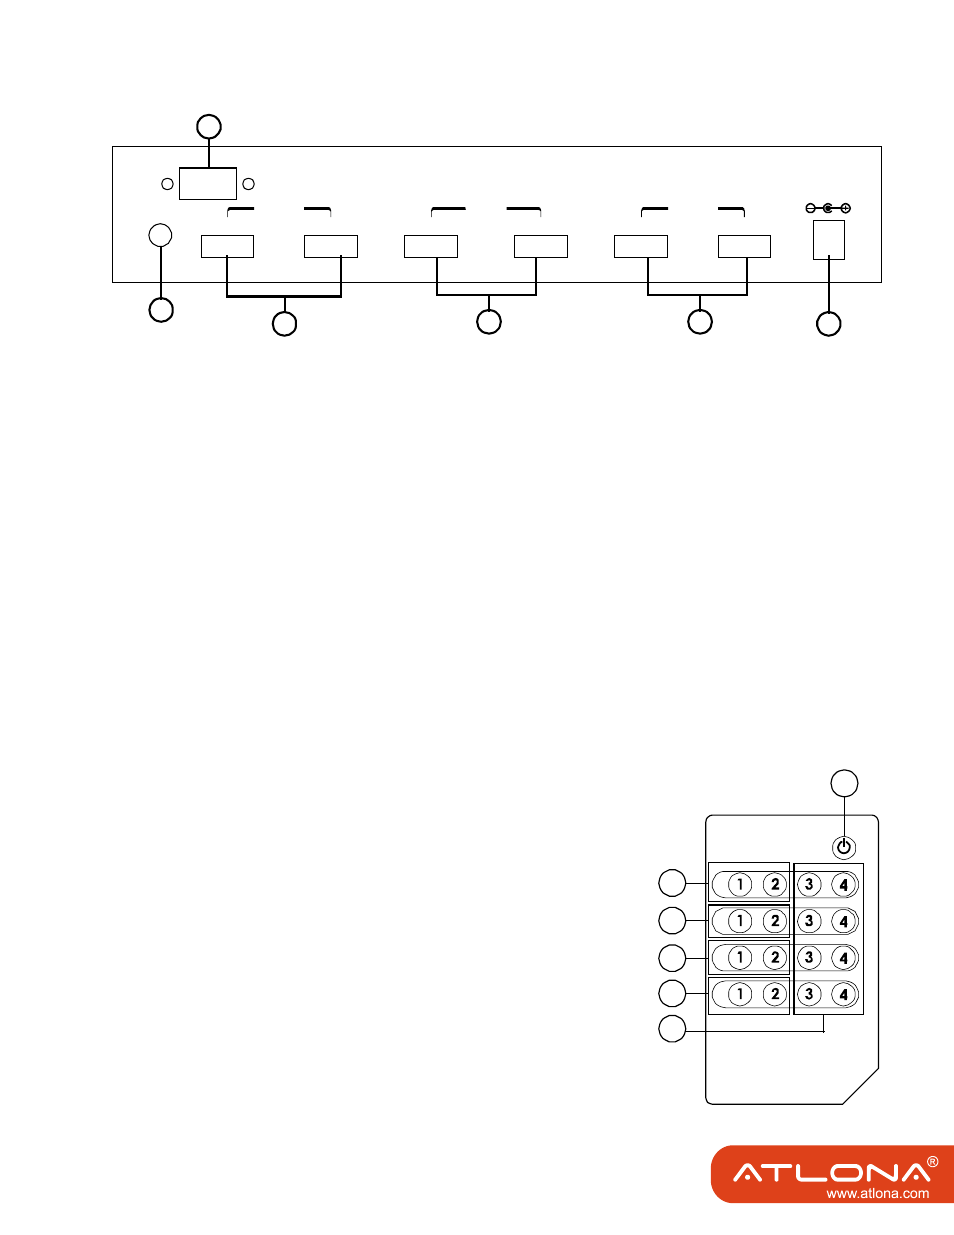
4.2 Rear Panel
4.3 Remote Control
1. IR IN Socket:
Plug the IR extender sensor (optional) into the socket for IR extension control.
2. RS-232 Communication Port:
Connect to the COM port of your PC for the distant control over RS-232 channel.
3. HDMI™ outputs A and B:
Connect each of these output ports to the HDMI™ input of an HDMI™ display.
4. HDMI™ inputs 1 and 2:
Connect to the HDMI™ output of your source equipment such as DVD player or set-top-
box.
5. HDMI™ outputs C and D:
Connect each of these output ports to the HDMI™ input of an HDMI™ display.
6. Power:
Plug the 5VDC power supply into the unit and connect the adaptor to AC wall outlet.
1. Power:
Press the button to turn on/off the unit.
2. Input Select for HDMI™ OUT A:
Press 1 or 2 to select the desired input source for HDMI™ OUT
A.
3. Input Select for HDMI™ OUT B:
Press 1 or 2 to select the desired input source for HDMI™ OUT
B.
4. Input Select for HDMI™ OUT C:
Press 1 or 2 to select the desired input source for HDMI™ OUT
C.
5. Input Select for HDMI™ OUT D:
Press 1 or 2 to select the desired input source for HDMI™ OUT
D.
1
3
4
6
2
5
A
B
1
HDMI
INPUT
2
HDMI
OUTPUT
HDMI
OUTPUT
C
D
RS-232
DC 5V
IR IN
OUTPUT
A
OUTPUT
D
OUTPUT
C
OUTPUT
B
POWER
1
2
3
4
5
6