Panel description, Panel description panel description, At-hd19ss – Atlona AT HD19SS User Manual
Page 6: At-hdrs
4
PANEL DESCRIPTION
PANEL DESCRIPTION
PANEL DESCRIPTION
AT-HD19SS
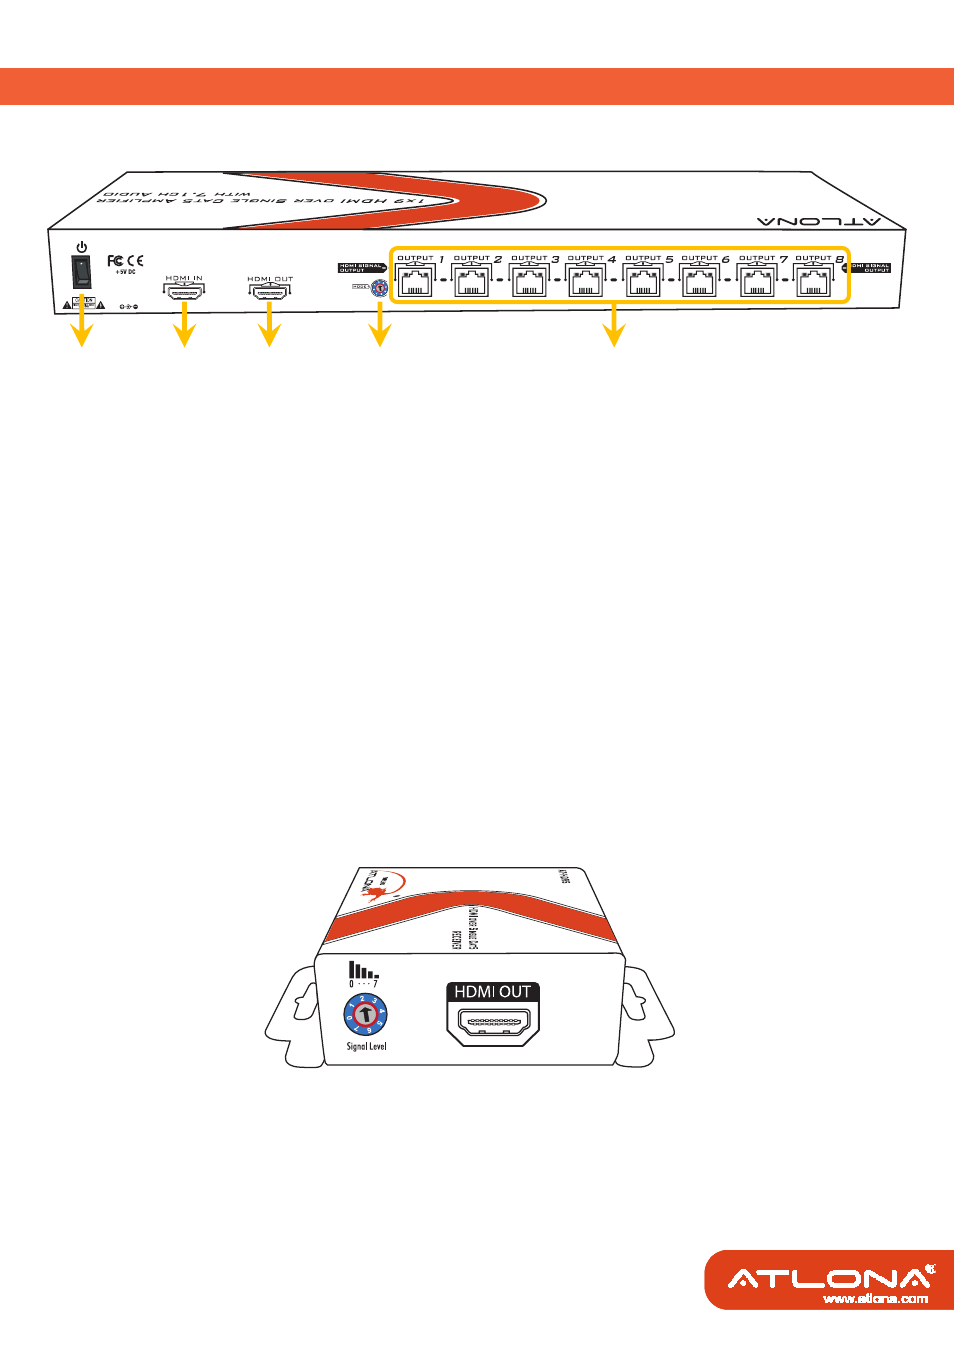
1. +5V DC: Connect to a 5V DC power supply unit here
2. HDMI IN: Connect to the HDMI
™
source here
3. HDMI OUT: Connect to a HDMI
™
display here for local monitoring or cascade to another
HDMI
™
splitter such as AT-HD14SS or AT-HD19SS
4. MODE:
0 = [Video] – supports up to HDMI
™
1.3 output. [Audio] – supports up to 7.1ch output
1 = [Video] – supports up to HDMI
™
1.3 output. [Audio] – locks to stereo audio output
2 = [Video] – locks to HDMI
™
1.2 output. [Audio] – supports up to 7.1ch output
3 = [Video] – locks to HDMI
™
1.2 output. [Audio] – locks to stereo audio output
4 = [Video] – DVI display mode. [Audio] – no audio output
5 = [Safe Mode] – uses default EDID with video supported up to 720p/1080i
6 = [Default Mode] – uses default EDID with video supported up to 1080p
7 = [EDID Learning Mode] – learns EDID from the display
[For more detail info, please refer to page 6.]
5. HDMI Signal OUTPUT 1–8: Link to each HDMI
™
display via a Cat-5e/6/7 cable with a
HDMI
™
over CAT5e receiver AT-HDRS or AT-HD15SRS on each CAT5 output port
AT-HDRS
HDMI OUT: Connect to a HDMI
™
display with a HDMI
™
male-male cable here.
Signal Level: Adjust the 8-level equalization control to the received HDMI
™
signals. The
HDMI
™
signal level varies from 0 (strongest) to 7 (weakest) for respective
transmission length from longest possible range to short distance. Please adjust the
signal level from 7 to 0 and stop turning the rotary switch whenever the audio/video is
playing normally. Inappropriate signal level setting may cause overpowering issue
that would shorten the product life significantly!
1
2
3
4
5
1
2
3
4
5