Remote control – Atlona AT HD V88M User Manual
Page 7
www.atlona.com | toll free:
1-877-536-3976
For International: 1-
408-962-0515
7
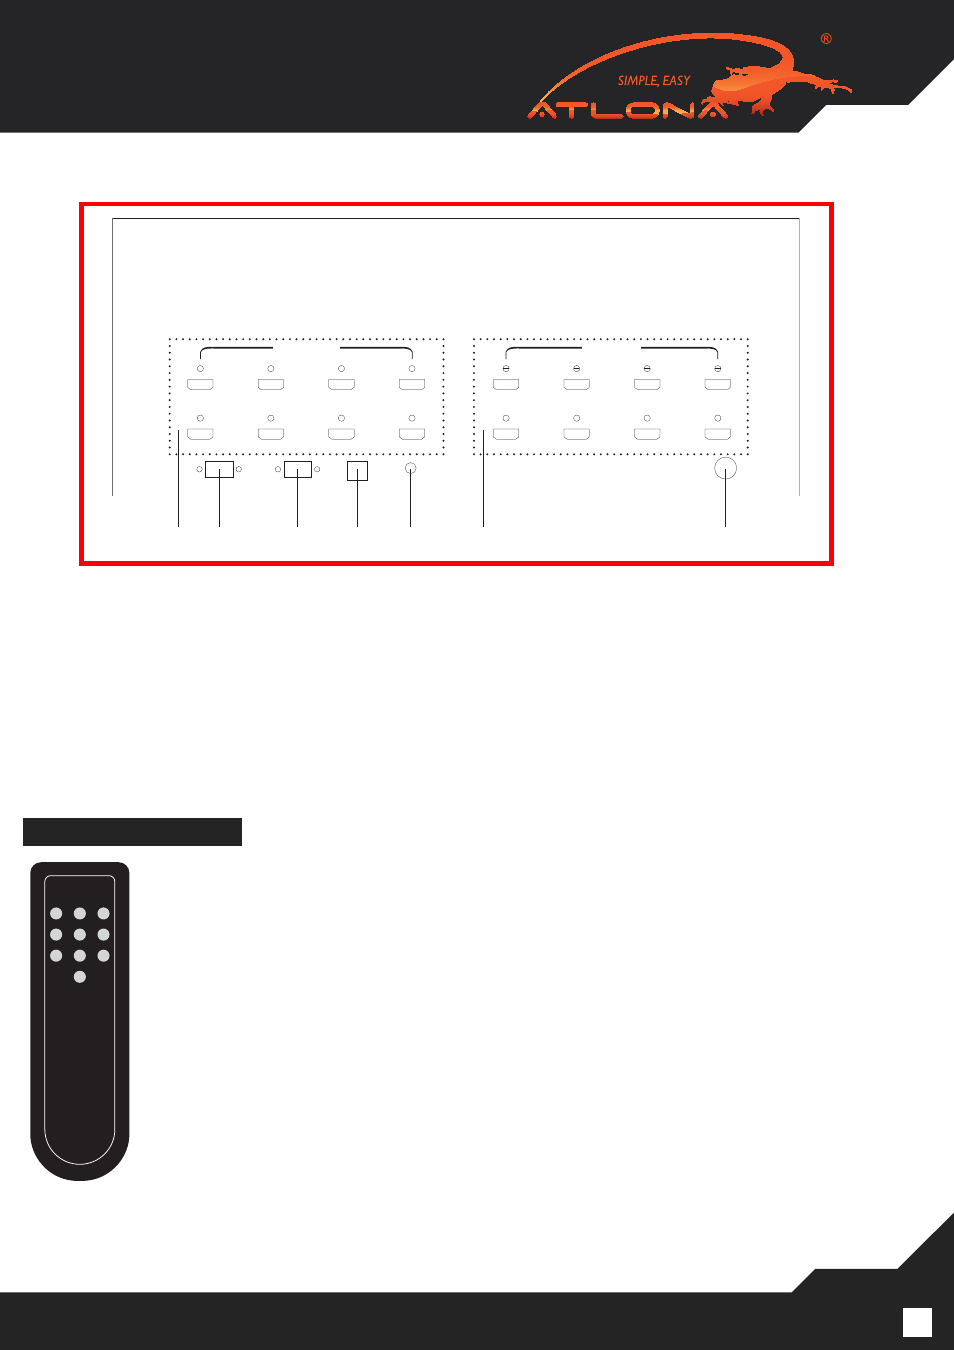
7.2. Rear Panel
1. HDMI OUTPUT A - H: Used to connect to desired HDMI displays.
2. SERVICE: Used for firmware upgrading.
3. RS-232: Used for controlling the switch though serial commands.
4. USB SERVICE: Used for firmware upgrade
5. IR IN: Use to extend your IR receiver with IR extender cable that accepts only 38KHz.
6. HDMI INPUT 1to 8: Use to connect the HDMI or DVI sources
7. DC 24V: Plug the 24V DC power supply into the unit and connect the adaptor to AC wall outlet.
This remote control can be set with multiple formats according to the dipswitch setting.
There are total of four dipswitches with two types of settings.
When the dip switches are all set to ON/↑ the remote control is able to control all outputs
and all inputs.
(For example, when output A wants to select input 5, Press 1 first, wait for a second then
press 5. The output display A will display input source 5.
Other settings referring to the below section are output based to control the input selections.
(For example, when all the dip switches are set to OFF/↓ this setting is based on output A
Which means it can only control the input selections. When output A wants to select input 3,
pressing 3 only switches output display A to display input source 3’s contents. )
REMOTE CONTROL
1
2
3
4
5
6
7
8
0
9
H
G
F
E
8
7
6
5
D
C
B
A
USB-SERVICE
RS-232
SERVICE
IR IN
4
3
2
1
HDMI OUTPUT
HDMI INPUT
DC 24V
AT-HD-V88M
①
⑥
⑤
②
③
④
⑦