Panel description, Electrical box – Atlona AT HDWP RSNET UK User Manual
Page 4
4
atlona.com
Toll free: 1-877-536-3976
Local: 1-408-962-0515
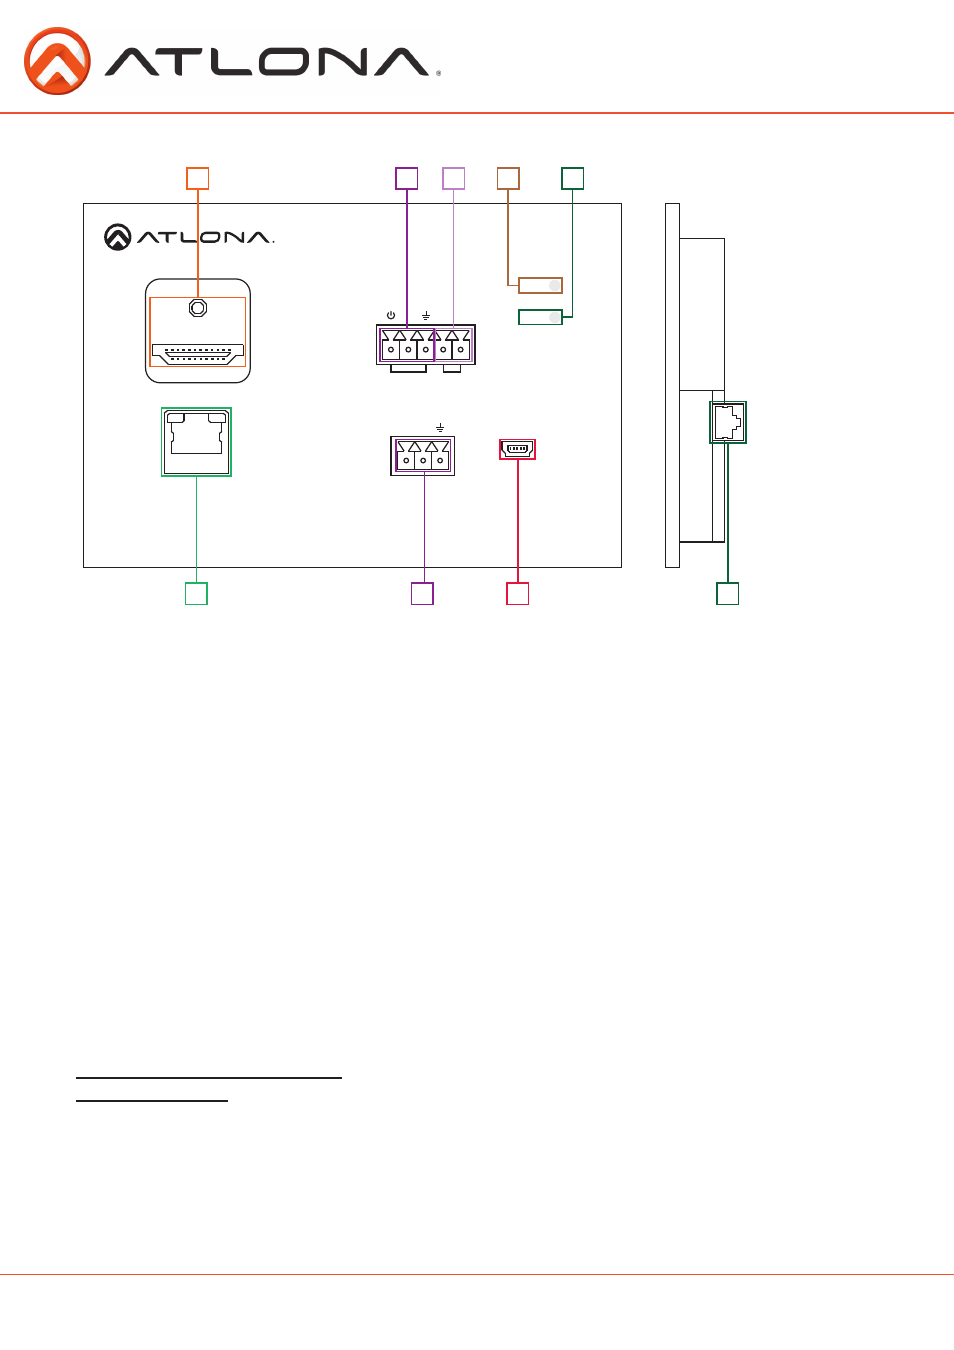
Panel Description
1. HDMI Out Port: Connect HDMI or DVI (with adapter - Ex. AT14040) display here.
2. IR IN Port: Connect included IR receiver to this port.
3. IR OUT Port: Use the included IR Emitter for this port.
4. Green Power LED: Power indicator. If plugged in, light will remain solid. If LED starts blinking
power is intermittent or there is a problem with the cable. If LED is off, no power is passing from
the transmitter (check the outlet on the transmitter or check the CAT cable).
5. Yellow Link LED: Signal Indicator for the CAT5e/6/7 IN port. LED will remain solid, unless there
is an issue with the cable or signal, then it will blink.
6. Ethernet Port: Bi-directional Ethernet pass through, send signal from a router to a source or to a
display.
7. RS-232 Port: Receive signal from a control system or PC.
8. Firmware Update Port: Use Mini USB to USB cable to connect to a Windows computer to update.
9. CAT5e/6/7 IN Port: Connect category cable from here to a compatible transmitter.
Ex. AT-HDTX-RSNET (recommended), AT-HDCAT-8ED, etc.
AT-HDWP-RSNET-UK
PWR
LINK
HDMI OUT
FW
IR IN
RS232
IR
IR OUT
-
+
RX
TX
ETHERNET
6
1
2
3
4
5
7
8
9
Electrical Box
With so many electrical back boxes it is hard to know which to purchase with any wall plate. For
convenience Atlona has compiled recommended electrical boxes to use with the HDWP-RSNET-UK.
For 9.5mm up to 12.5mm walls: Red/Grey 2 Gang box or mud ring is best
For 12.5mm walls: Appleby 2 gang box or mud ring is best
Note: All electrical back boxes must be at least 30mm deep.