Flush fixing surface fixing, Installation – CP Electronics EBDSPIR User Manual
Page 2
Installation
The detector should be sited so that the occupants of the room fall
inside the detection pattern shown overleaf, at a recommended height of
2.8m on the ceiling. Note that the lower the sensor is installed the
smaller the detection range will be, subject to the parameters shown on
the diagram.
Avoid direct sunlight entering the sensor.
Do not site within 1m of forced air heating
or ventilation.
Do not site within 1m of any lighting.
Do not fix to a vibrating surface.
Wire the product using the connector using the diagram on the front
page.
Mount using one of the two options above.
To switch from more than one position simply wire two or more units in
parallel.
Set the LUX level to maximum and the time to minimum.
Power the unit up—the load should come on immediately.
Vacate the room or remain very still and wait for the load to switch off
(should take no more than 2 minutes).
Check that the load switches on when movement is detected.
To set the final LUX level wait until the level of natural daylight is just
enough that lighting is required. Starting with the LUX control fully clock-
wise (at minimum), very slowly turn the control anti-clockwise until the
lights come on. Note that when the LUX control is at maximum then the
lights will always come on with occupancy.
Set the time required.
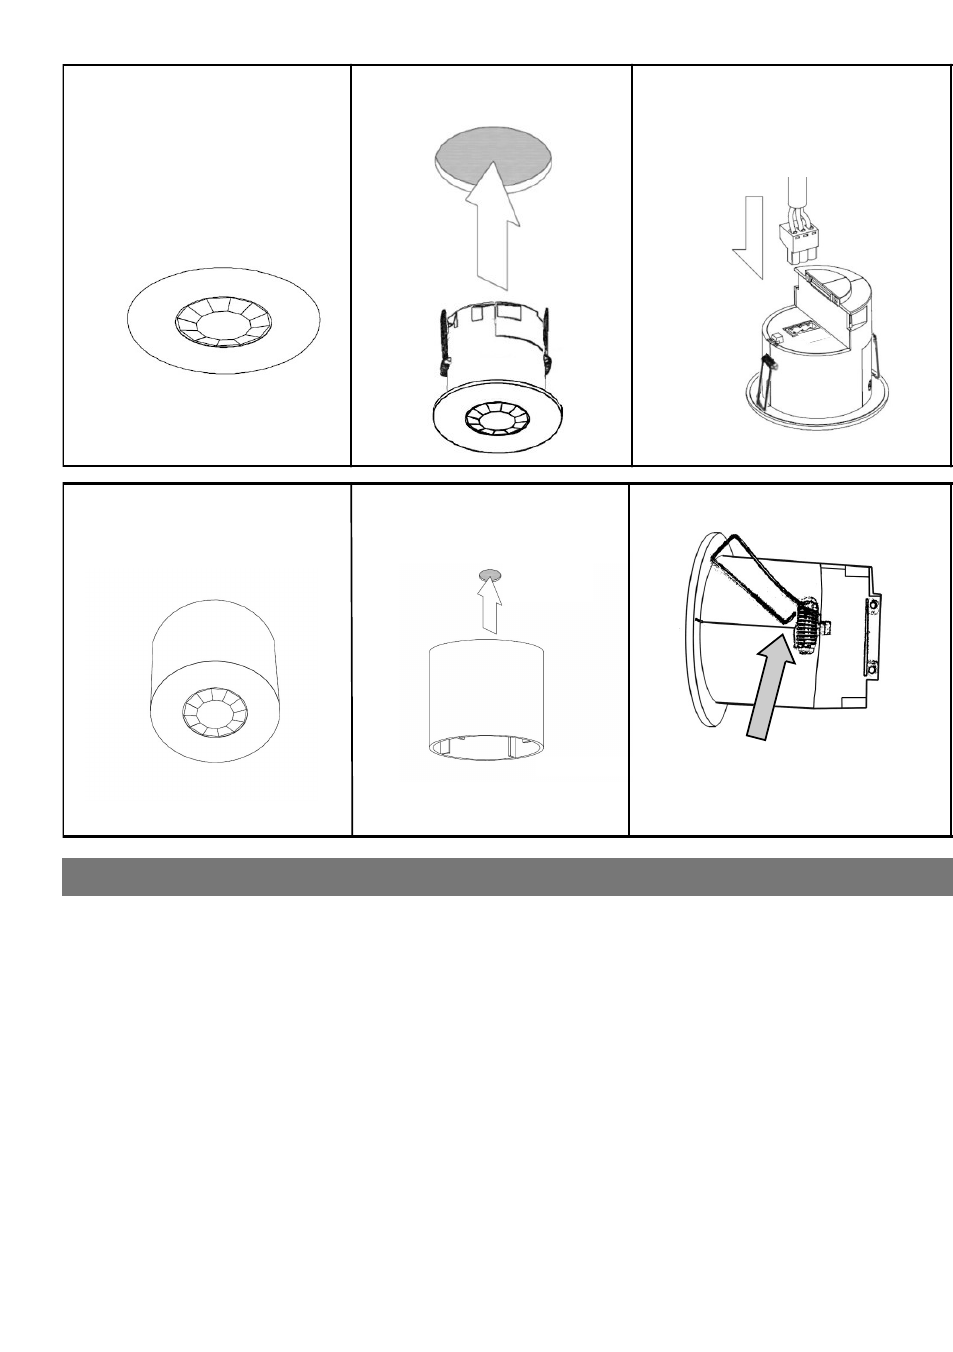
FLUSH FIXING
SURFACE FIXING
1
2
2
1
Hole Ø64mm
Warning - be careful bending
springs when mounting unit.
Pull out spring tab and rotate
spring arm as shown
50mm or 60mm fixing centres