Installation – CP Electronics MWS3A-PRM-2CH User Manual
Page 4
4
The MWS3A-PRM-2CH is designed to be mounted using either:
Flush fixing, or
Surface fixing, using the optional Surface Mounting Box (part no. MWS3A-DBB).
Both methods are illustrated below.
Warning - be careful bending springs when mounting unit.
Installation
Important
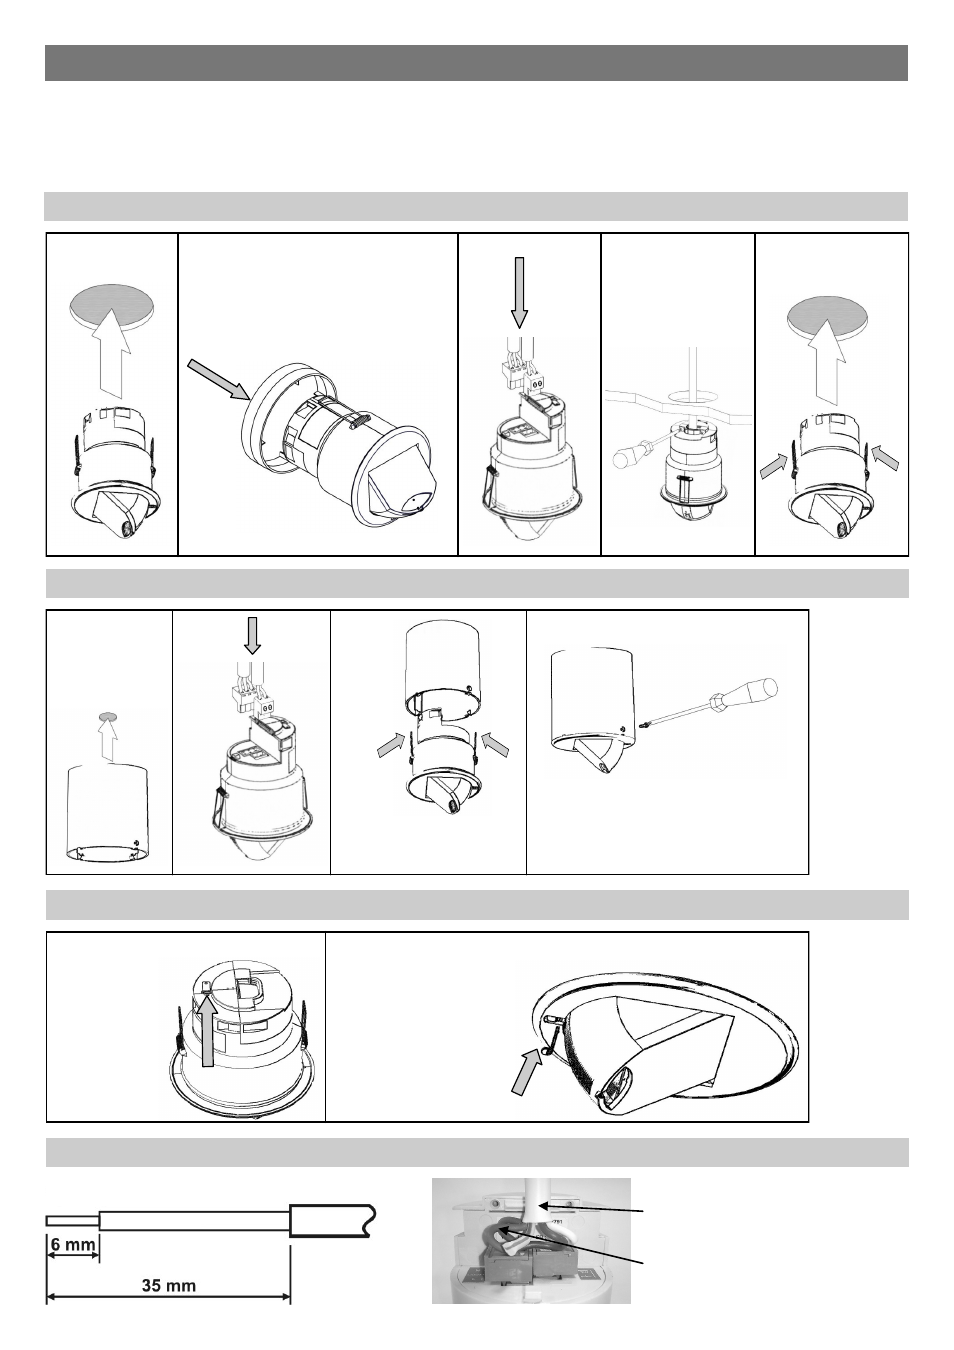
Ensure that the cables are formed as shown
before affixing the cable clamp. The clamp
MUST clamp the outer sheath(s) only.
Bend cores as shown.
Wire stripping details
Flush fixing
Surface fixing
Head locking
1
3
2
4
Hole Ø30mm
MAX
1
2
Remove metal
locking clip from
rear of unit.
Adjust head to
required position.
Push clip into position
shown below to lock
head.
To remove clip, lever
out with a small
screwdriver.
1
5
4
3
Hole Ø74mm
Attach cable clamp
2
If the range is compromised by the
ceiling construction / material. Add the
supplied 20mm spacer ring.