Installation instructions, Wood joist installation 1a – Crimson JKS User Manual
Page 4
4
JKS111824-0001
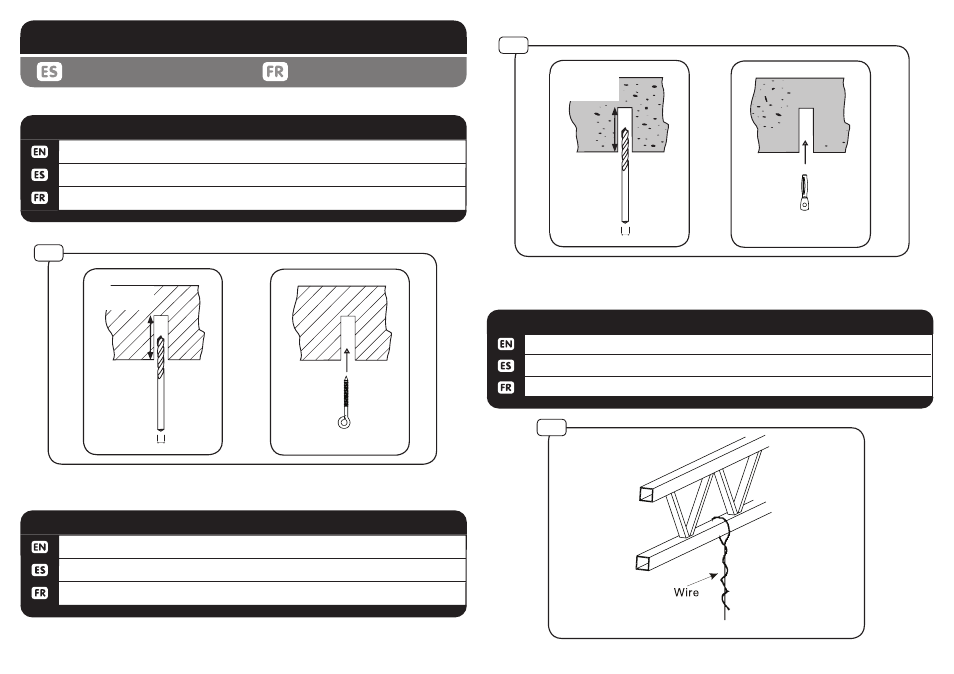
Loop wire around truss and twist around itself several times.
Conecte el cable alrededor de la viga de acero y torcer.
Attacher le fil d’acier autour de la faisceau et tourner autouri.
1c
TRUSS INSTALLATION
1b
Anchor
drill depth
38mm / 1.5”
drill diameter
6mm
1/4”
Truss
INSTALLATION INSTRUCTIONS
Instrucciones de instalación
Instructions d’installation
Ensure that holes are on center of wood joist. Use a 4mm - 5/32” wood bit to make a 51mm / 2” deep hole
on marks.
Asegúrese de que los agujeros están en el centro de la viga de madera. Uso un 4 mm - 5 / 32“ poco de
madera para hacer un 51mm / 2” hoyo profundo en materia de marcas.
Veiller à ce que les trous sont au centre des solives de bois. Utilisez un 4mm - 5 / 32” bits du bois pour
faire un 51mm / 2” trou profond sur les marques.
WOOD JOIST INSTALLATION
1a
Use a 6mm - 1/4” masonry bit to make a 38mm / 1.5” deep hole on marks. Hammer in anchor using a
Rawl setting tool.
Uso un 6mm - 1/4“ broca de hormigón para hacer un 38mm / 1.5” hoyo profundo en materia de
marcas. Martillo de anclaje con la herramienta de Rawls
Utilisez un 6mm-1/4” bits de maçonnerie pour faire un 38mm/1.5” trou profond sur les marques.
Marteau d’ancrage en utilisant l’outil Rawl
STRUCTURAL CONCRETE INSTALLATION
1b
1a
drill depth
51mm / 2”
drill diameter
4mm
5/32”
Eye Bolt
1c