Installation steps – CRU RAX210-SJ User Manual
Page 4
CRU
U s e r M a n u a l f o r 2 - B a y R A X ( A9-210-0008) REV 1.0
- 4 -
2. Installation Steps
2.1 Installing Hard Drives
2.1.1 HDD Installation for RAX210
a) Pull on the ejection handle and open the door.
b) Slide in your SATA hard drive, connector-end first.
Note: the drive’s label should be facing up.
c) Shut the door.
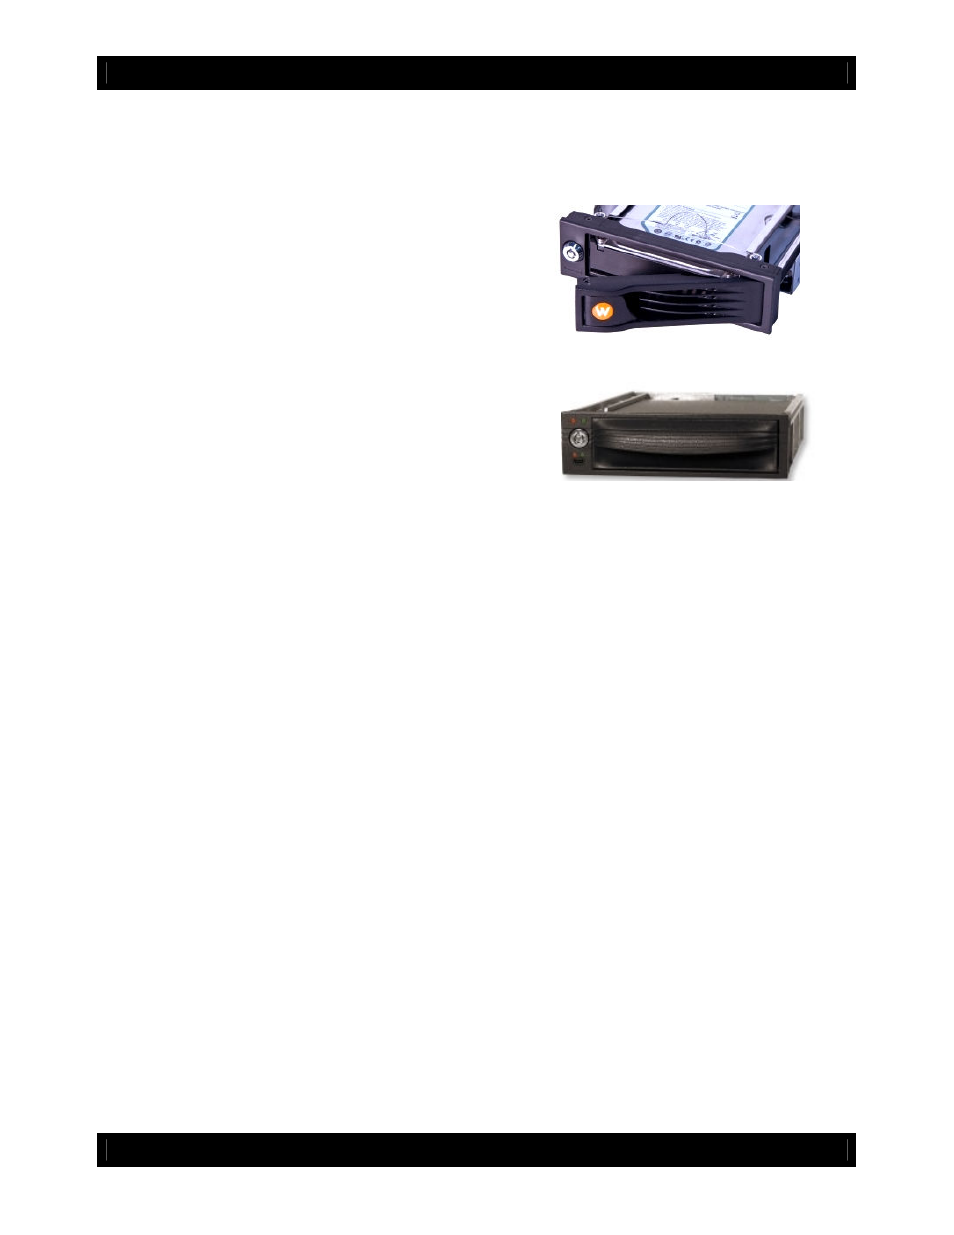
2.1.2 HDD Installation for RAX211 and RAX 212
a) Slide the drive carrier out of the RAX.
b) The carrier’s cover is held in place by a screw on the
rear of the carrier. Remove the screw, then remove
the cover.
c) Slide the drive in from the front of the carrier.
d) Mate the connection on the drive with the connection
on the drive carrier circuit board.
e) Flip the drive/carrier assembly over, and secure the drive in place with the provided screws.
f) Attach the Temperature Control Cooling Sensor to the top of the drive with an adhesive strip.
g) Replace the carrier cover and secure the screw on the rear of the carrier.
h) Slide the carrier into the RAX.
i) NOTE – A flashing green LED on the bay indicates bay fan failure. Call CRU technical support
for assistance.
2.1.3 Drive, bay, and frame installation for RAX219 and models with one open bay.
2-Bay RAX models can be purchased with one or both bays unpopulated. RAX219 is the “empty bay”
model of the 2-bay RAX series. For instructions on how to install your HDD, bay, or frame into these
products, please see the install guide that accompanies your particular bay.
2.2 Tips for Rack Mounting
•
Elevated Operating Ambient: If installed in a closed or multi-unit rack assembly, the operating
ambient temperature of the rack environment may be greater than room ambient.
•
Reduced Air Flow: Installation of the equipment in a rack should be such that the amount of air
flow required for safe operation of the equipment is not compromised.
•
Mechanical Loading: Mounting of the equipment in the rack should be such that a hazardous
condition is not achieved due to uneven mechanical loading.
•
Circuit Overloading: Consideration should be given to the connection of the equipment to the
supply circuit and the effect that overloading the circuits might have on over current protection
and supply wiring. Appropriate consideration of equipment nameplate ratings should be used
when addressing this concern.
•
Reliable Earthing: Reliable earthing of rack-mounted equipment should be maintained.
Particular attention should be given to supply connections other than direct connections to the
branch circuit (e.g. use of power strips).