CRU RAX840-IR User Manual
Page 5
CRU
a)
Check RAX’s LCD to find out the IP address of the Config GUI configuration port. It will appear in this
format: xxx.xxx.xxx.xxx.
b)
Next, change your computer’s IP address so that all but the last three digits match RAX’s address. For
example, if RAX’s IP is 169.254.12.62, you might assign your computer the number 169.254.12.63
(assuming no other computer on the network is already using that number). The process of changing
your computer’s IP address varies depending on its operating system. (For Windows XP, open Network
Connections in the Control Panel. Right-click on your network and select Properties. On the new window
that opens, select TCP/IP and click the Properties button. Mac users can go to System Preferences
Network.) By default, your computer is probably set to receive a new IP address automatically. Change
the setting to manual configuration and then type in the IP address.
c)
Using the same process as the previous step, change the computer’s Mask setting to match RAX’s
Mask setting.
d)
Finally, use RAX’s LCD interface to change RAX’s Gateway setting. It should match the IP address
you assigned to your computer.
e)
Launch a web browser and type RAX’s IP address into the URL bar, as if it were a website. This will
access RAX’s GUI, which you will use to configure the unit.
The tables below show example settings. The table on the left shows the type of settings that will appear
by default. The table on the right shows how the settings might look after you’ve made changes.
RAX
Computer
IP Address
169.254.12.62 (blank)
Mask
255.255.000.000 (blank)
Gateway
000.000.000.000 (blank)
Before making changes
RAX
Computer
IP Address
169.254.12.62
169.254.12.63
Mask
255.255.000.000
255.255.000.000
Gateway
169.254.12.63 (blank)
After making changes
3.3 Using the GUI to configure the RAID.
(You may skip this step if you purchased a pre-configured unit.)
You will use the web browser-based GUI to set up a RAID and create logical volumes on RAX. After
accessing the GUI the GUI’s main page should load, displaying a picture of RAX with several options to
the left. When you click on any option, you will be prompted for a user name and password. The user
name is "admin" and the default password is "1234."
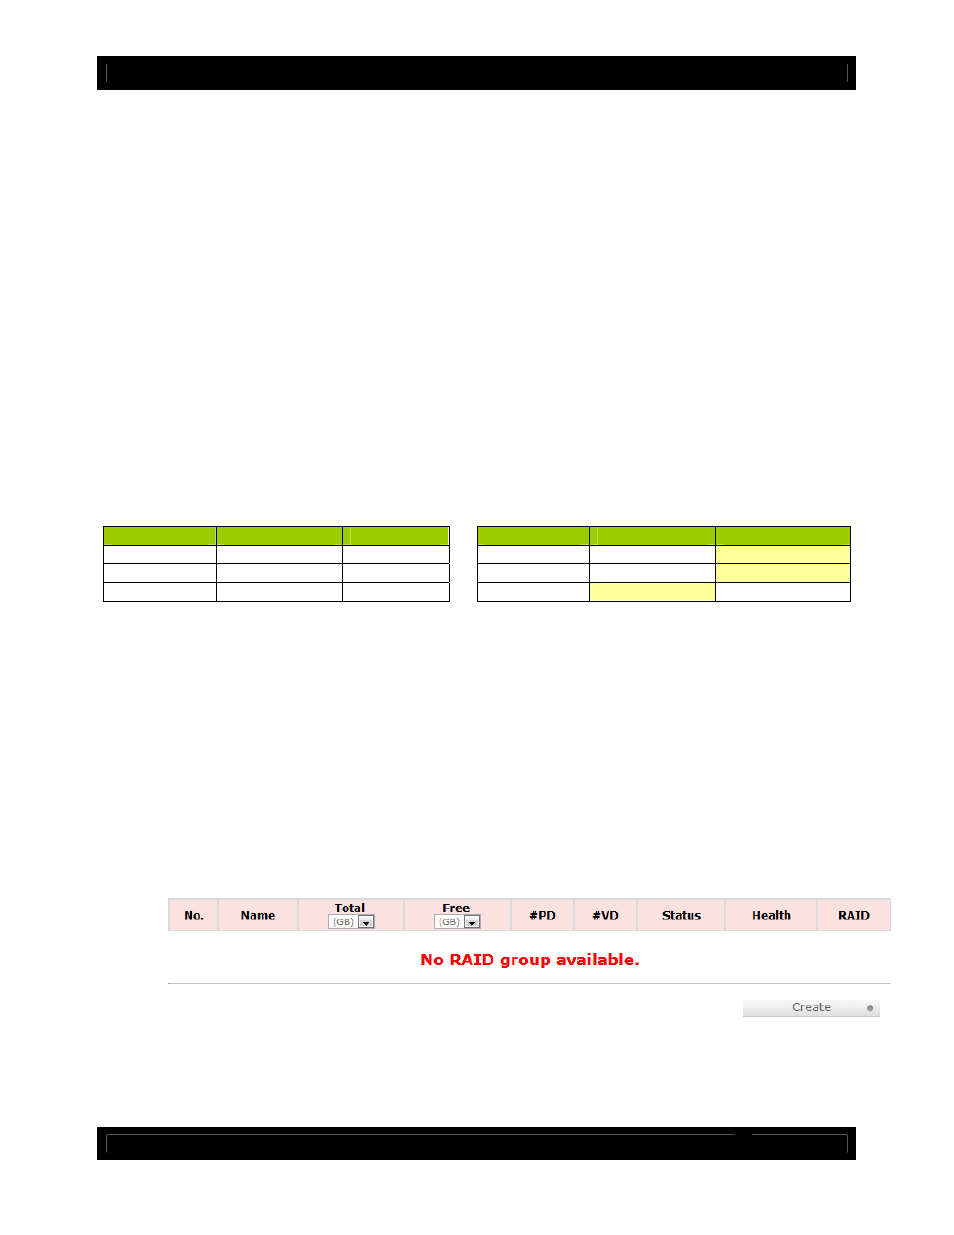
3.4 Manually Creating a Usable RAID Set
To manually create a usable RAID set, you will first need to create a new RAID Group.
a)
Click the “Create” button at the bottom of the page to open the RAID Group creation screen.
b)
Enter a name for the new RAID Group in the first field, and then select your desired RAID type or
JBOD from the dropdown box. CRU-DataPort recommends RAID 5 for maximum performance,
capacity, and security. For more information on RAID, see Section 3. Click “Select PD” to select
the drives that will be added to the RAID Group.
R A X 8 4 0 - I R Q u i c k S t a r t G u i d e A 9 - 8 4 0 - 0 0 0 4 - 1 R E V 1 . 0
- 5 -