CRU HotPlug Field Kit User Manual
Page 4
WiebeTech
H o t P l u g - E u r o V e r s i o n U s e r M a n u a l ( A 9 - 0 0 0 - 0 0 3 6 R E V . 1 . 1 )
- 4 -
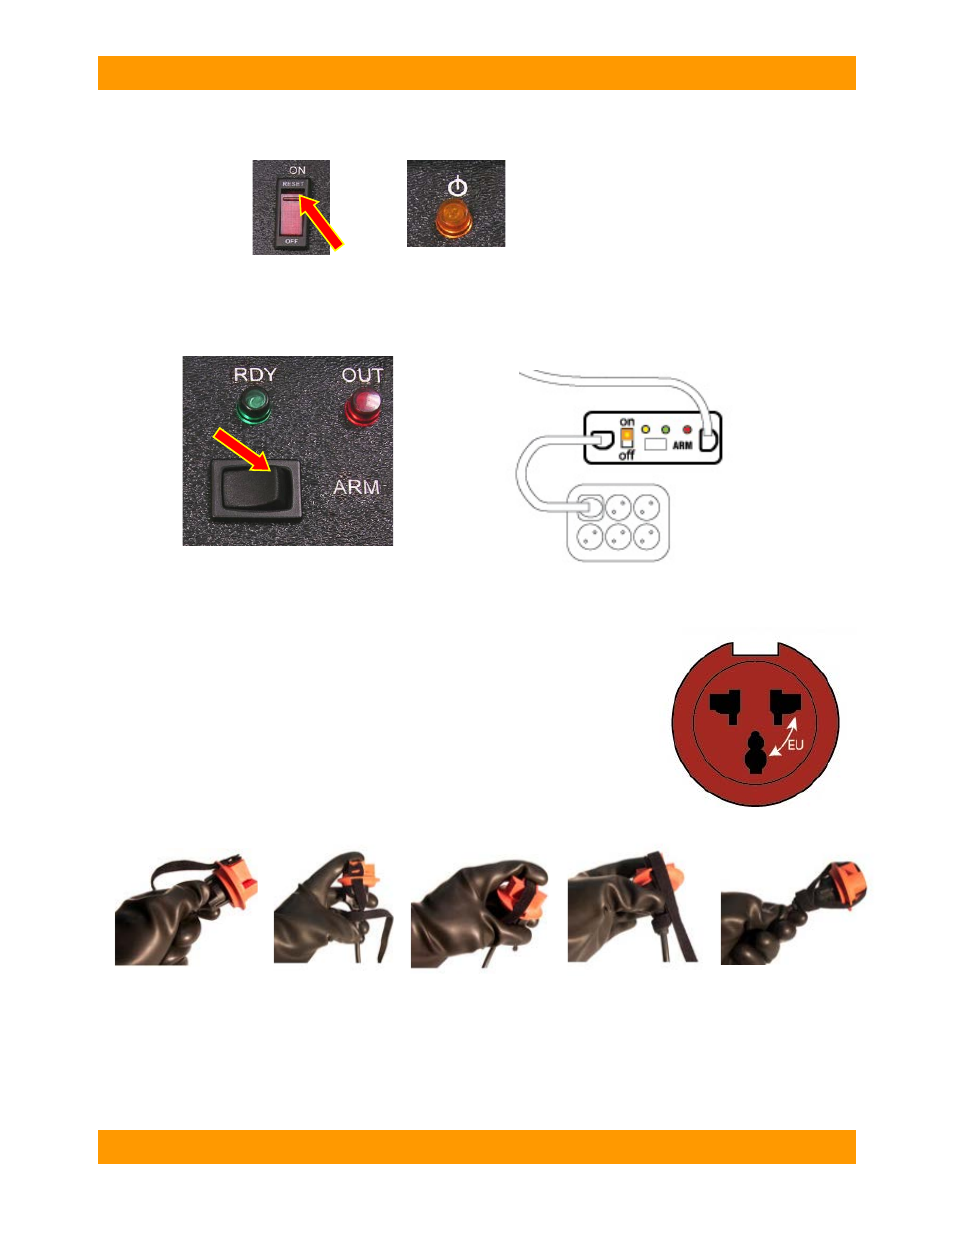
6.
Move the HotPlug power switch to the ON position. The power indicator (yellow) will light.
7.
The cabling should now all be in place, and the yellow and red indicators on the HotPlug console
should both be lit. Push the button labeled “ARM” to ready the HotPlug for the power transfer. The
green indicator will light, showing that HotPlug is armed and ready. Note: At this point, the
computer is still receiving power from the original power source.
Warning: Live prongs are exposed during this step. Do not contact prongs with people or
objects. Complete this step carefully, quickly, and accurately. We recommend wearing
gloves certified for high voltage use.
8.
Unplug the power strip from the wall outlet in one quick motion, and
immediately plug it into the plug protector. Use the strap to secure the
plug protector to ensure it remains in place.
As soon as the power strip is unplugged from the wall outlet, HotPlug instantly begins supplying the
power strip with a new flow of power. The computer is now being powered by the new power source.
Attach plug protector to
exposed pins.
Wrap strap around base
of plug.
Use the built-in grooves
to wrap the strap up and
over plug protector.
Bring the strap back
down the other side
Wrap the remainder of
the strap around the
base.
Plug Protector