Switching on the vsn490 – Datapath VSN490 User Manual
Page 8
8
Switching on the VSN490
Ensure that both Power Supply Units are switched on (Fig.3 - R1).
Press and release the main power switch (Fig.2- 1).
The BIOS and boot messages will appear on the Control Screen that is plugged into one of the the output
sockets on the backplane.
When the system has booted the Windows® “Splash Screen” is displayed on the Control Screen.
Complete the Windows® setup procedure by selecting language, user account details and computer
name. You will be prompted for the Operating System Software Key, this is located on the Operating
System CD case in the Accessories pack.
Once the account has been set up, the Control Screen and Display Wall will open into a Windows®
desktop.
The VSN490 has pre-configured factory settings for the wall layout and screen resolution. These settings
can be changed using the TWIN tab accessed from the Display Properties dialogue. To access the TWIN
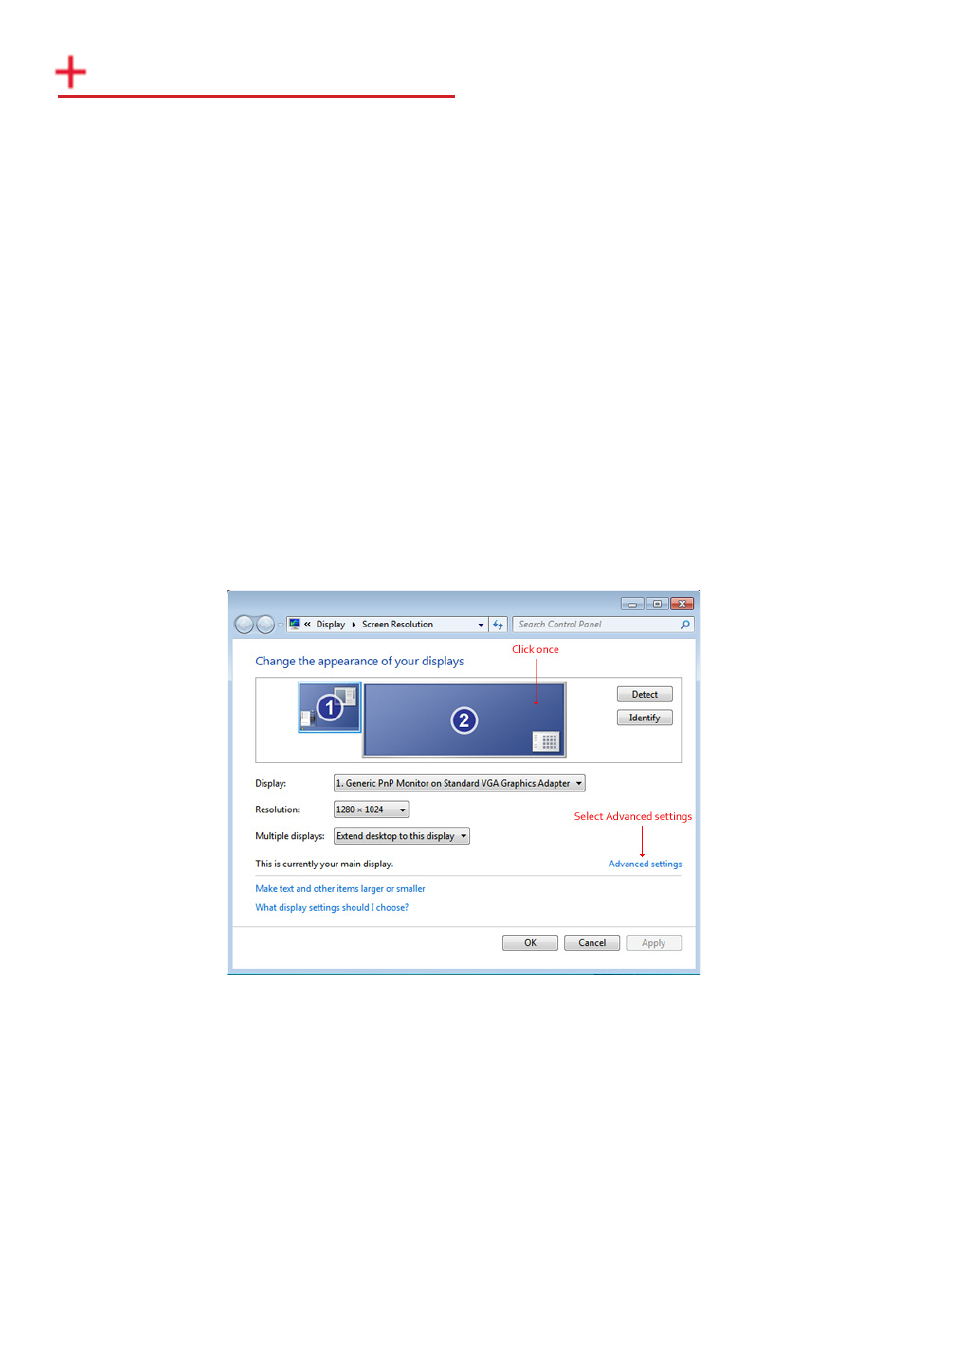
tab right click on the desktop and select Screen Resolution, the following dialogue is displayed:
Fig.4
This dialogue shows the Control Screen as the Primary Monitor (1) and the display wall as the Secondary
Monitor (2).
To access the TWIN Properties tab, highlight the Secondary Monitor by clicking once inside the box and
then selecting Advanced settings.