Holland Electronics HMM 3 User Manual
Page 2
IV. Picture Brightness
To adjust for proper brightness, turn the corresponding trimpot on the bottom of the HMM-3.
See picture below.
V . Video Looping
The HMM3 is capable of outputting a quality picture of adequate brightness even when the video input has
been looped to the baseband video inputs of a TV or VCR.
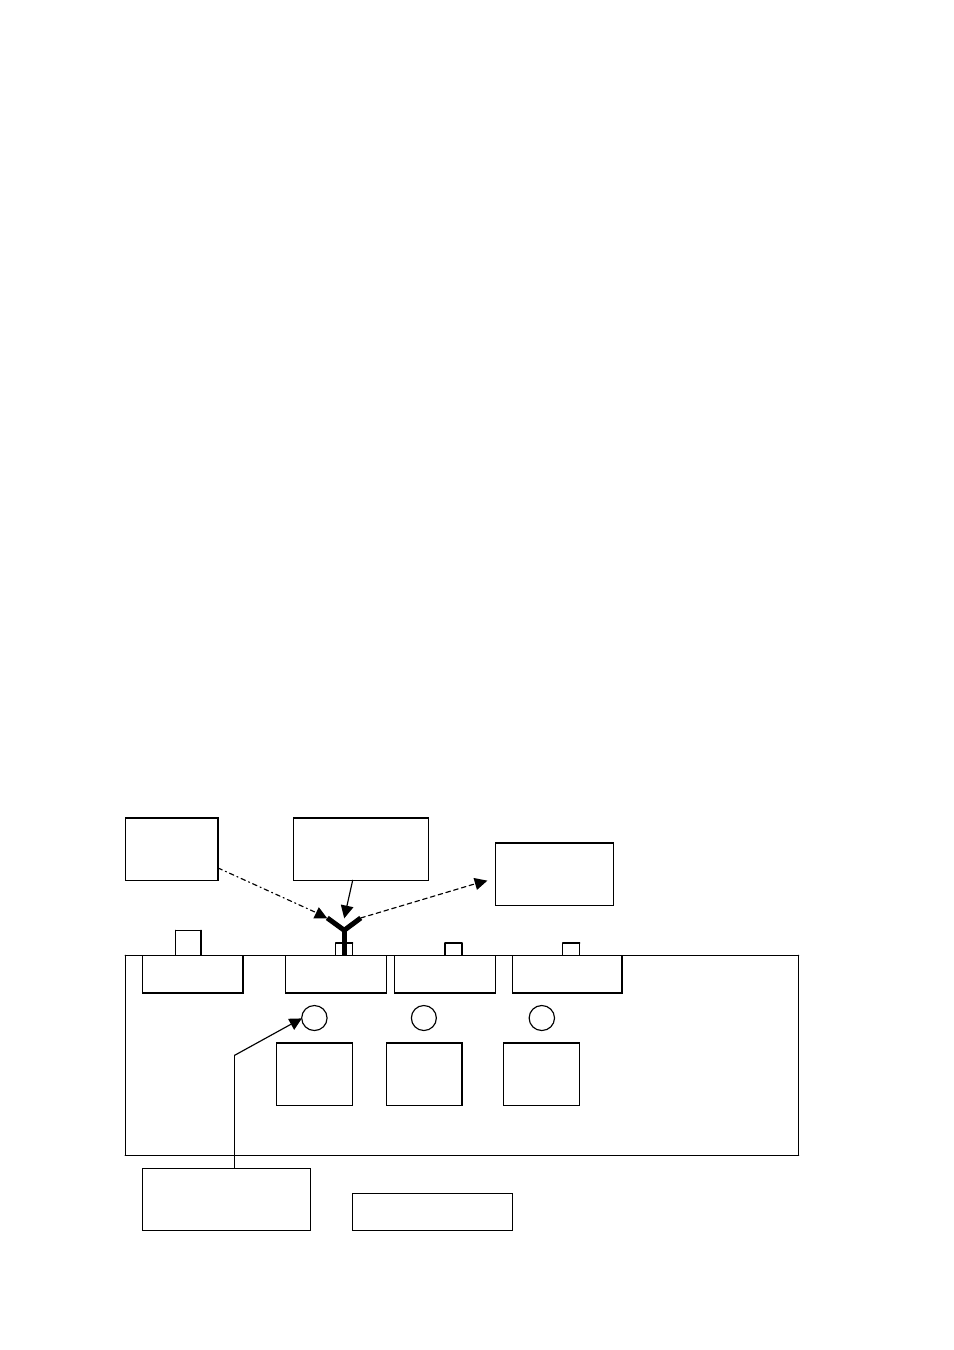
Steps for adding video looping to the HMM-3 video input
1. Connect a RCA-Y plug (not included) to the selected video input of HMM-3 (A,B,C)
2. Connect a RCA cable from the “Video Output” of the video source (TV, VCR, DVD player etc.) to the
RCA-Y that is connected to the HMM-3.
3. Connect another RCA cable from the RCA-Y plug on the HMM-3 to the “Video Input” of the unit being
looped to (TV or VCR).
4. Check the picture from the HMM-3 on the selected channel (A,B,C). If the picture is too dark, then
adjust the picture brightness by using the video adjustment trimpot on the bottom of the unit. Adjust
the video level to a comfortable brightness as compared to a typical off-air signal
VI . Audio Looping
Audio looping can be done in a similar manner as the video looping.
1. Connect a RCA Y-plug (not included) to the selected audio input on the HMM-3.
2. Connect a RCA cable from the “Audio Output” of the audio source (TV, VCR, DVD player etc.) to the
RCA-Y that is connected to the HMM-3.
3. Connect another RCA cable from the RCA-Y plug on the HMM-3 to the “Audio Input” of the unit being
looped to (TV or VCR).
NOTE: No audio adjustment is needed on the HMM-3.
Video C
Level
Video B
Level
Video A
Level
BOTTOM VIEW
RCA Y-Plug
(
by others)
Video
Source
TV, VCR or
DVD
Video C In
Video B In
Video A In
Turn trimpot to adjust
brightness
RF Out