Saturn ST-CO9151 User Manual
Page 2
3
GB
Convection oven
Dear Buyer!
We congratulate you on having
bought the device under trade name
«Saturn». We are sure that our
devices will become safe and
reliable assistance in your
housekeeping.
Avoid extreme temperature changes.
Rapid temperature change (e.g. when
the unit is moved from freezing
temperature to a warm room) may
cause condensation inside the unit and
a malfunction when it is switched on. In
this case leave the unit at room
temperature for at least 1.5 hours
before switching it on.
If the unit has been in transit, leave it
indoors for at least 1.5 hours before
starting operation.
Important Safety Instructions
These basic safety precautions should
always be followed:
1.
Read all instructions.
2.
First check that the voltage marked
on the product corresponds with your
supply voltage. And the wall outlet is
properly grounded.
3.
Always switch power off before
removing plug from wall outlet.
4.
Remove plug by grasping the plug.
DO NOT PULL THE CORD.
5.
To protect against electrical shock,
do not immerse cord, plugs or motor
assembly in water or other liquids.
6.
Unplug from power outlet when not
in use and before cleaning.
7.
Allow the appliance to cool before
putting on or taking off parts.
8.
Do not use outdoors. This appliance
is not designed for outdoor use.
9.
Do not place the appliance on, or ,
near electrical equipment, hot gas flame
or in a heated oven.
10. Do not let the cord hang over the
edge of a table or counter or to touch
hot surfaces. Always use on a stable flat
surface.
11. Extreme caution must be used
when moving an appliance containing
hot oil or other hot liquids.
12. Do not use appliance for purpose
other than intended usage.
13. Do not move or lift the convection
oven while the power cord is still
connected to the wall outlet. Remove
the plug from the wall outlet, then
remove the top by using both hands,
move carefully.
14. Before removing the lid: Turn the
time off, disconnect the power cord, Lift
the top using carrying handle, Place the
top ,preferably resting the stainless
steel edge rim and the handle/plastic
top on a flat surface.
15. Do not place the hot underside of
the lid directly onto laminated surfaces,
wood surfaced, paper plastic or other
flammable surfaces. Put the lid on a
heat resistant surface.
16. Always place the top unit onto the
bowl before plugging in the power cord
and switching on.
17. Do not clean with metal scouring
pads.
18. No user service care. Do not
operate if the appliance has a damaged
or broken cable or plug, return the oven
to authorized service centre or qualified
persons.
19. The appliance is not intended for
use by persons (including children) with
reduced physical, sensory or mental
capabilities, or lack of experience and
knowledge, unless they have been given
supervision or instruction concerning
use of the appliance by a person
responsible for their safety.
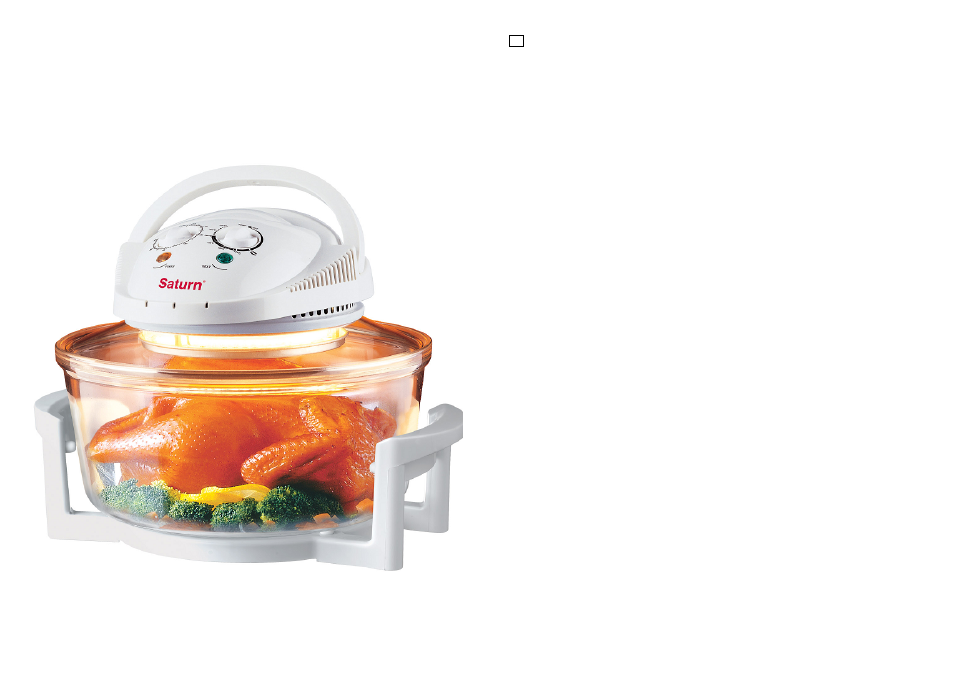
Introduction
The multi-function halogen oven has
brought an end to the traditional
cooking way. While cooking, the
halogen oven produces a circle of hot
moving air, which cooks the food all
over evenly. The cooked food becomes
a very delicious dish with its natural
flavor and full nutrition.
The model of the halogen oven is
reasonably designed with attractive
appearance. In it, there are a 65 –
250°C scope temperature controller
(thermostat) and 0-60 minute scope
timer. You may select the cooking
temperature and cooking time for your
food. The hot air inside the oven will
never bring about smoke, nor will the
food be burnt. Your kitchen is then clean
and safe, free from contamination.
The halogen oven not only saves you
from the heavy kitchen work, but also
makes your cooking enjoyable.
Operation
1. Insert the oven plug according to the
power specification. It is not allowed to
share the same plug-set with other
electrical appliances.
2. Turn the timer clockwise to your
required time, then the red lamp lights
up.
3. Set the temperature controller
clockwise to your required temperature,
then the green light turns on. The
convection starts working.
2