TabletKiosk Sahara NetSlate a230T User Manual
Page 5
2. In the Windows 7 System Tray, tap on the “Wireless Networks” icon. In the Windows XP
START Menu, tap on “Programs > Intel PROSet Wireless > Intel PROSet Wireless”.
3. From the list that appears, tap to select the network you wish to connect to and then tap
the “Connect” button. If no wireless networks appear after a few moments, tap on the
refresh button located on the right side of the dialog box.
4. If the wireless network you are attempting to connect to is security-enabled, you will see
a dialog box requesting a network key or password. The key/password (your network
administrator should be able to supply this to you) must be entered correctly or you will
not be able to successfully connect to the network.
If you entered the network key correctly, you should now be connected to the wireless
network. If it appears you are connected to the network, but have limited or no actual
connectivity, it is most likely due to an improperly entered network key. Disconnect from the
network by tapping the “Disconnect” button and try to connect again. If you continue to have
trouble connecting, contact your network administrator for assistance.
NOTE: If your network access point or router uses WiFi Protected Set-up, the WPS Wizard will
appear on the screen. Choose your access point from the drop-down list, enter your PIN when
prompted. Unless you need to configure your access point/router for the first time, just tap on
the “No” button when asked. If you entered your PIN properly, you should see the same pop-up
window informing you that you are connected. Check with your Network Administrator or the
instructions that came with your access point/router for locating the PIN.
Connecting to a WWAN with the optional 3G/3.5G Module
In order to connect to a Wireless Wide Area Network (WWAN), you will need to have a
Broadband Access account already set-up with your cellular carrier of choice. The WWAN card
that comes in the Sahara NetSlate is compatible with carriers that use UMTS/HSPA or quad-
band GSM/GPRS/EDGE data networks.
NOTE: For more information regarding the capabilities and specifications of the 3G/3.5G Data
module, please visit our website at
www.tabletkiosk.com
.
Your wireless provider should supply you with a SIM card and the software necessary to
access their cellular network. Please refer to their instructions for the proper procedures for
installing their software and configuring your WWAN
access account.
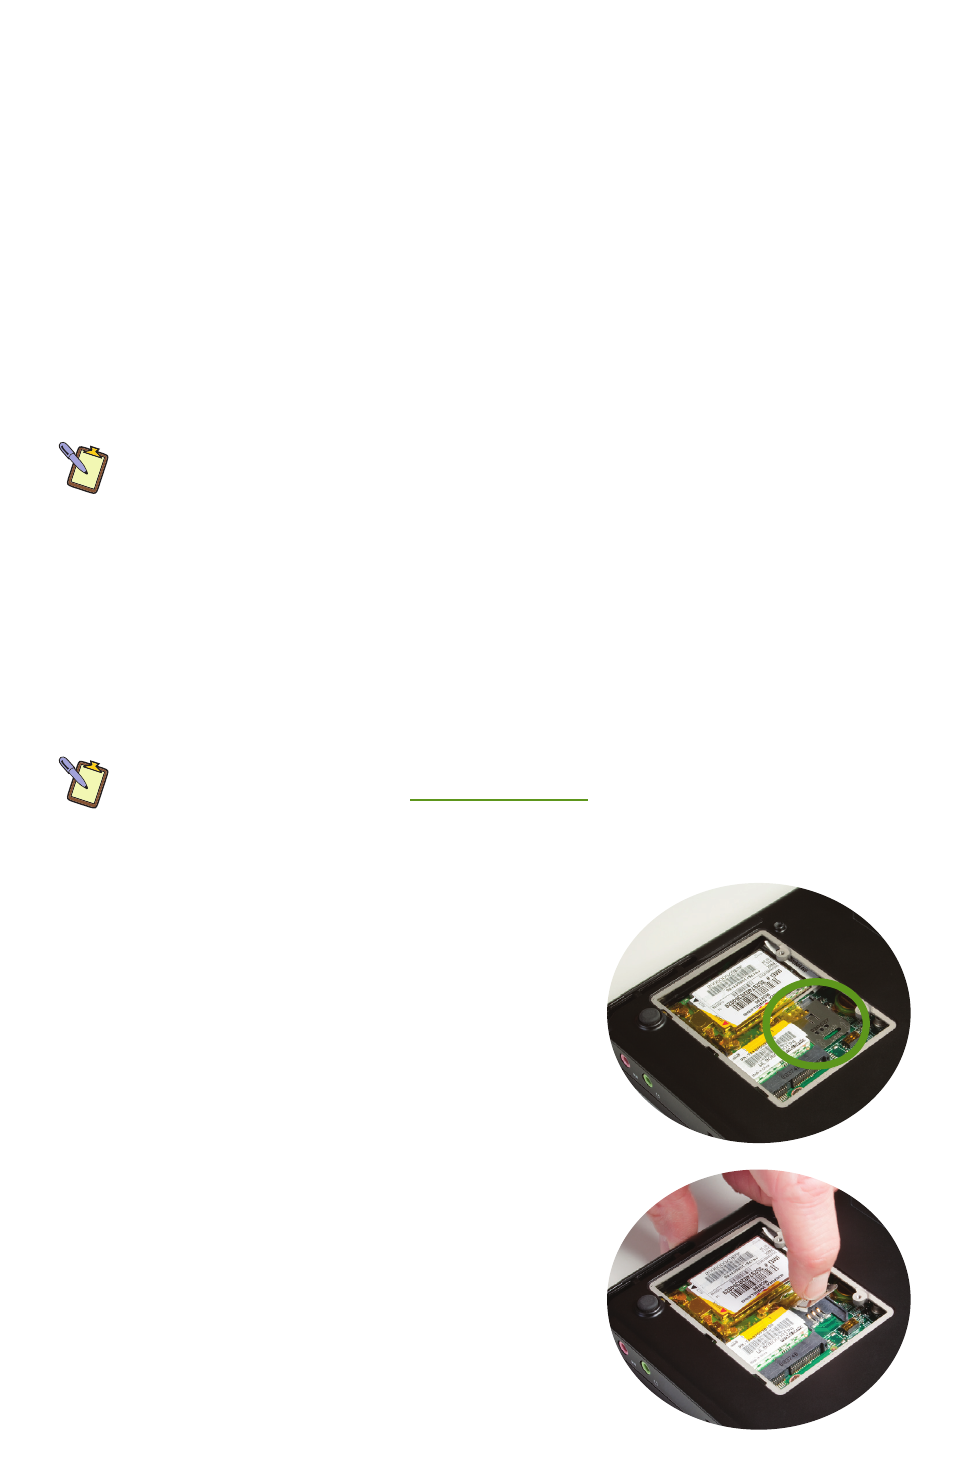
To insert the SIM card into your Sahara NetSlate a230T:
1. Power off the system and place it face down on a
flat surface that will not damage the screen so that
you can access the back of the system.
2. Locate the Wireless Networking Compartment near
the right side of the system and just above the
stylus garage (see the chapter “Touring Your Sahara
NetSlate” in the on-screen User’s Guide for the
location). Remove the two screws that secure the
access cover (use a #0 Philips screw driver).
3. Lift the cover from the edge where the screw
holes are located to remove it and set it aside. The
wireless networking adapter, Bluetooth adapter
and WWAN data module are inside. The SIM
card holder is located toward the top left of the
compartment, closest to the docking connector
and is metallic silver.