Tempest lighting, inc – Tempest Graze In-Grade Trough System User Manual
Page 2
Tempest Lighting, Inc
13110 Saticoy Street, Unit C, North Hollywood, CA 91605, USA
www.tempest.org [email protected]
t: +1 888 649 6743 f: +1 818 982 5510
In the interest of continuous product improvement, specifications are subject to change without notice
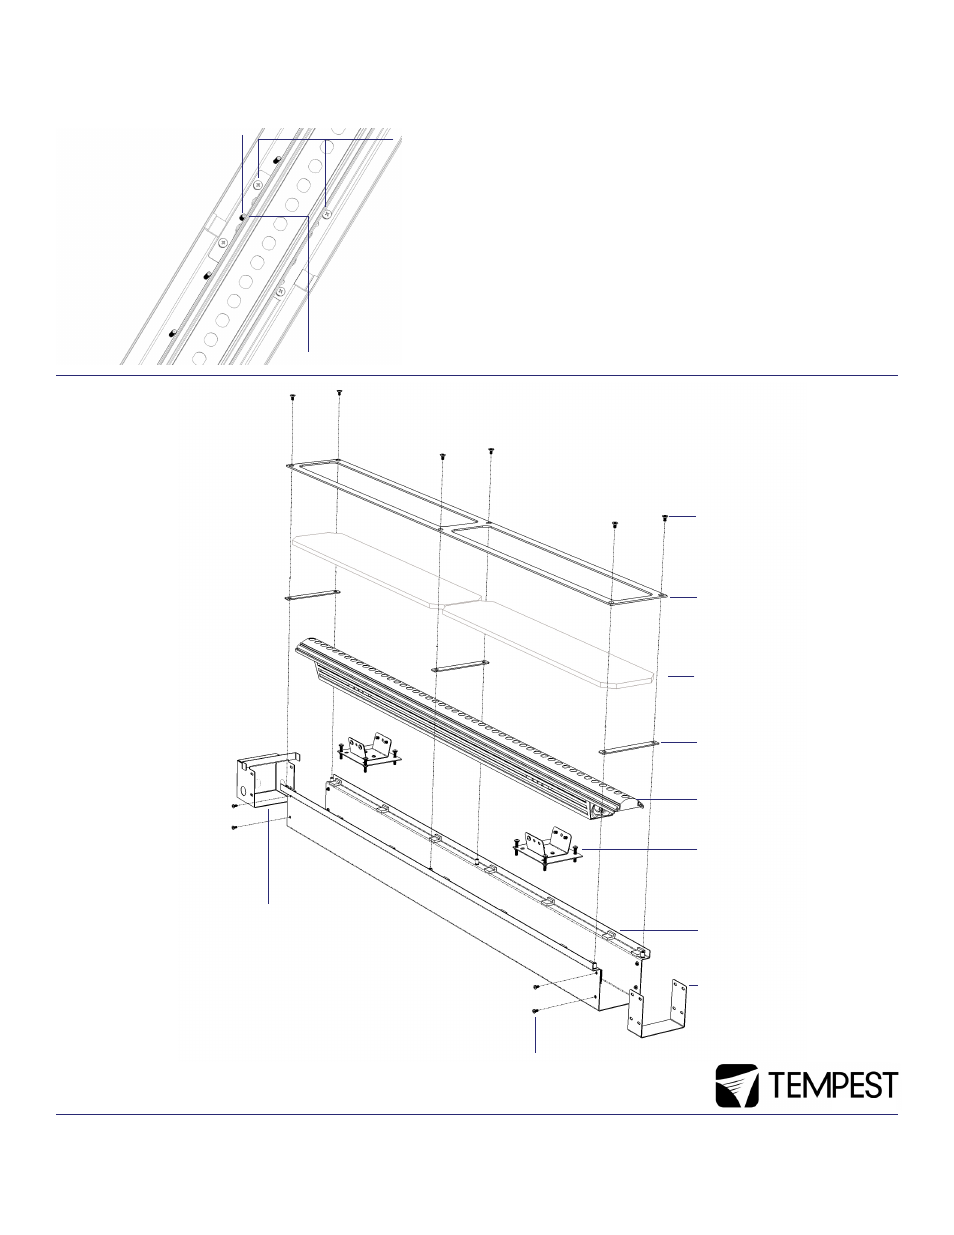
13. Carefully lower the fixtures into the trough, aligning the mounting
plates with the pattern of M5 studs in the trough base.
14. Align the fixtures as needed.
15. Lock in place as needed with the M5 nuts provided (optional).
Fixture Mounting Plate
locates on one M5 stud
this side...
Adjust screws
front and back
to set fixture
angle (step 14)
Lock position with M5
Nuts provided with
Fixture Mounting plate
(step 15)
PARTS EXPLOSION
16. Replace the glass panels and check that they are seated on the rubber
pads.
17. Replace the stainless steel trim, using the Torx Pin screws and screw-
driver bit provided.
Note: Tempest in-grade enclosures have 3/8”/10mm tempered glass windows
and may be safely walked on. They are NOT rated for drive-over vehicle use.
M6 Flathead Torx-Pin
Security Screws
Stainless Steel Cover
Trim
3/8”/10mm Clear
Tempered Glass
Spacers - all spacers
MUST be in place befor
pouring concrete/
backfilling
Philips Color Kinetics
Graze Fixture
3550.MCK Fixture
Mount Kit (1 kit per
Graze fixture)
3550.24 OR
3550.48 OR
3550.96 In-Grade
Trough
3550.JN Joiner — joins
two trough sections
M4 x 8mm fixing
screws — 8 per trough
3550.EC End
Cap — two
required for each
continuous run