Pre-encoding tasks – Adobe Media Encoder CS4 User Manual
Page 22
19
USING ADOBE MEDIA ENCODER CS4
Encoding media
Last updated 4/29/2012
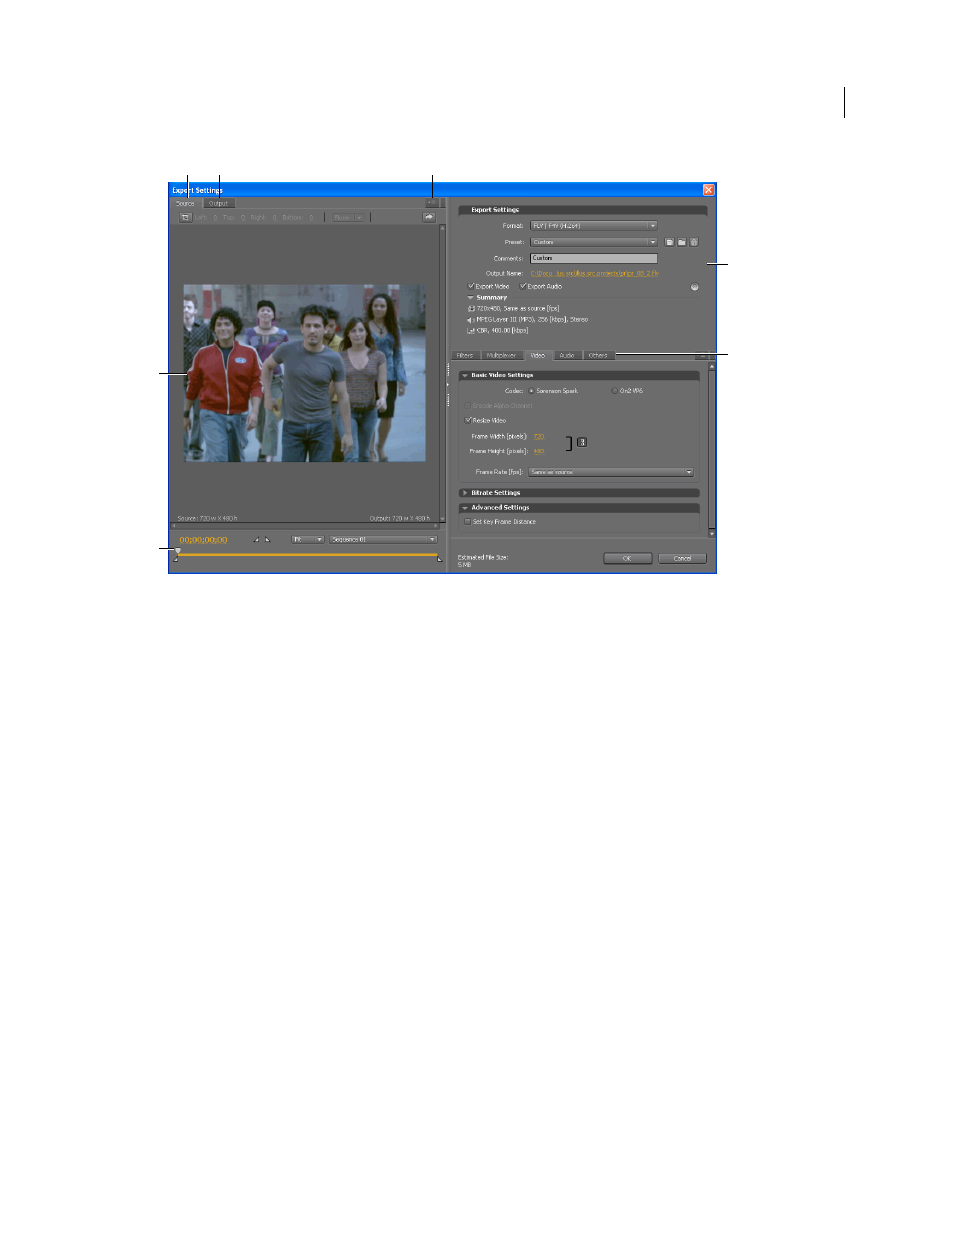
Export Settings dialog box
A. Source tab B. Output tab C. Source tab menu button D. Image area E. Playhead F. Export settings G. Options tabs
Viewing area options
These options are available on the panel menu of the Export Settings viewing area:
Aspect Ratio Corrected Preview
Displays the image, correcting for differences between the source file native pixel
aspect ratio (PAR) and your computer screen.
1:1 Pixel Preview
Displays the image using a square PAR. If the source file native PAR uses non-square pixels, the
image appears distorted on a computer screen.
Viewing area controls
•
To scale the video image, choose a scale setting from the View Zoom Level menu. Fit scales the image to fit into the
available image area. The zoom level affects only the image in the dialog box; it does not affect the source file or
exported file. You can zoom out by pressing Ctrl+ hyphen (Windows), or Command+ hyphen (Mac
OS). You can
zoom in by pressing Ctrl+ equals (Windows), or Command+ equals (Mac OS). Do not use the numeric keypad.
•
To cue the video numerically, drag the timecode display; or click the timecode display and enter a valid number.
•
To cue the video using timeline controls, click or drag in the timeline under the image to set playhead.
Pre-encoding tasks
In general, it’s best to apply certain processing options—such as deinterlacing and cropping—to an exported file before
encoding it to a particular format. Doing so can prevent visual artifacts associated with performing the same tasks after
encoding. These tasks are pre-encoding tasks. The cropping options, deinterlacing options, and filters options you
specify in the Export Settings dialog box are applied before encoding.
Note: You can access the Gaussian Blur filter option (a pre-encoding task) by selecting the Filters tab.
A
B
C
D
F
G
E