Configuration – American Time PoE User Manual
Page 22
© American Time
22
PoE Installation Manual
Appendix
Tr
oubleshooting
Configuration
Network Clock
Connect
Installation
Intr
oduction
Specifications
Configuration
Schedule Editor (cont)
16. Print Button – This button is used to print the entire schedule. All events will be printed as they appear in the
schedule list.
17. Save Button – This button is used to Save the current schedule. The schedule name and last modified date will be
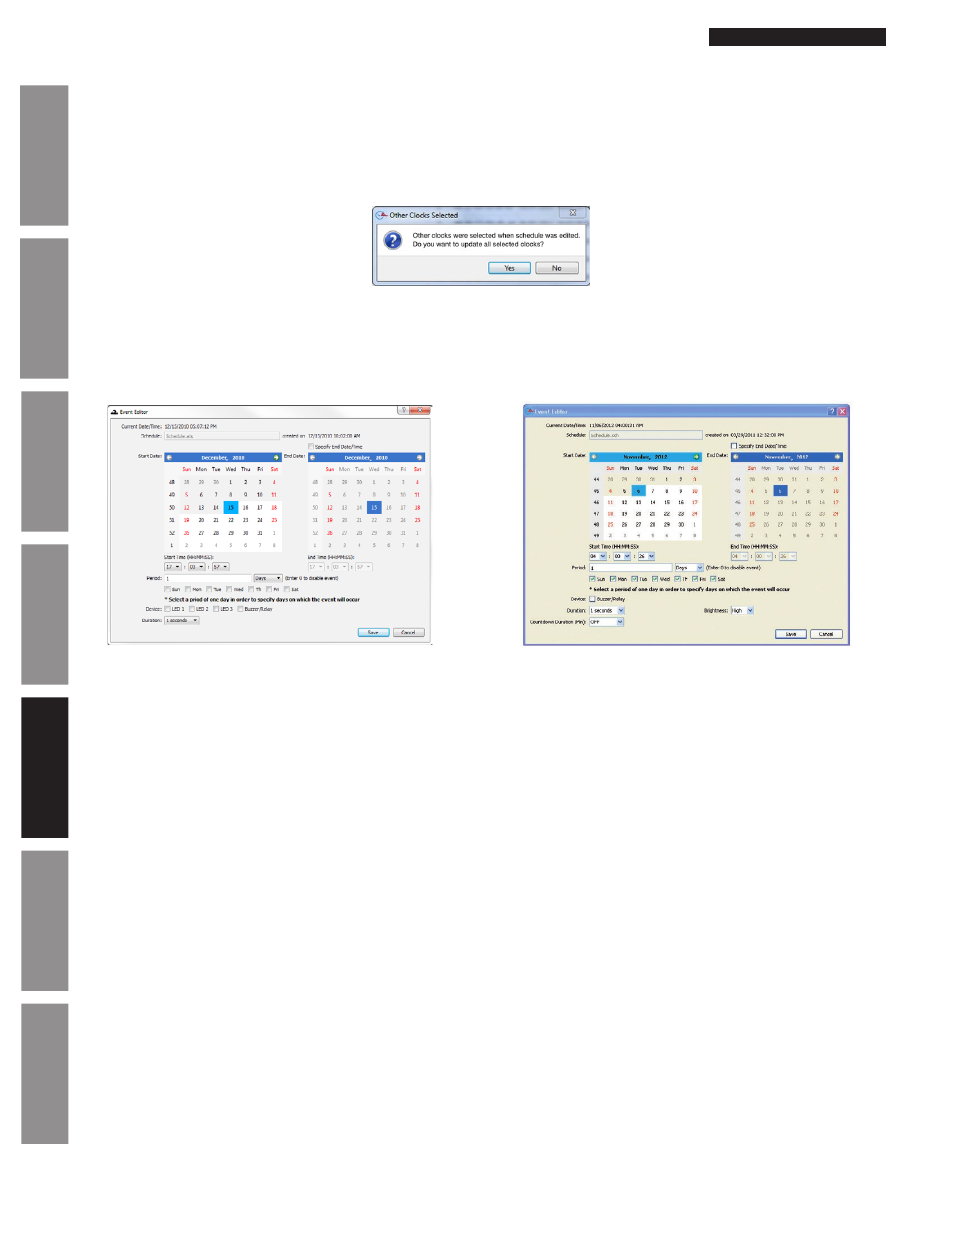
updated. If multiple clocks were selected in the Network Clock Connect screen, the Other Clocks Selected
prompt will appear. This allows all of the selected clocks to be updated with the same schedule.
18. Cancel Button – This button is used to cancel any changes made to the schedule.
Event Editor
The Event Editor may be entered by adding a new event or editing an existing event in the Schedule Editor. Here the event is
defined with a start date/time, end date/time (optional), period, duration, and device selection. Reference Appendix C for event
entry examples. The maximum number of scheduled events is 100.
1. Current Date/Time – This displays the current date and time of the selected network clock.
2. Schedule – This displays the filename of the schedule in which the event resides. The last modified date and time is
also displayed.
3. Start Date Calendar – This is used to select the start date of the event. A date selection prior to the current date is not
possible.
4. Start Time (HH:MM:SS) – This is used to select the start time of the event.
5. Specify End Date/Time – This checkbox is used to define an end date and time for the event. The event will be a
reoccurring event if this checkbox is not selected. The End Date Calendar and End Time will not be enabled unless
this box is checked.
6. End Date Calendar – This is used to select the end date of the event. An end date cannot be selected unless the
Specify End Date/Time checkbox is checked. A date selection prior to the current date is not possible.
7.
End Time (HH:MM:SS) – This is used to select the end time of the event. The end time cannot be defined unless the
Specify End Date/Time checkbox is checked.
8.
Period – This is used to defined the period of the event. The period is the interval of time between event occurrences.
An entry of 0 will disable the event. A numeric value must be entered into the text field. The pull-down menu consists
of seconds, minutes, hours, days, and weeks. Here are the possible entries per period duration:
• <x> seconds – 0<x<60
• <x> minutes – 0<x<60
• <x> hours – 0<x<24
• <x> days – 0<x<365
• <x> weeks – 0<x<53
Note: Select a period of one day in order to specify days on which the event will occur.
Relay/Analog Clock Buzzer Event Editor
Digital Clock Event Editor