American Time AllSync IQ User Manual
Quick start installation guide, Allsync iq master clock, Connect cables to the allsync iq master
QUICK START INSTALLATION GUIDE
1
Choose location and install AllSync IQ Master
a. Place the AllSync IQ indoors in an area with a network drop, or run an Ethernet data cable to the
unit from a network switch or hub.
b. Locate near 120vac power
c. Locate near signaling and/or clock wiring
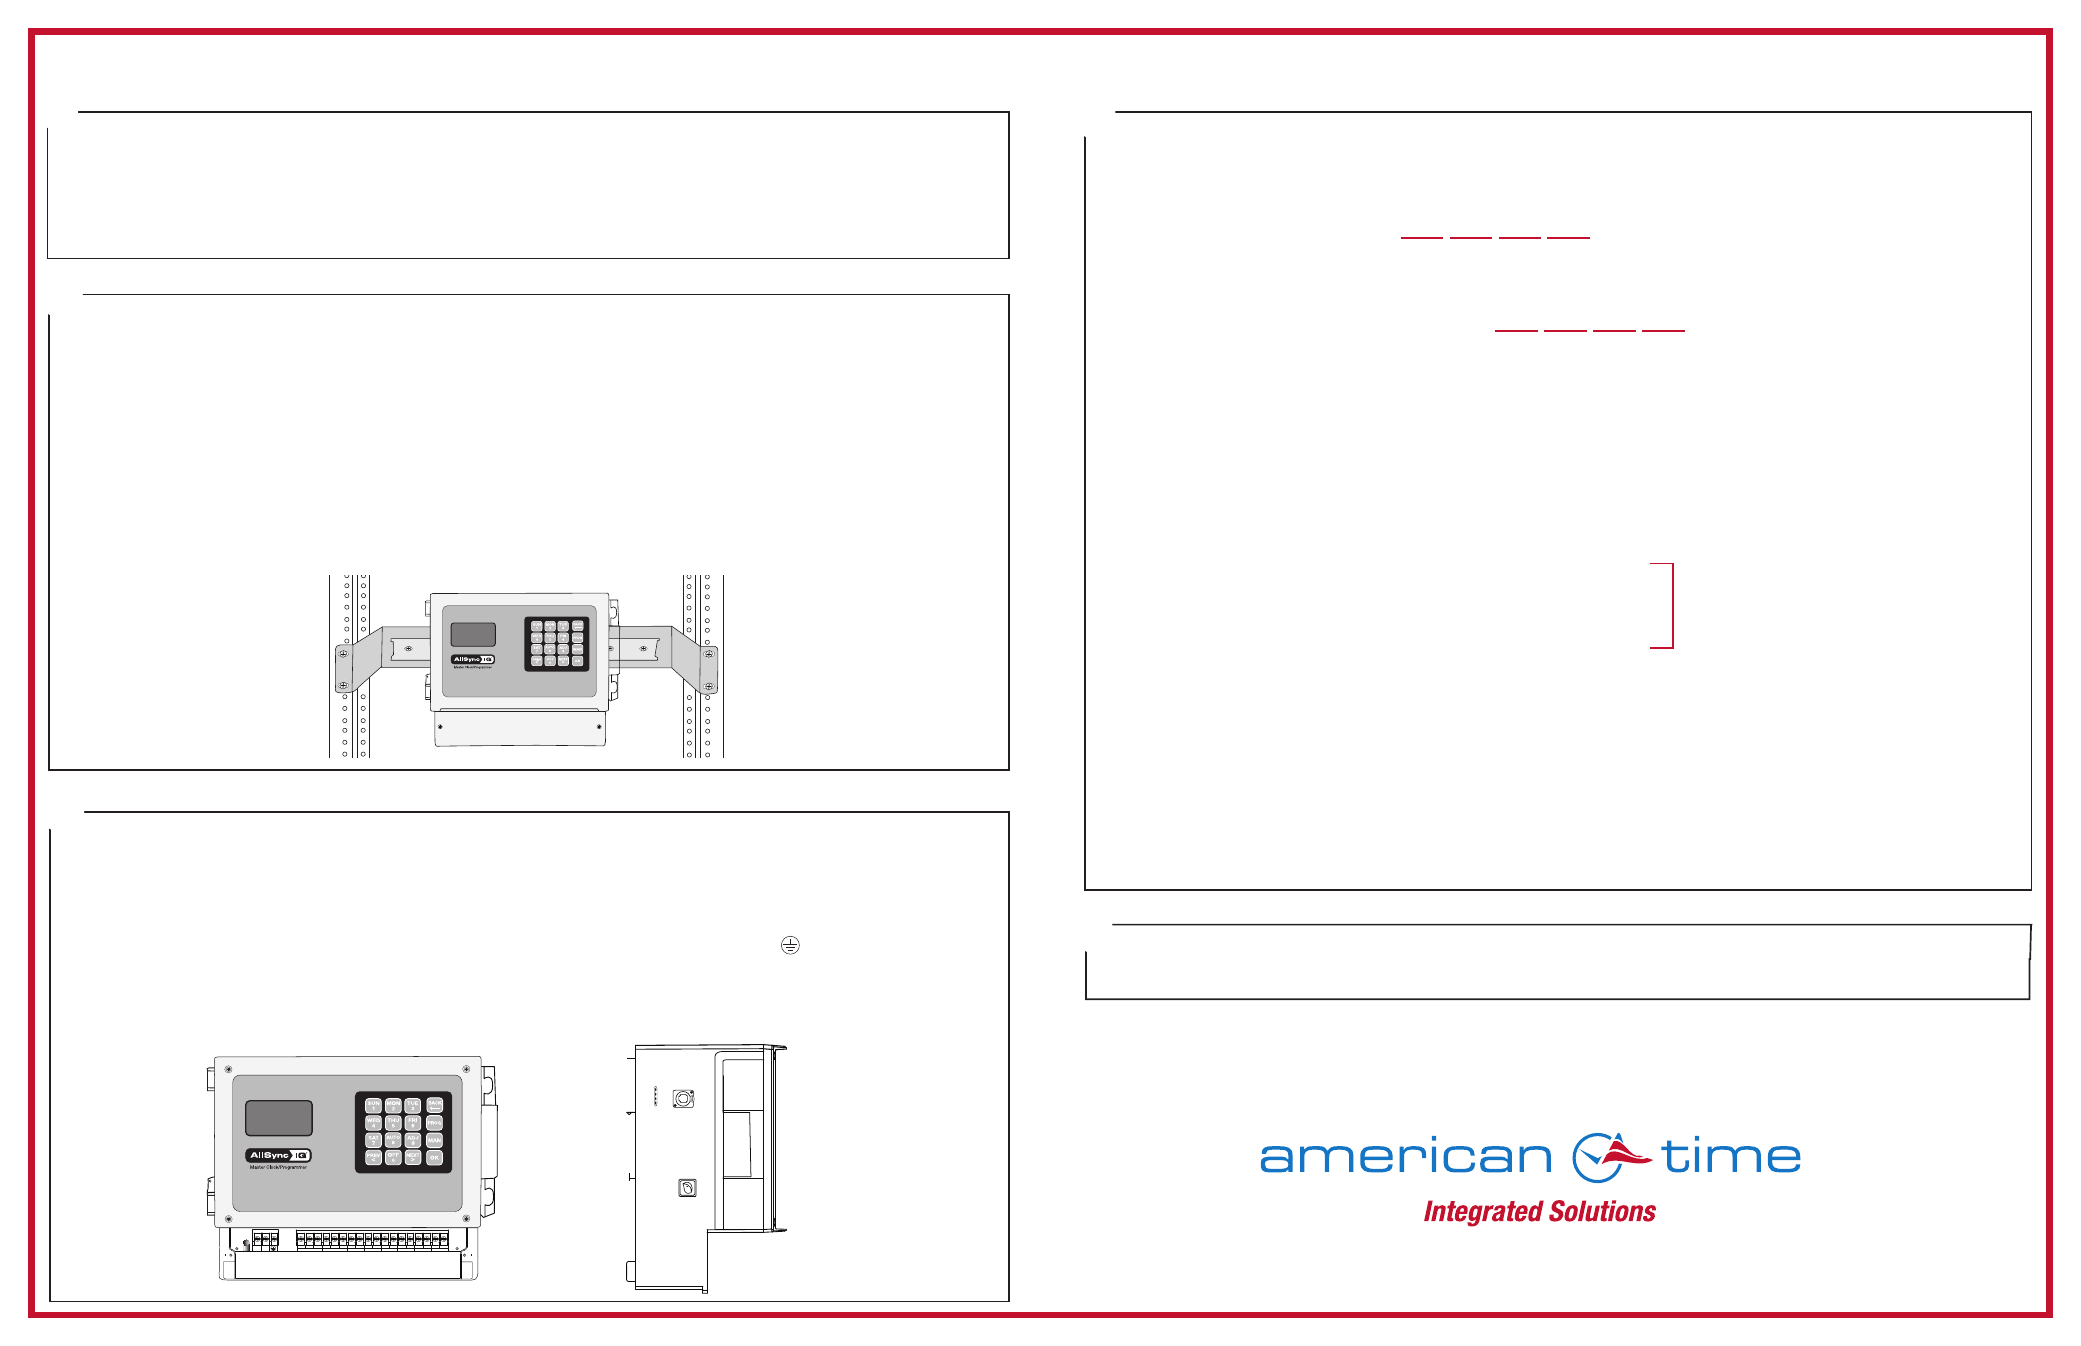
Mount the AllSync IQ Master
a.
Wall Mount - see mounting template on reverse side
1. Use included mounting template to mark hole locations
2. Drill pilot or anchor holes
3. Install keyhole screw (leave screw head 0.1" away from wall)
4. Hang AllSync IQ master
5. Install bottom screws through open wiring compartment
b.
Rack Mount - install into 19" server rack (H002944 bracket kit required)
1. Place four (4) screws (not included) into server rack with H002944 kit
2. Follow instruction sheet 1719 (included) to mount to din rail bracket
2
Connect cables to the AllSync IQ Master
a. Connect Ethernet patch cable to Ethernet RJ45 port located on left side of AllSync IQ master.
Note: Disconnect and lockout power prior to making power connections.
b. Knock out desired power entry location.
c. Connect power wires to screw terminals labeled H (Hot), N (Neutral) and (ground) through open
knockout location. Use only approved cables, strain relieve and conduit.
d. Turn on power at power source.
e. Turn on power with power switch located on left side of AllSync IQ master.
3
BELL 5
BELL 6
COM
NO
BELL 4
CLOCK 2
COM
BELL 3
BELL 2
BELL 1
COM
NO
NO
COM
COM
NO
NC
COM
NO
CLOCK 1
NO
NO
NC
COM
H
N
COM
NO
1:49
FRI OCT 3 2014
:45
AM
American Time
800-328-8996
ALLSYNC IQ MASTER CLOCK
Use the Setup Wizard
a. Press
1 to start the Setup Wizard
(Page 5 in Installation Manual)
b. Create a 4 digit
User Lock or enter 0000 to disable this feature. Press
O
.
Tip: Record this password.
c. Create a 4 digit
Service Lock (for advanced features) or enter 0000 to disable this feature.
Press
O
.
Tip: Record this password.
d. Select local time zone by using the
<>
keys. Press
O
.
e. Press
8
to select automatic DST (Daylight Saving Time) or
0
to disable DST if your location
doesn't observe DST. Press
O
f. Press
1
for 12-hour mode - AM/PM (1:00PM).
Press
2
for 24-hour mode - Military (13:00).
g. Press
1
to Enable DHCP or press
2
to Disable DHCP. Press
O
.
h. Use the keypad to enter the Unit IP Address. Press
O
.
i. Use the keypad to enter the Subnet Mask. Press
O
.
j. Use the keypad to enter the Gateway IP. Press
O
.
k. Use the keypad to enter the Time Server Address. Press
O
.
l. Use the keypad to enter the Alternate Time Server Address. Press
O
.
m. Press
O
to accept the default (80) Port Number.
n. To confirm proper set, press
8
to sync.
•If successful, “Ethernet Sync Successful” will display.
•If not successful, “Ethernet Sync Failed” will display. Refer to the troubleshooting guide in the
Installation Manual.
o. “Setup Wizard Successfully Completed” will display.
4
AllSync IQ Terminal Block
For wiring your AllSync IQ, reference your AllSync IQ Installation and Operation Manual.
5
Your AllSync IQ is now set up for proper operation. For information on other features, see the AllSync
IQ Installation and Operation Manual that was included with your unit. If you have any questions or
problems that cannot be resolved by followint the steps in the Troubleshooting guide, please contact
Technical Support at American Time at
800-328-8996
phone:
800-328-8996
fax:
800-789-1882
online:
american-time.com
mail:
140 3rd St. So.; PO Box 707, Dassel, MN 55325-0707
Skip if
1
is
selected in step g
C
e
1:49
FRI OCT 3 2014
:45
AM
American Time
800-328-8996
®