Set up the clock, Adjustments via network clock connect – American Time American Series Analog PoE Clock User Manual
Page 2
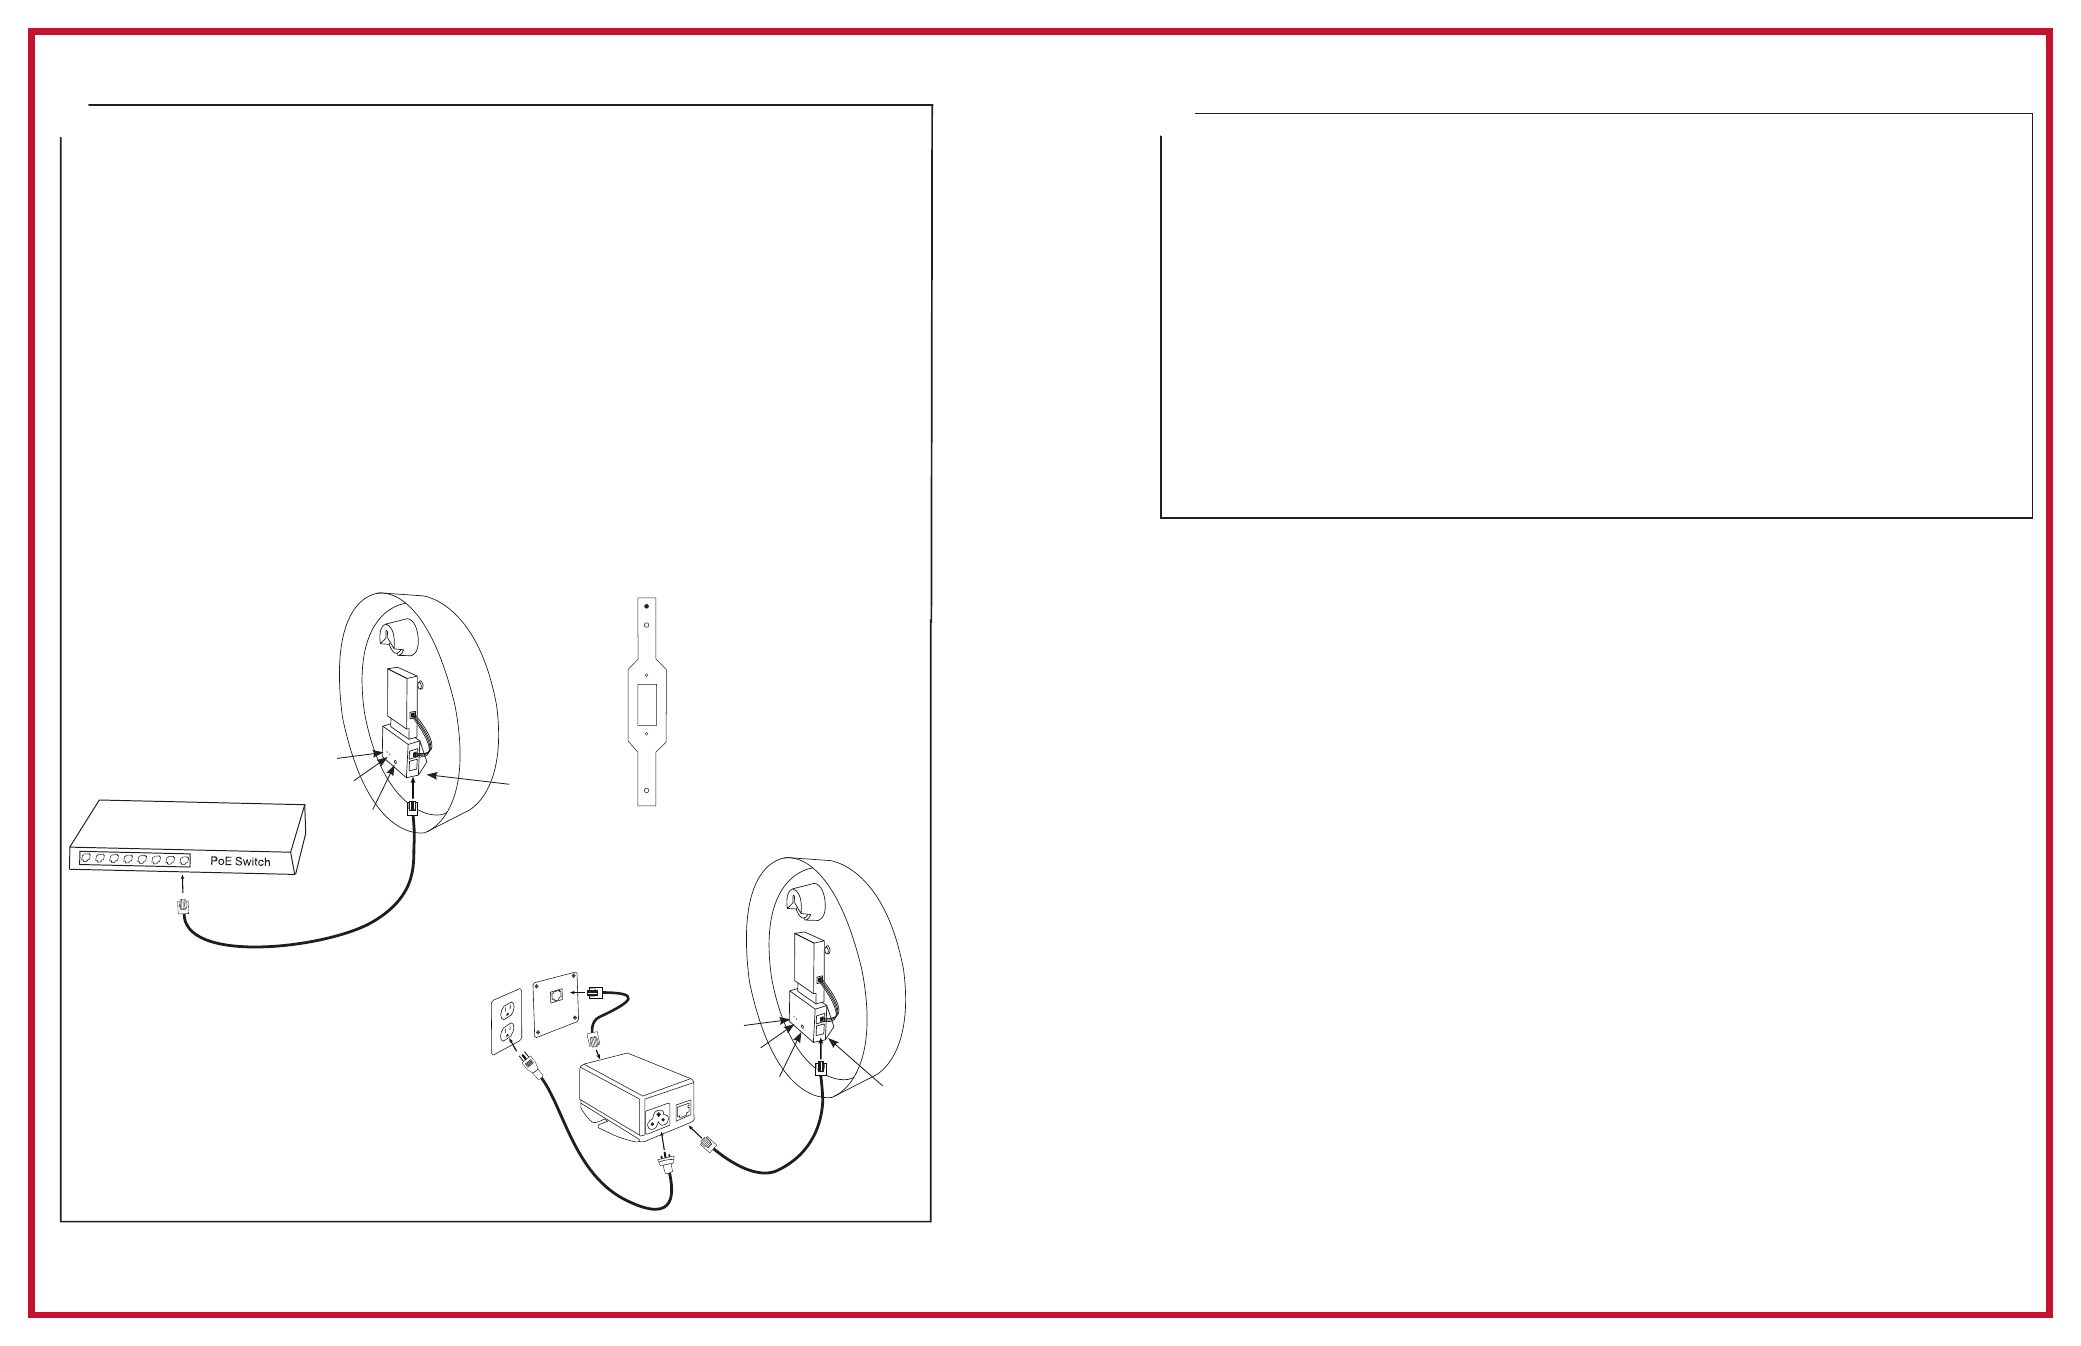
Set up the Clock
1.
Apply power to the clock by connecting a CAT 5 or higher Ethernet patch cable
(A)
from
a PoE switch (Fig. 1) or single injector (Fig. 2) to the PoE receiver
(F)
.
—PoE Switch (Fig.1) - Check with network administrator for infrastructure needs. This part
is not supplied by American Time.
—PoE Injector (TMA200) (Fig. 2) - This is an optional power source that may be
purchased from American Time.
2.
The Status LED
(B)
will indicate the clock's status as follows:
—Flashing Orange: Acquiring an IP address using DHCP
—Flashing Red: Attempting SNTP sync
—Continuous Red: Failed SNTP sync
—Flashing Green: Received SNTP sync
—Continuous Green: Successful SNTP sync
Note: When a DHCP network is not present at initial start up, the PoE clock will default
to a random Static IP in the range of 169.254.1.0 to 169.254.254.255. For more details
reference the Power over Ethernet (PoE) Clock Installation & Operation Manual at
.
3.
The Buzzer LED
(C)
designates if the buzzer is enabled. The buzzer is an optional
feature.
A
=PoE connection
(CAT 5 or higher Ethernet patch cable)
B
=Status LED
C
=Buzzer LED
D
=Default Button
E
=Keyhole Hanger
F
=PoE Receiver
QUICK START INSTALLATION GUIDE
POWER OVER ETHERNET ANALOG CLOCKS
5
A
B
D
C
Fig. 1
F
reset
AC
DC
To wiring
box
Optional
Security
Bracket
(12" shown)
B
D
C
Fig. 2
A
To local
power
(110vac)
F
TMA200 Single
Injector
4
Adjustments via Network Clock Connect
1.
Download Network Clock Connect from:
e-firmware-updates. Click Search Now
and click on Network Clock Connect from the list. The software will automatically
download. It is also available from the optional USB Drive (H004167B-POE,
purchased separately).
2.
Install Network Clock Connect application – Password = clock4u (default)
3.
Network Clock Connect will allow you to configure:
• Network address settings
• Time Synchronization settings
• Daylight Saving Time settings
• Schedules (Buzzer clocks) - maximum of 100 scheduled events
For more details, reference the Power over Ethernet (PoE) Clock Installation and
Operation Manual.