Kvm-8-e, kvm-16-e installation and user manual – Apantac KVM-8 User Manual
Page 2
D. Press “Scroll Lock” twice, then the <Space> key to
manually scan to the next computer input
E. Press “Scroll Lock” twice, the <r> key will Reset
the control connection.
F. When switching to an input with the password en-
abled, the password prompt will appear. Enter the
correct password to access the computer
(3) OSD - On Screen Display
A. Enable OSD menu
Press “Scroll Lock” twice, the OSD menu will ap-
pear. Use “ “ and “ “ key to navigate to the
computer you would like to control (1—8, A-H),
then press the <ENTER> Key. Press the <ESC> to
exit the menu, the OSD menu will disappear from
the screen
B. Function Key F1 (EDIT):
In the OSD menu, Use “ “ and “ “ key to navi-
gate to the computer you would like to edit. Press
<F1> key to begin editing the name. <F5> to
delete the characters, <Enter> to move to the next
line. Press <F1> to save the changes.
C. Set Admin password:
a. After entering the OSD menu, press “->“ key
than <F2> key to set the Admin password.
Remember to set Admin password prior to
setting user password
b. After setting the Admin password, th en en-
able input password manager. You can now
set a password for each input.
c. If the user password is not set, then the Admin
password must be used to gain access to the
input
d. If you choose not to set Admin password, please
follow steps in section “D”
D. Function key <F2>
After entering the OSD menu, Use “ “ and “ “ key
to navigate to the input that you would like to set the
password, press <F2> to set password. There will be a
“-” mark next to the name of the computer input to
indicate it is password protected. To access the input,
a small window will appear on the screen to prompt the
password. To disable or change the password, press
<F2>, first enter the old password, then press
<ENTER> to disable the password, or type in the new
password twice to confirm the new password setting
E. Function key <F3> (Scan Set)
After entering the OSD menu, Use “ “ and “ “ key to
navigate to the computer you would like to scan, then
press <F3>, a small clock will appear next to the input.
After selecting the input, press “->“ to SNC window,
enter the scan interval, then press <F3> to start man-
ual scan. Now to the right of SCN, there will be a small
clock icon. While scanning, only the inputs with the
clock icon next to it, will be scanned.
F. Function key <F4> (Auto scan)
Press “Scroll Lock” twice to enter the OSD menu, then
press <F4> to enable Auto Scan. Press “->“ to
change the scan interval on the lower right corner. The
interval can be from 1 - 255 seconds. Press <ENTER>
to confirm
G. Screen
Saver:
Press “Scroll Lock” twice to enter the OSD menu, press
“->“ to zMIN window to enter idle time prior to sleep
(Screen Saver). Time can be 1 - 255 minutes, press
<ENTER> to confirm
H. VGA Extender image quality adjustment
There are 21 levels of electronic adjustment for image
quality. Press “Scroll Lock” twice to enter the OSD
menu, then use the <+> and <-> to adjust image
quality. To erase the adjustment from memory, press
the “8” key on the front panel, then unplug/re-plug the
power supply
J. Reset:
If error occurs on the mouse and keyboard while hot
swapping the inputs, press “Scroll Lock” twice follow by
<r> key to reset
H. Input
Channel
Display:
There will be a small icon next to the input channel,
after the channel is selected
L. If there are any changes to the input channel (add or
removed), you need to exit then re-enter the OSD
menu to refresh the information
KVM-8-E, KVM-16-E
Installation and
User Manual
Apantac LLC
13500 SW Pacific HWY #117
Portland, OR 97223
T: +1 (503) 616 3711
F: +1 (503) 389 7921
E: [email protected]
Dual Interface (PS2/USB) CAT5 KVM
MT HOOD KVM-8-16-E 0209
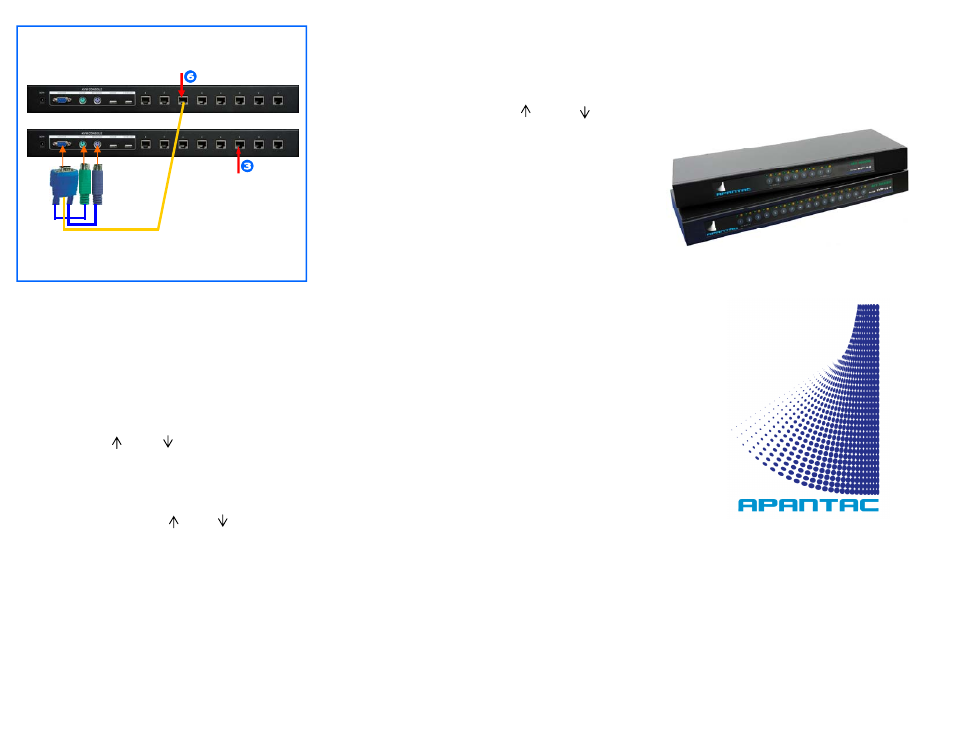
Selecting Secondary Input
CATx Cable
Input to be
Selected
Cascading Input
To Select input 3 on the secondary switch
Press “63”
Primary KVM
Secondary KVM