Audio Enhancement First Time User Manual
Your amplifier your microphone, Adjusting volume
1
Congratulations on your new classroom
audio system!
Getting started with your classroom audio system is really quite simple. Here are some quick
pointers to get your system up and running.
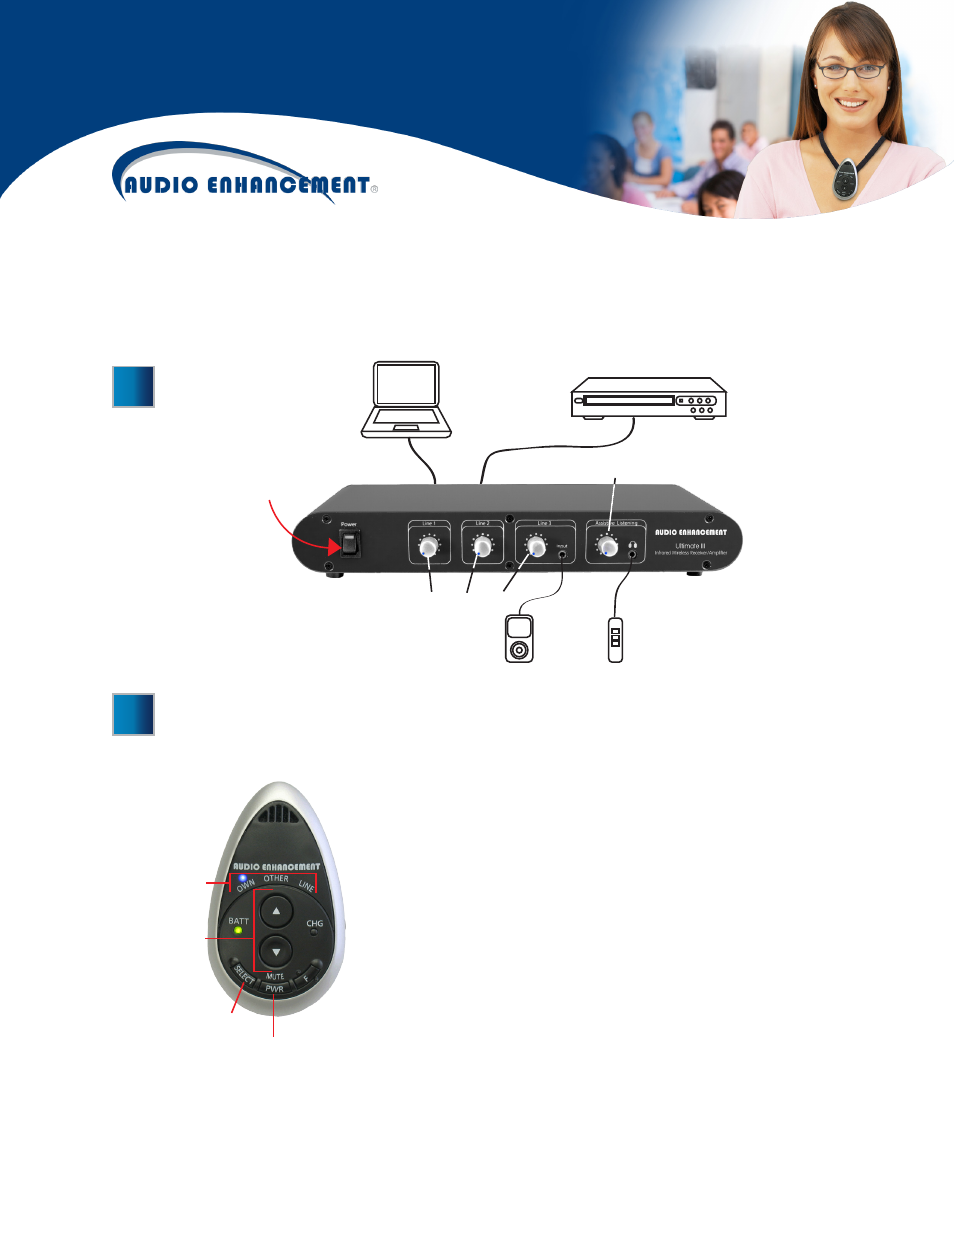
Your Amplifier
Your Microphone
DVD
Output level control for Assistive Listening
Front Panel
line input for
a portable
device
Front Panel line level output for Assistive
Listening Device such as a Student FM
transmitter
Turn power
on to activate
the classroom
sound system
by pressing the
“Power” button.
The red “Power”
LED should
illuminate.
Level controls for Media
(Line) Sources
1
2
Press and hold PWR for about 3 seconds to turn the microphone
on or off. Tap the PWR button to mute and un-mute. If you have
the microphone on mute for over 5 minutes, it will turn off to save
battery life.
If there is no sound, make sure your amplifier is on.
Adjusting Volume
Control the volume of your amplifier and auxiliary devices using
the volume controls on your microphone.
Adjust volume with the arrow buttons. When the light indicates
OWN, you are adjusting the volume of your teacher microphone.
To adjust the volume of the student’s mic, tap SELECT until light
moves to OTHER, then use volume arrow buttons.
Selecting the LINE audio source will control the volume of audio
devices you have plugged into the back of the amplifier, such as a
computer or DVD player.
Indicates selected
audio source
Increases and
decreases volume
Toggles source for
volume adjustment
Power/Mute