Valera – BDI 9721 VALERA User Manual
Page 2
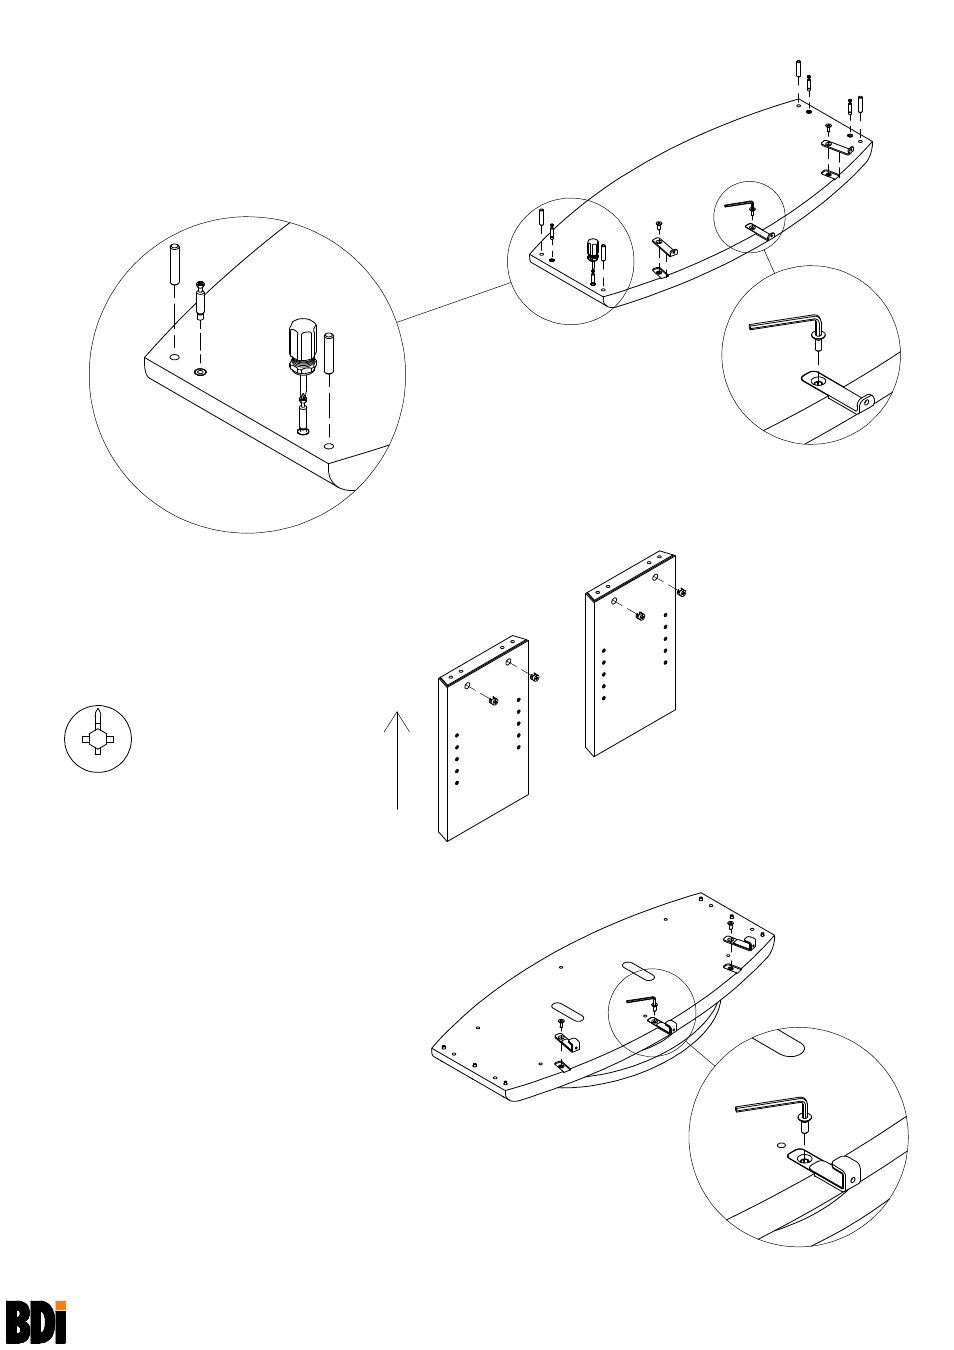
Cam Fastener (C)
Arrow to point up to start
VALERA
9721 9723 9724
ASSEMBLY INSTRUCTIONS
2
BDIUSA.COM [email protected]
Step 2
Install Hardware onto Top Panel
Lay
Top Panel (N) on its Top on a carpeted surface, with holes facing up.
Install
Dowel Pins (D) and Cam Bolts (E) into Top Panel (N) using Phillips
Screwdriver (A).
Install
Upper Brackets (I) onto Top Panel (N) with Machine Screws (G)
using
4mm Hex L-Wrench (B), do not fully tighten for ease of Back Panel
(Q) installation.
Step 3
Install Hardware into Side Panels
Install
Cam Fasteners (C) into Side Panels (O)
as shown, align arrow on
Cam Fastener (C) to
point up.
Step 4
Install Hardware into Bottom Panel
Install
Lower Bracket (J) into Base Assembly
(P) with Machine Screws (G) and tighten using
4mm Hex L-Wrench (B).
Do not fully tighten Brackets for ease of
Back
Panel (Q) installation.
D
E
E
D
A
C
O
O
C
UP
B
G
I
B
G
J
N
P