Strata, Step 2, Step 3 – BDI 1401 Strata User Manual
Page 3: Step 1
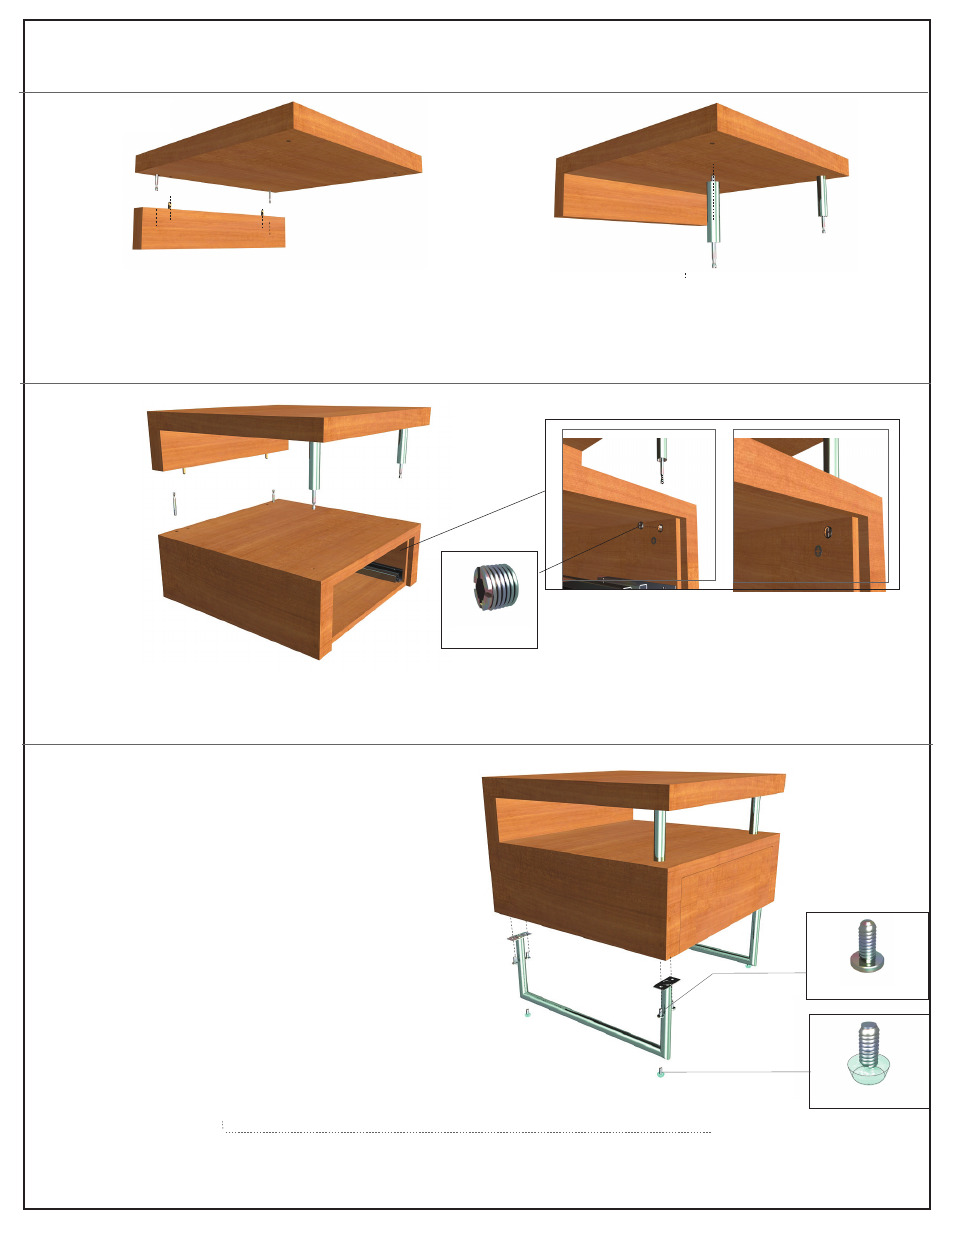
Step 2
Designed by Jason Guidry. These distinctive product configurations are protected by US and international patents, trade press, and/or copyright
laws. “Strata” and BDI are trademarks of Becker Designed Inc. All Rights reserved. ©2005, BDI
Strata
™
Model 1410 assembly instructions
Your Strata
™
Home Furniture is engineered for easy assembly. Carefully follow this procedure to prevent any damage.
Step 3
Floor Glide x 4
Socket Screw x 8
Placement and Maintenance
Strata
™
Home Furniture is designed for indoor use on level
floors. Clean steel parts and wood veneer with a moist cloth.
A - Install cam bolts x 2 into underside of top shelf along back edge. Attach spacer block, with wood dowels installed,
to top shelf as shown. Ensure that cam nuts are facing rearward. Cam nuts can be tightened with supplied hex wrench. Align
Arrow on face of cam nut to face toward the open end of the hole. Once cam bolt is properly seated, secure by rotating cam
nut clockwise approximately 3/4 of 1 rotation.
B - Install spacer tubes x 2 along front edge of top panel as shown. Hand tighten only!
A
B
Cam Nut
(pre-installed)
A - Install cam bolt x 2 along the top back edge of the assembled cabinet. Attach top shelf assembly to the assem-
bled cabinet.
B- secure front spacer tubes with cam nut and hex wrench as shown. Note: drawer must be removed for this opera-
tion.
A
B
Attach the metal leg x 2 to the bottom side of the assem-
bled cabinet using the socket screw x 8 and hex
wrench.
Install the leveler glides to the bottom of the legs and level as
needed.
Step 1